
Steps to Add Nofollow Links in WordPress
Nofollow links are an important part of search engine optimization (SEO) and website management. They help website owners control how search engines interact with outbound links by preventing the transfer of ranking authority to external websites.
Whether you are linking to affiliate products, sponsored content, advertisements, or third-party resources, adding nofollow attributes can help maintain your website's SEO health and comply with search engine guidelines.
This guide explains how to Add Nofollow Links in WordPress using the built-in WordPress editor as well as by manually editing HTML code.
What Is a Nofollow Link?
A nofollow link is a hyperlink that contains the following attribute:
rel="nofollow"
When search engines encounter this attribute, they understand that the website owner does not want to pass ranking authority to the linked page.
Example:
<a href="https://example.com" rel="nofollow">Visit Example</a>
Nofollow links are commonly used for:
-
Affiliate links
-
Sponsored content
-
Paid advertisements
-
User-generated content
-
External websites that you do not fully endorse
Add Nofollow Links Using the WordPress Editor
Modern WordPress versions often provide nofollow options directly within the editor, especially when SEO plugins are installed.
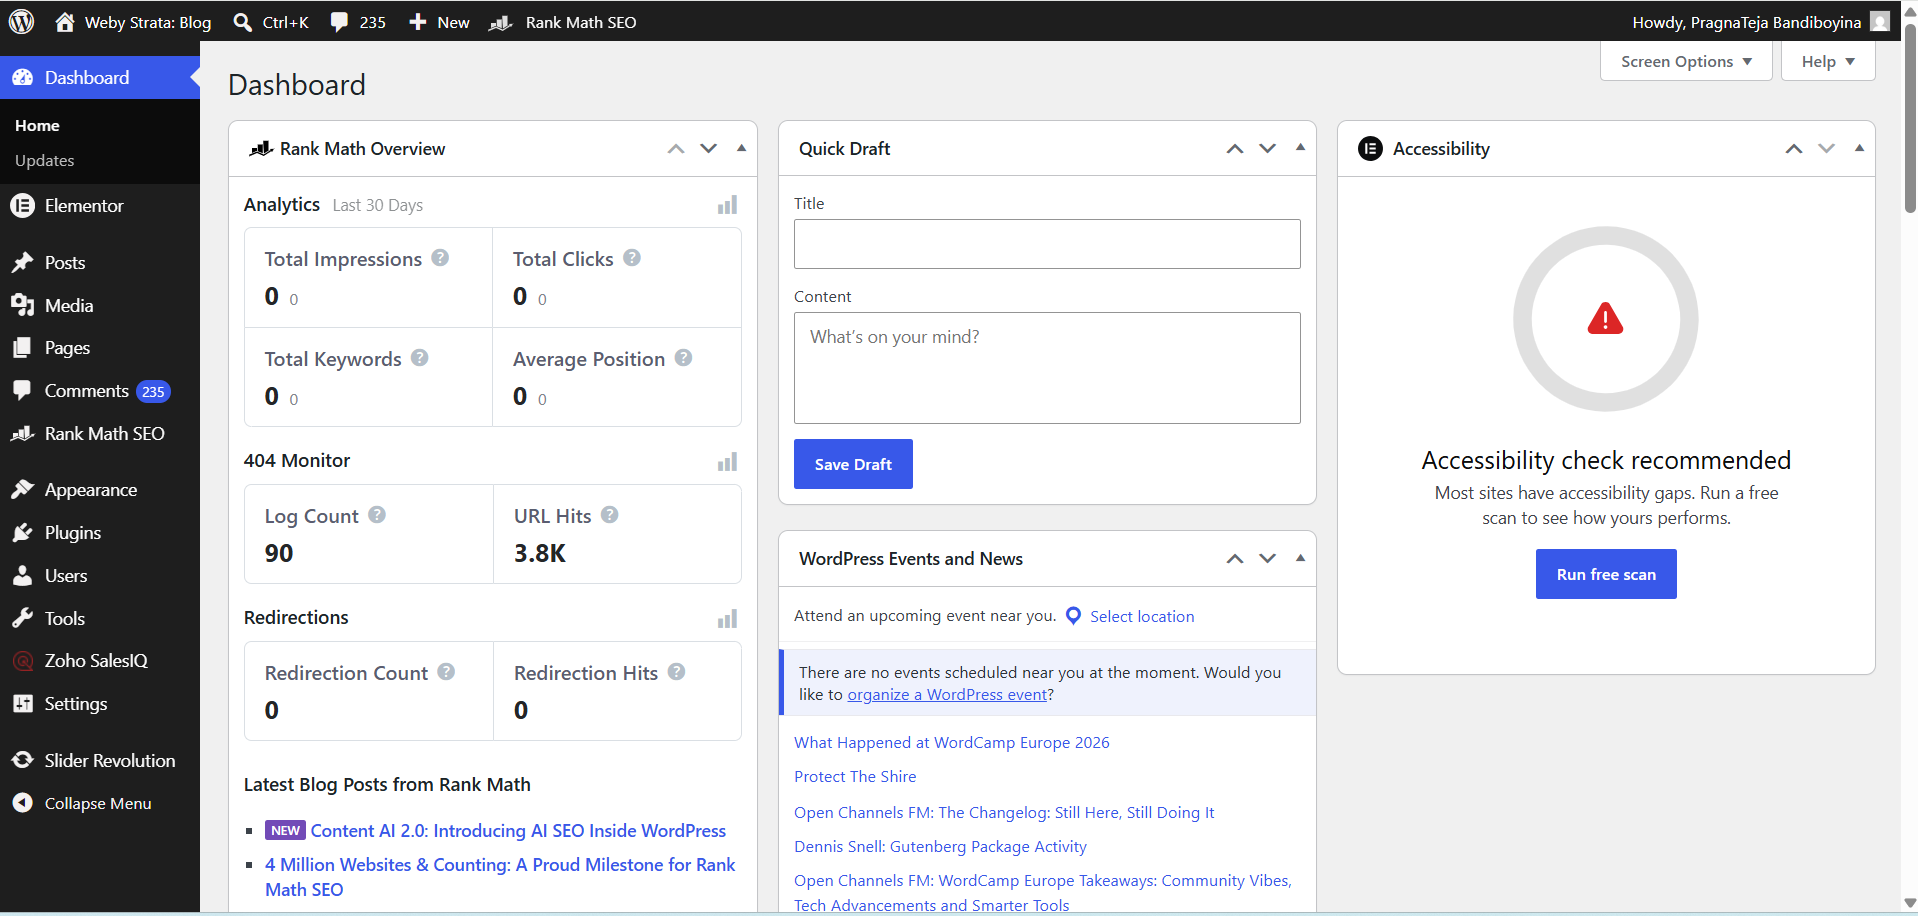
Step 1: Log in to WordPress
Access your WordPress dashboard using your administrator credentials.
Step 2: Open a Post or Page
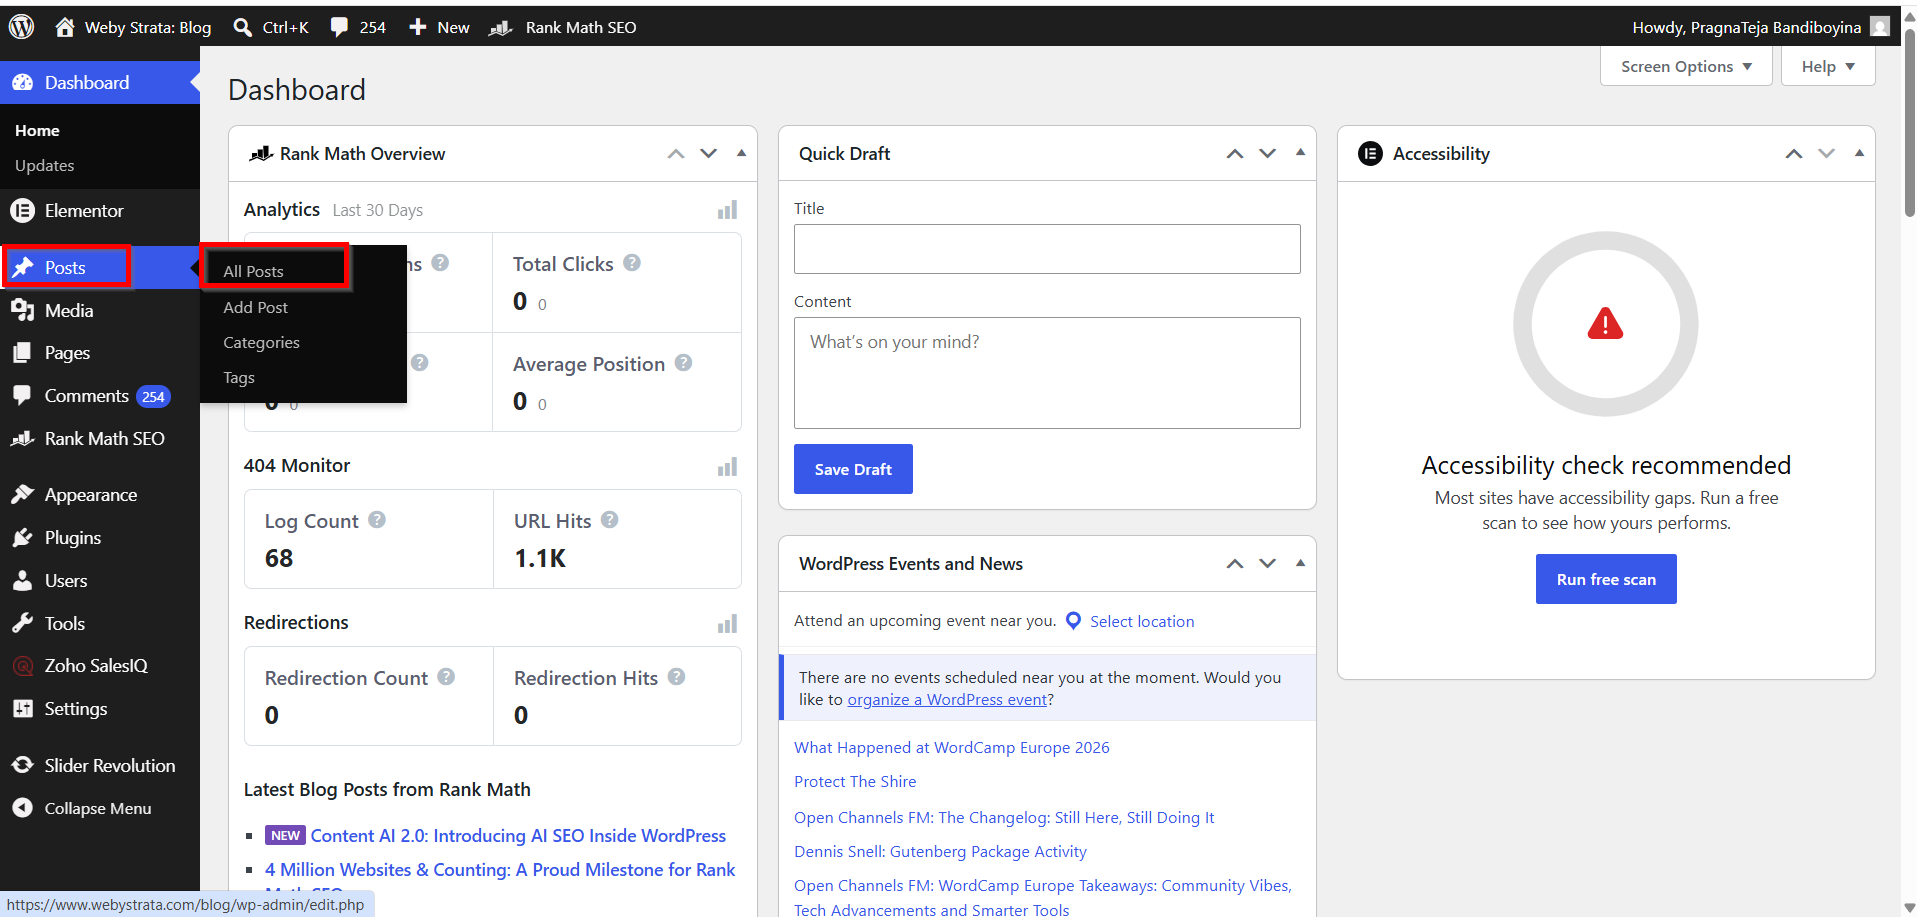
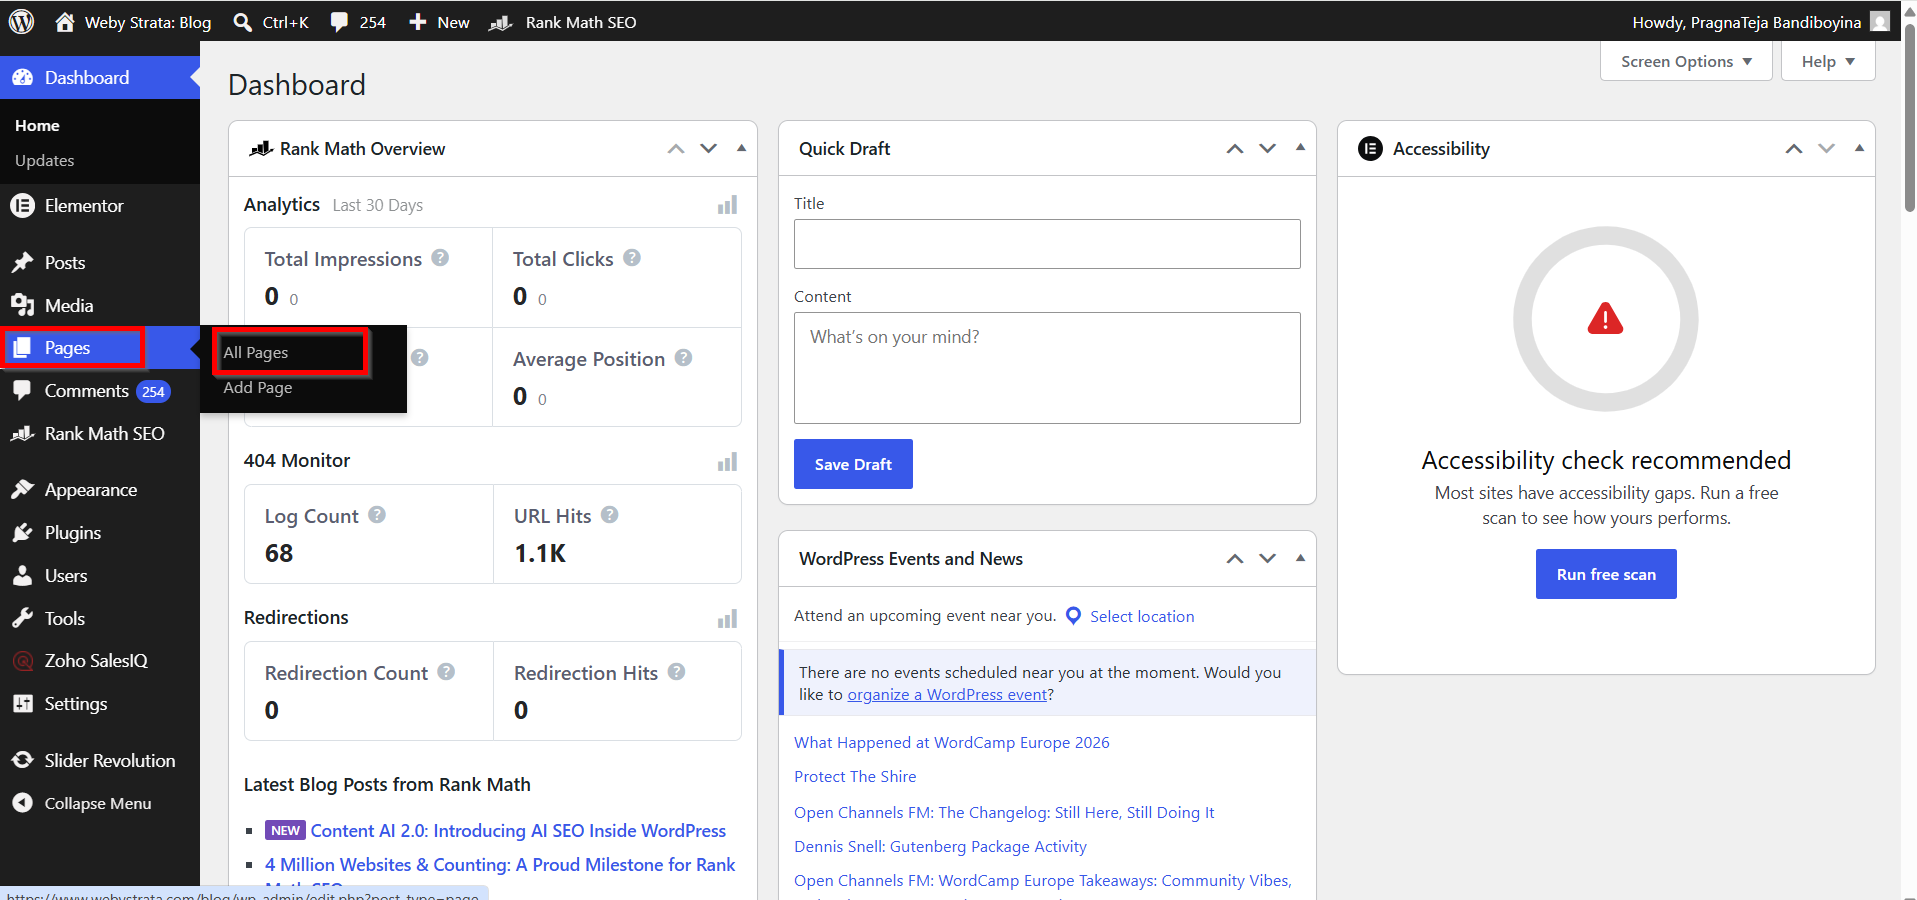
Navigate to:
Posts → All Posts
or
Pages → All Pages
Open the content where you want to add a nofollow link.
Step 3: Create or Edit a Link
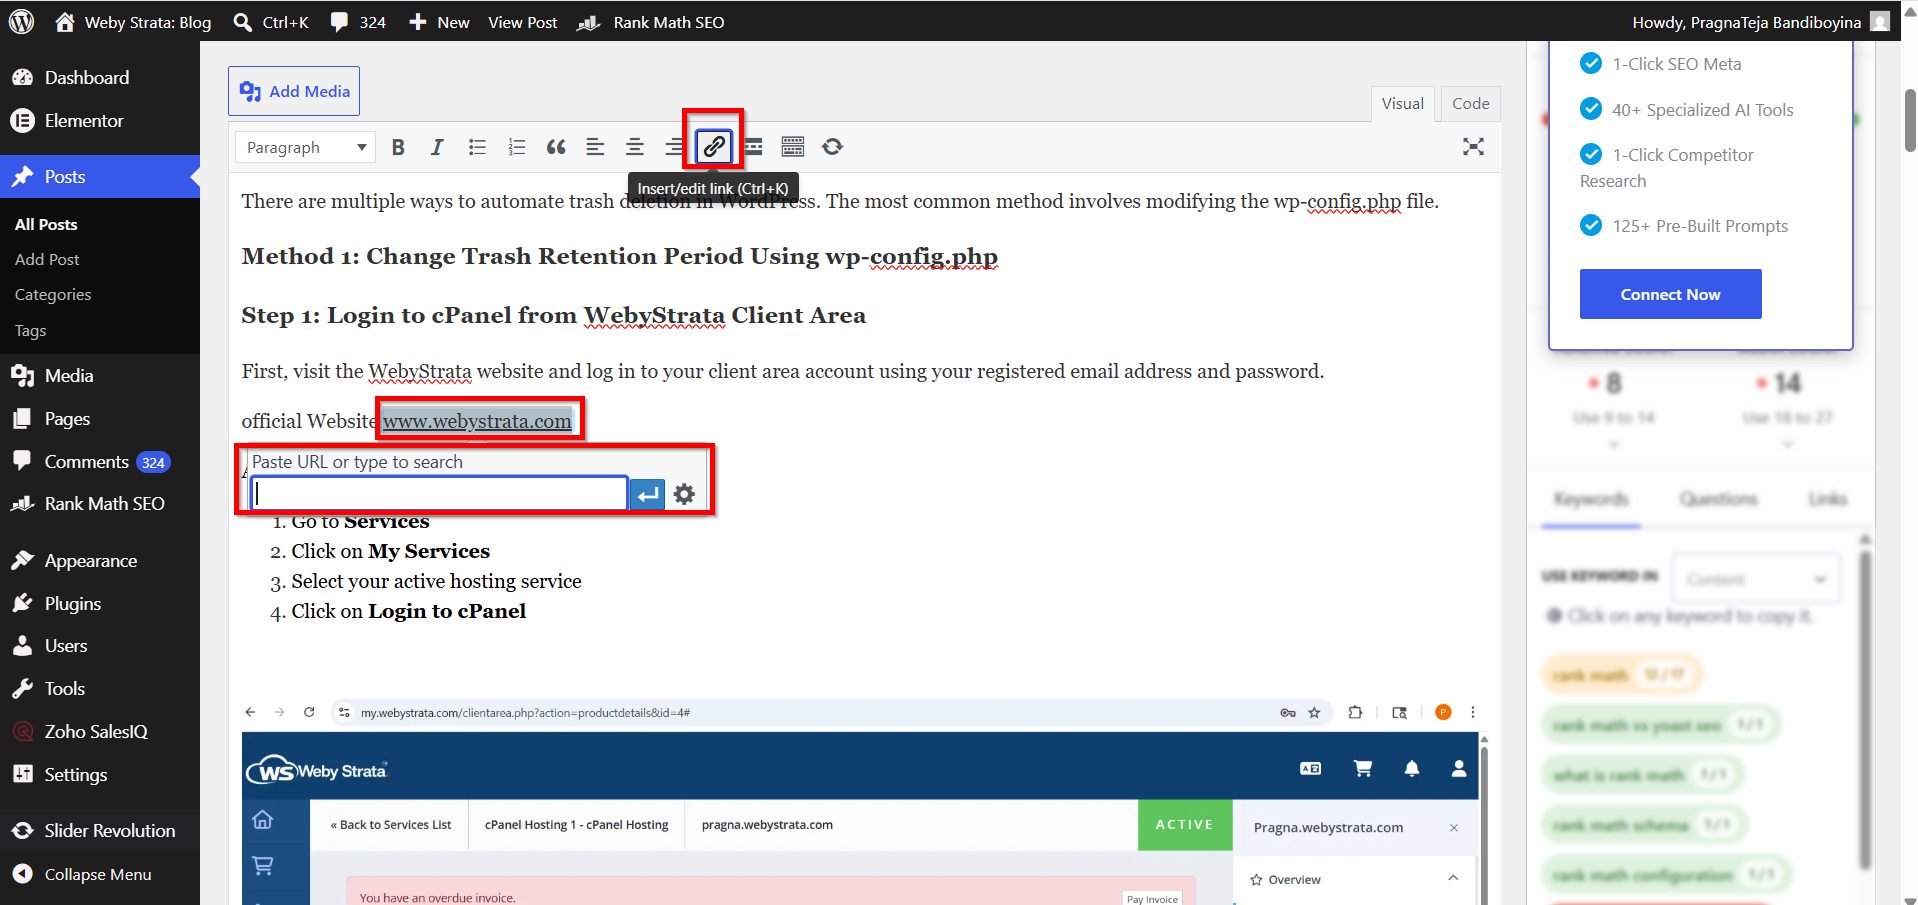
Highlight the text that should contain the hyperlink.
Click the Link icon from the editor toolbar and enter the destination URL.
Step 4: Open Link Settings
After creating the link:
-
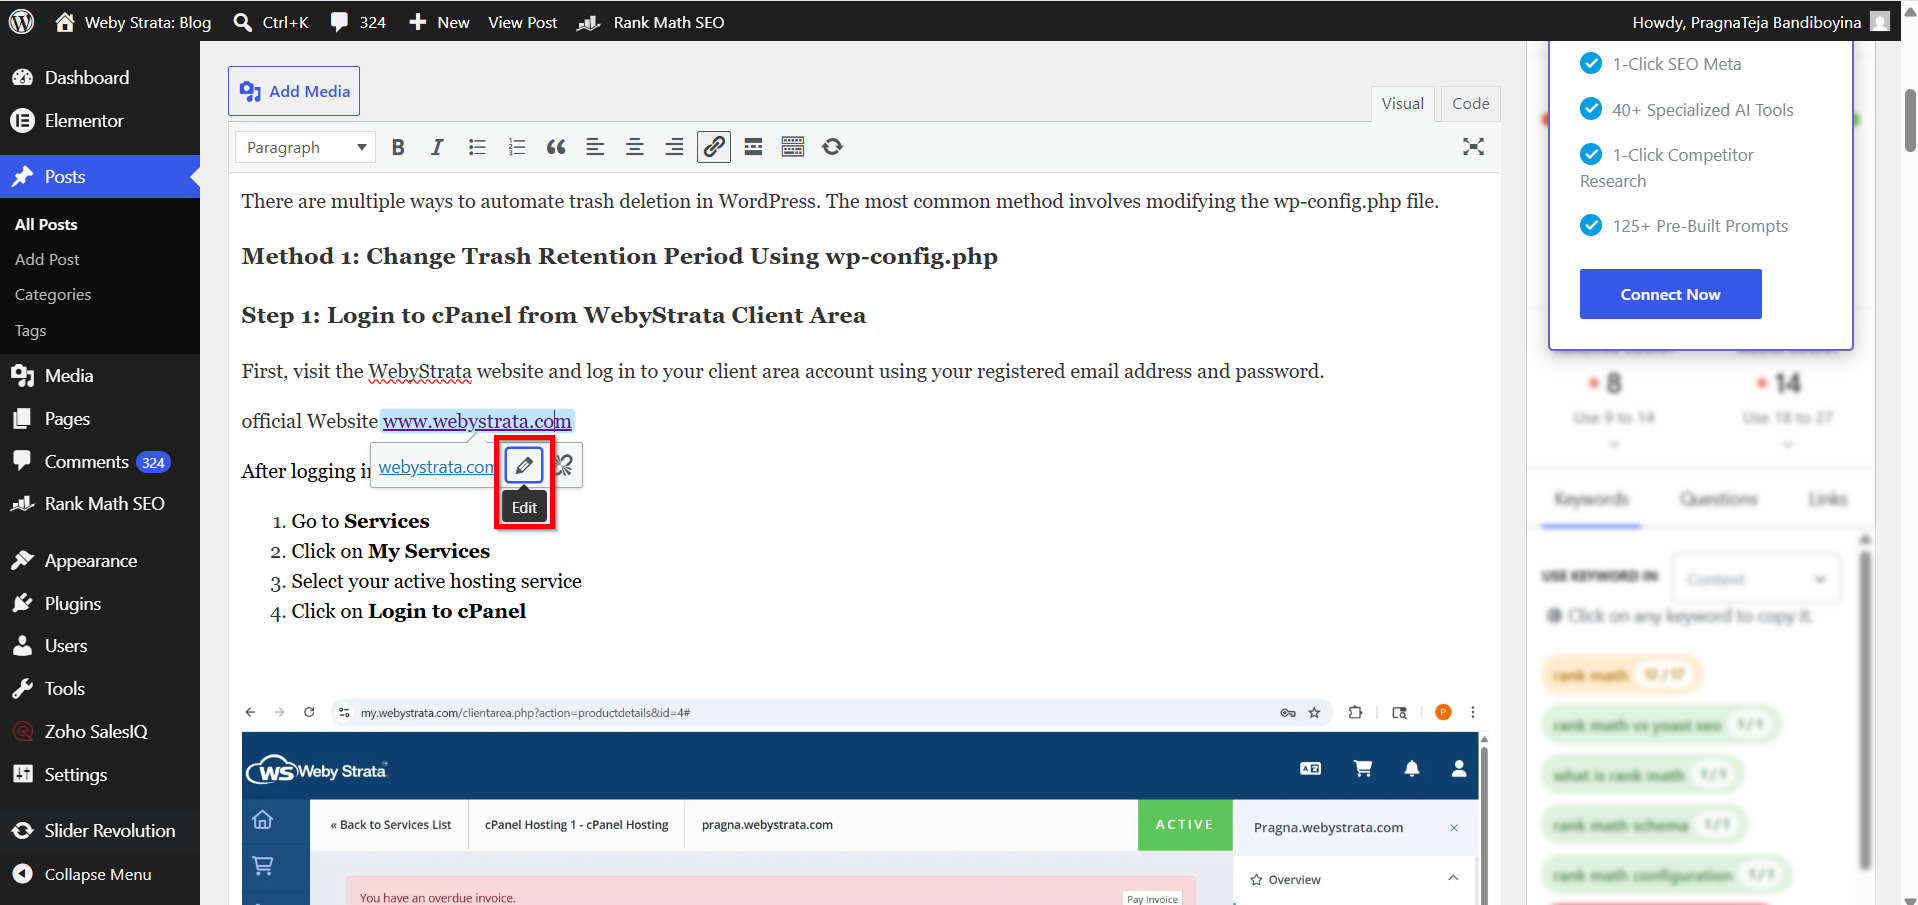
Click the linked text and Click Edit icon.
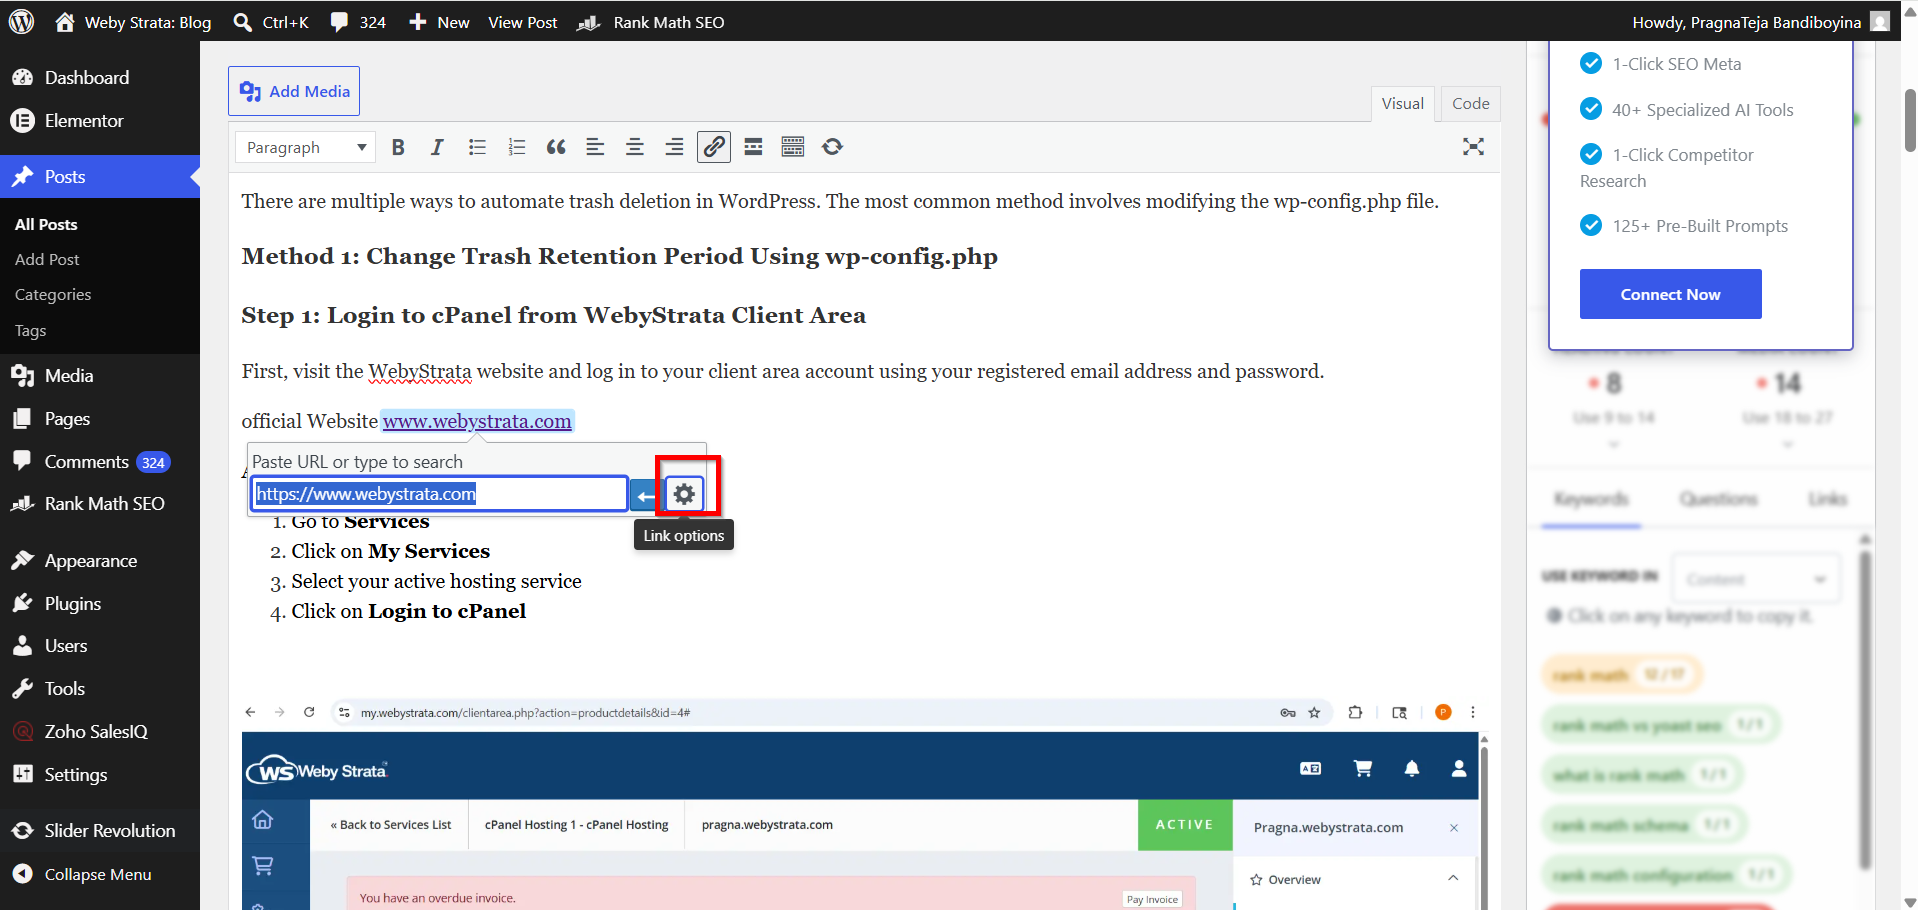
2. Select the Settings icon.
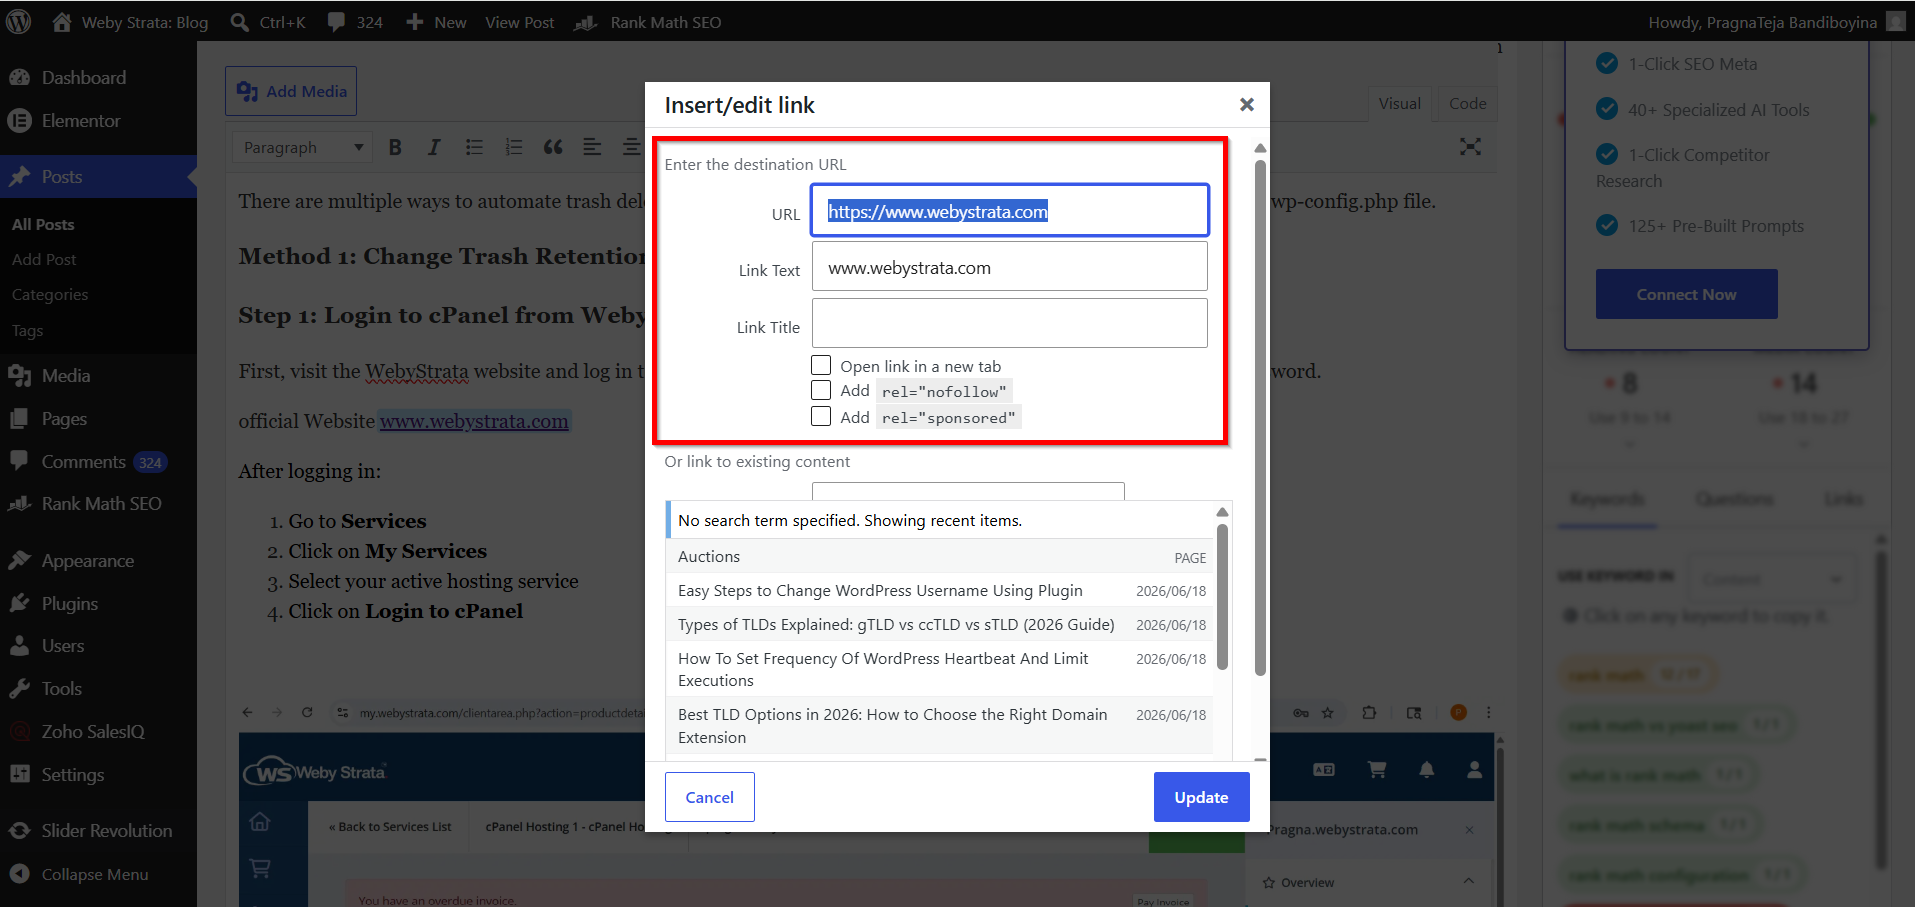
3. Open the advanced link settings.
Depending on your WordPress setup, you may see options such as:
-
Nofollow
-
Sponsored
-
UGC (User Generated Content)
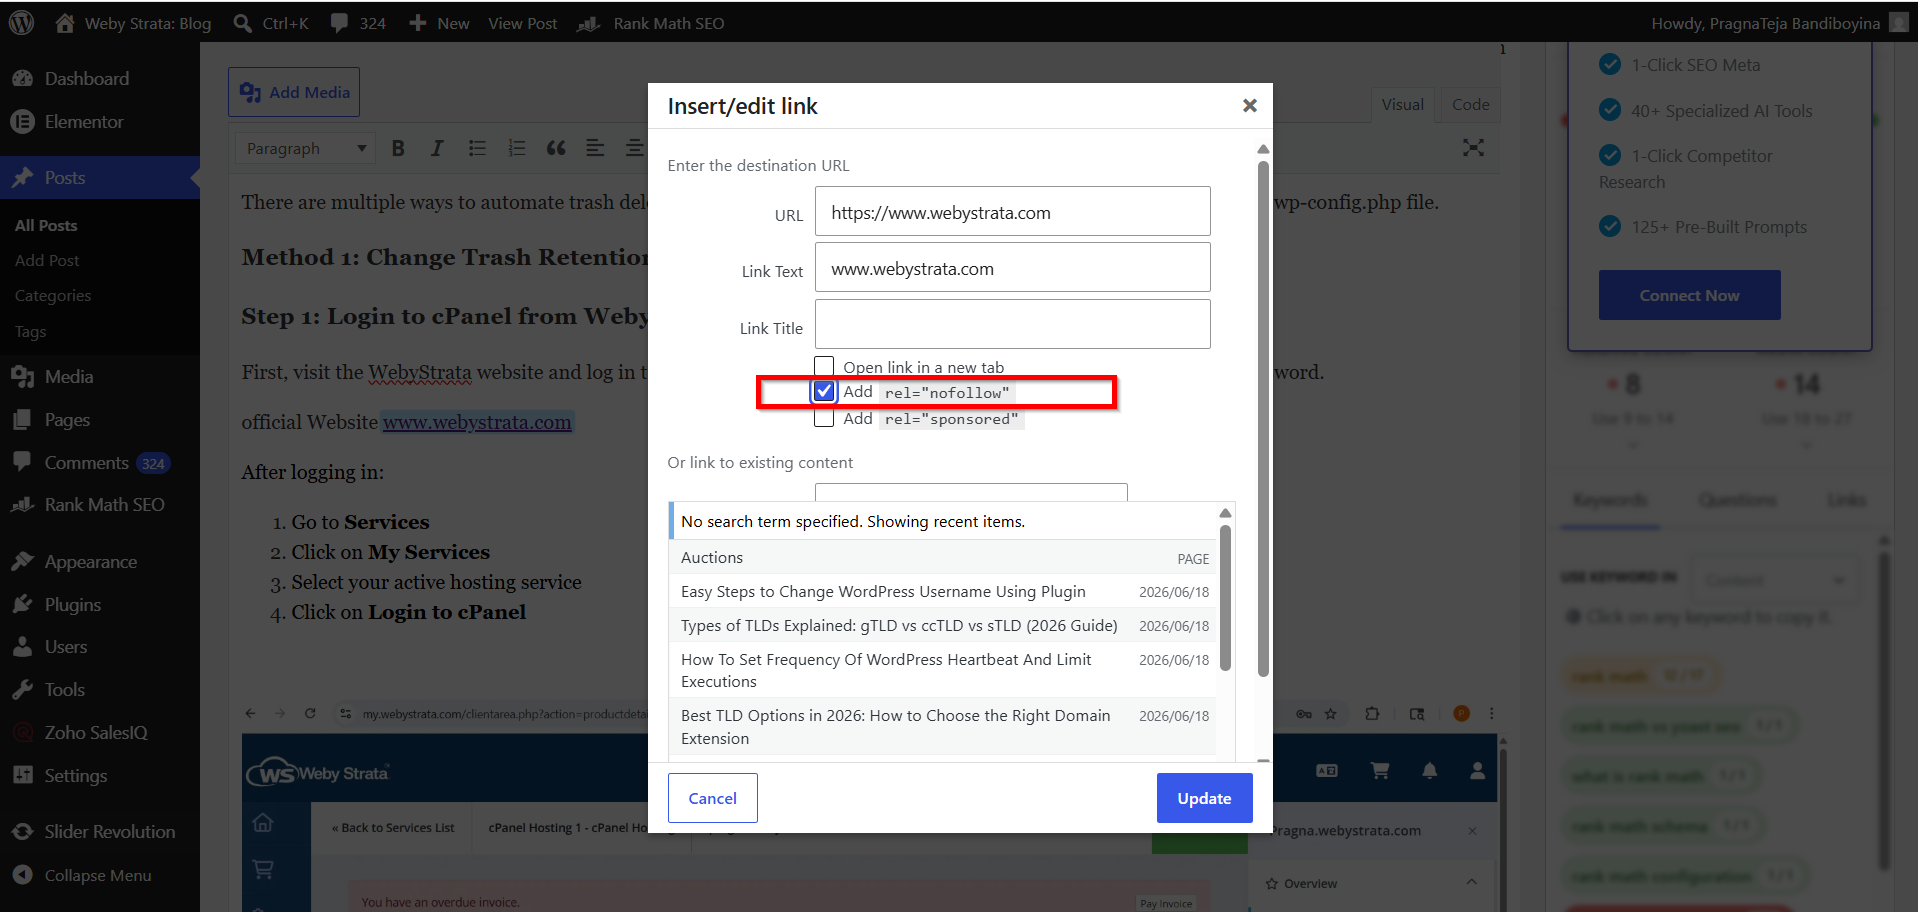
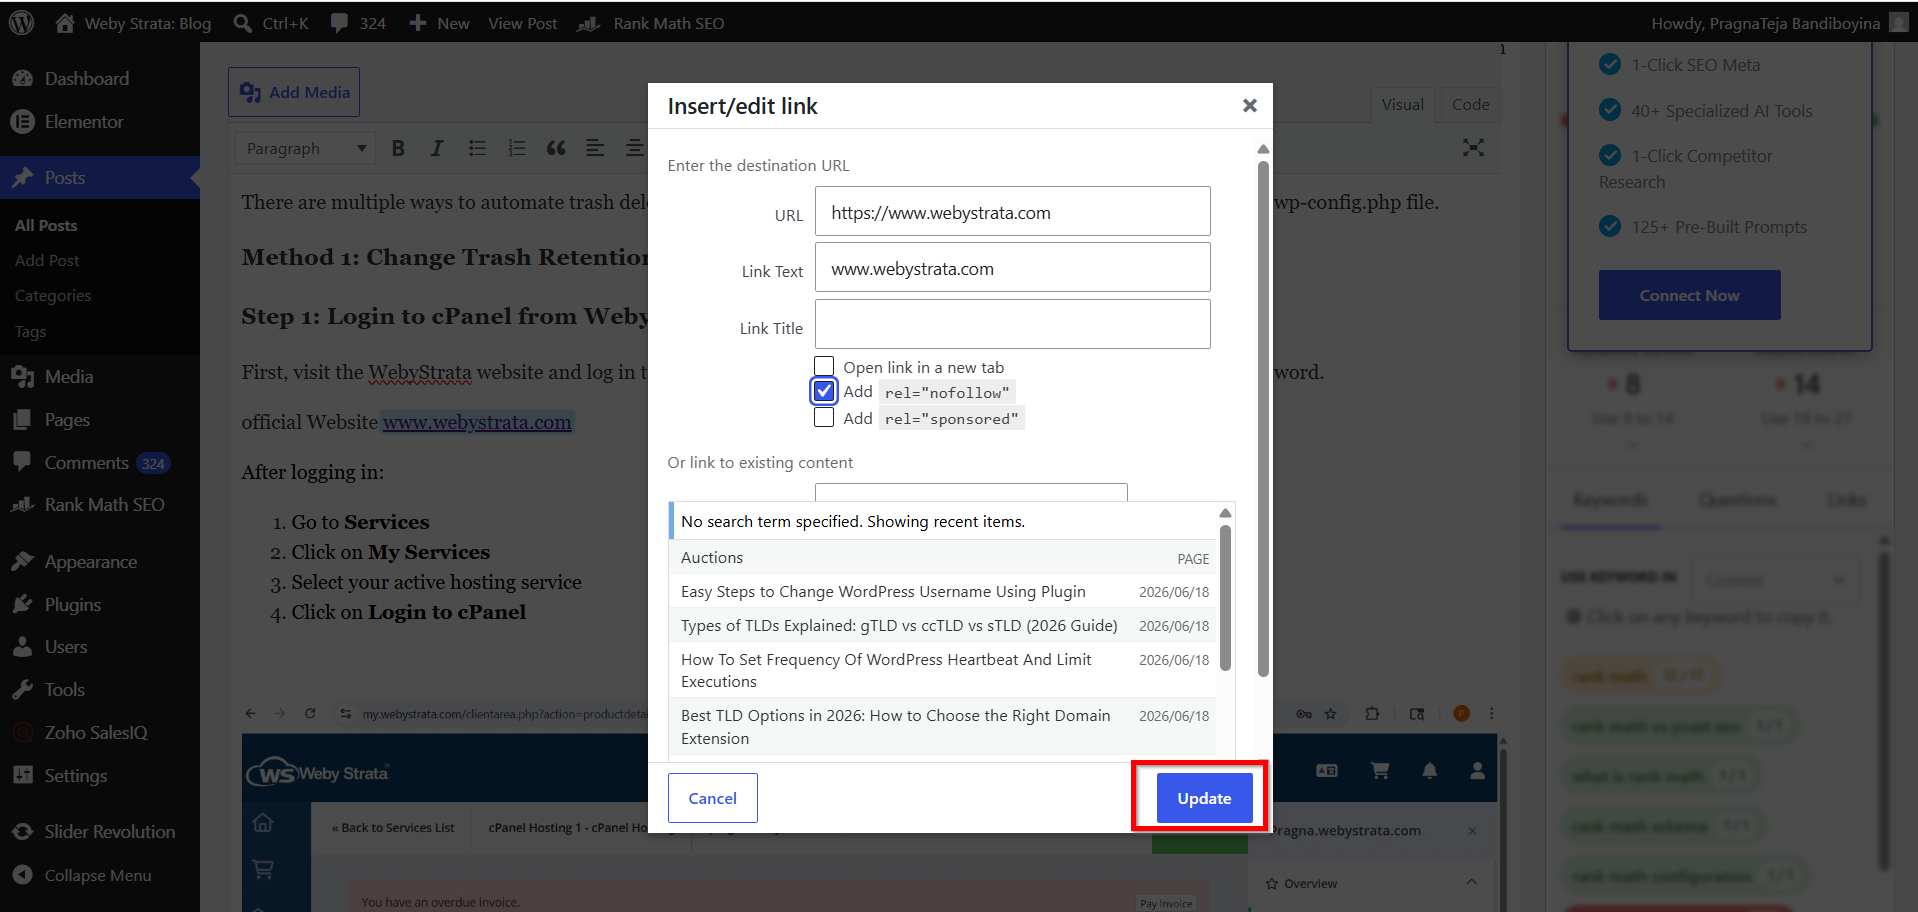
Step 5: Enable Nofollow
Check the Nofollow option and save the link.
WordPress will automatically add the appropriate attribute to the hyperlink.
Step 6: Update the Page
Click Update to save your changes.
You have successfully used the editor to Add Nofollow Links in WordPress.
How to Verify a Nofollow Link
After adding a nofollow attribute, verify it by checking the page source.
Step 1
Visit the published page.
Step 2
Right-click anywhere on the page.
Step 3
Select View Page Source.
Step 4
Search for your hyperlink.
You should see:
<a href="https://example.com" rel="nofollow">Example Website</a>
This confirms that the nofollow attribute has been successfully applied.
Why Add Nofollow Links in WordPress?
There are several reasons to use nofollow links:
-
Helps maintain SEO best practices
-
Prevents passing link equity to external websites
-
Complies with search engine guidelines for sponsored content
-
Useful for affiliate marketing
-
Protects website authority from low-quality external links
Learning how to Add Nofollow Links in WordPress is a valuable skill for bloggers, business owners, and website administrators.
When Should You Use Nofollow Links?
Consider using nofollow attributes for:
-
Affiliate marketing links
-
Sponsored blog posts
-
Banner advertisements
-
User-submitted links
-
External websites with uncertain credibility
For trusted references and authoritative sources, standard follow links may still be appropriate.
Benefits of Nofollow Links
Better SEO Management
Compliance with Search Engine Guidelines
Affiliate Link Protection
Reduced SEO Risk
Easy Link Control
Conclusion
Knowing how to Add Nofollow Links in WordPress helps maintain SEO best practices and gives you better control over external links. You can easily add nofollow attributes through the WordPress editor or manually edit the HTML code when needed.
By using nofollow links appropriately, you can manage affiliate links, sponsored content, and third-party references more effectively while keeping your website aligned with search engine recommendations.
