
How to Update WordPress Memory Limit from cPanel
Have you ever encountered the error message "Allowed memory size exhausted" while working on your WordPress website? This error usually appears when your website reaches the PHP memory limit assigned by your hosting server. Since WordPress relies heavily on PHP to run themes, plugins, and core functionalities, insufficient memory can lead to performance issues, plugin failures, or even website crashes.
As your website grows and you install more plugins, upload media files, or receive more visitors, the default memory allocation may no longer be enough. Fortunately, if your website is hosted on a cPanel-based server, increasing the WordPress memory limit is a simple task that requires only a few edits to your website files.
In this guide, you'll learn how to update the WordPress memory limit directly from cPanel and improve your site's overall performance.
What is the WordPress Memory Limit?
The WordPress memory limit determines how much server memory PHP scripts can use while running your website. When WordPress reaches this limit, it may display errors such as:
-
Allowed memory size exhausted
-
White Screen of Death (WSOD)
-
Plugin installation failures
-
Theme customization issues
-
Slow website performance
-
Failed updates or backups
Increasing the memory limit gives WordPress more resources to process tasks efficiently.
Steps to Update WordPress Memory Limit from cPanel
Follow these simple steps to increase your WordPress memory allocation.
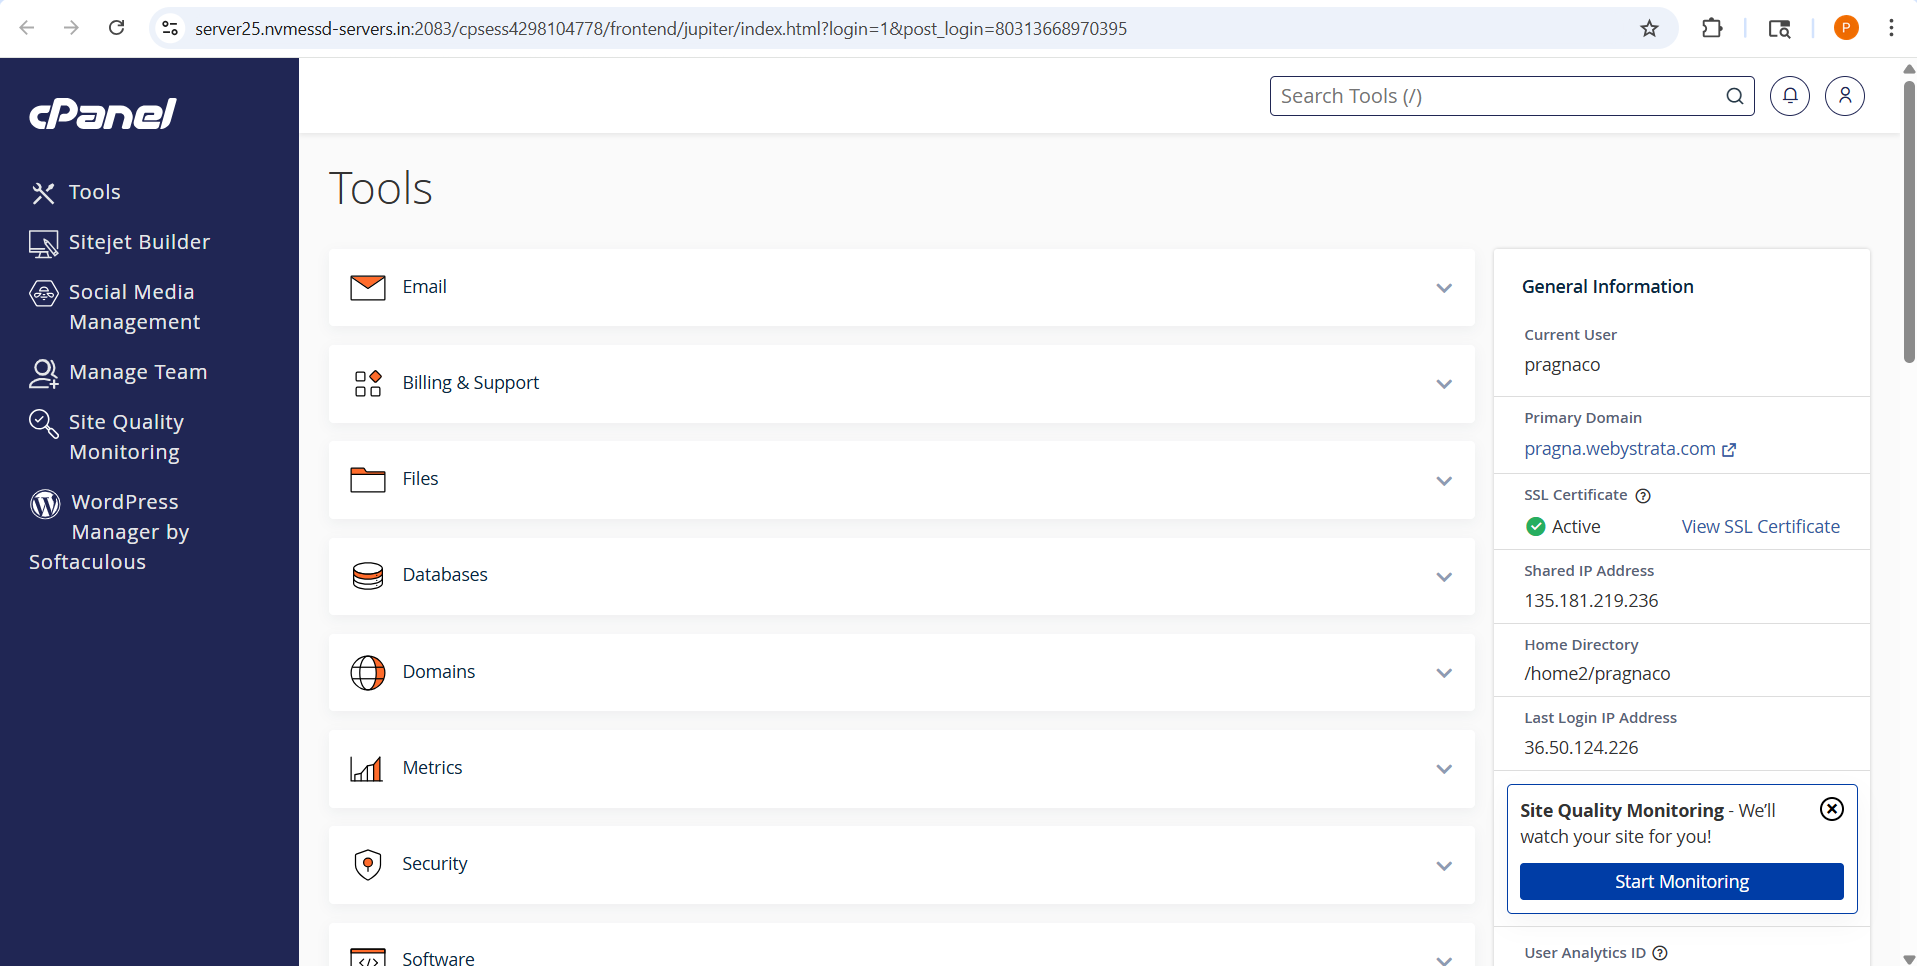
Step 1: Log in to cPanel
Access your hosting account and log in to your cPanel dashboard using your credentials.
Step 2: Open File Manager
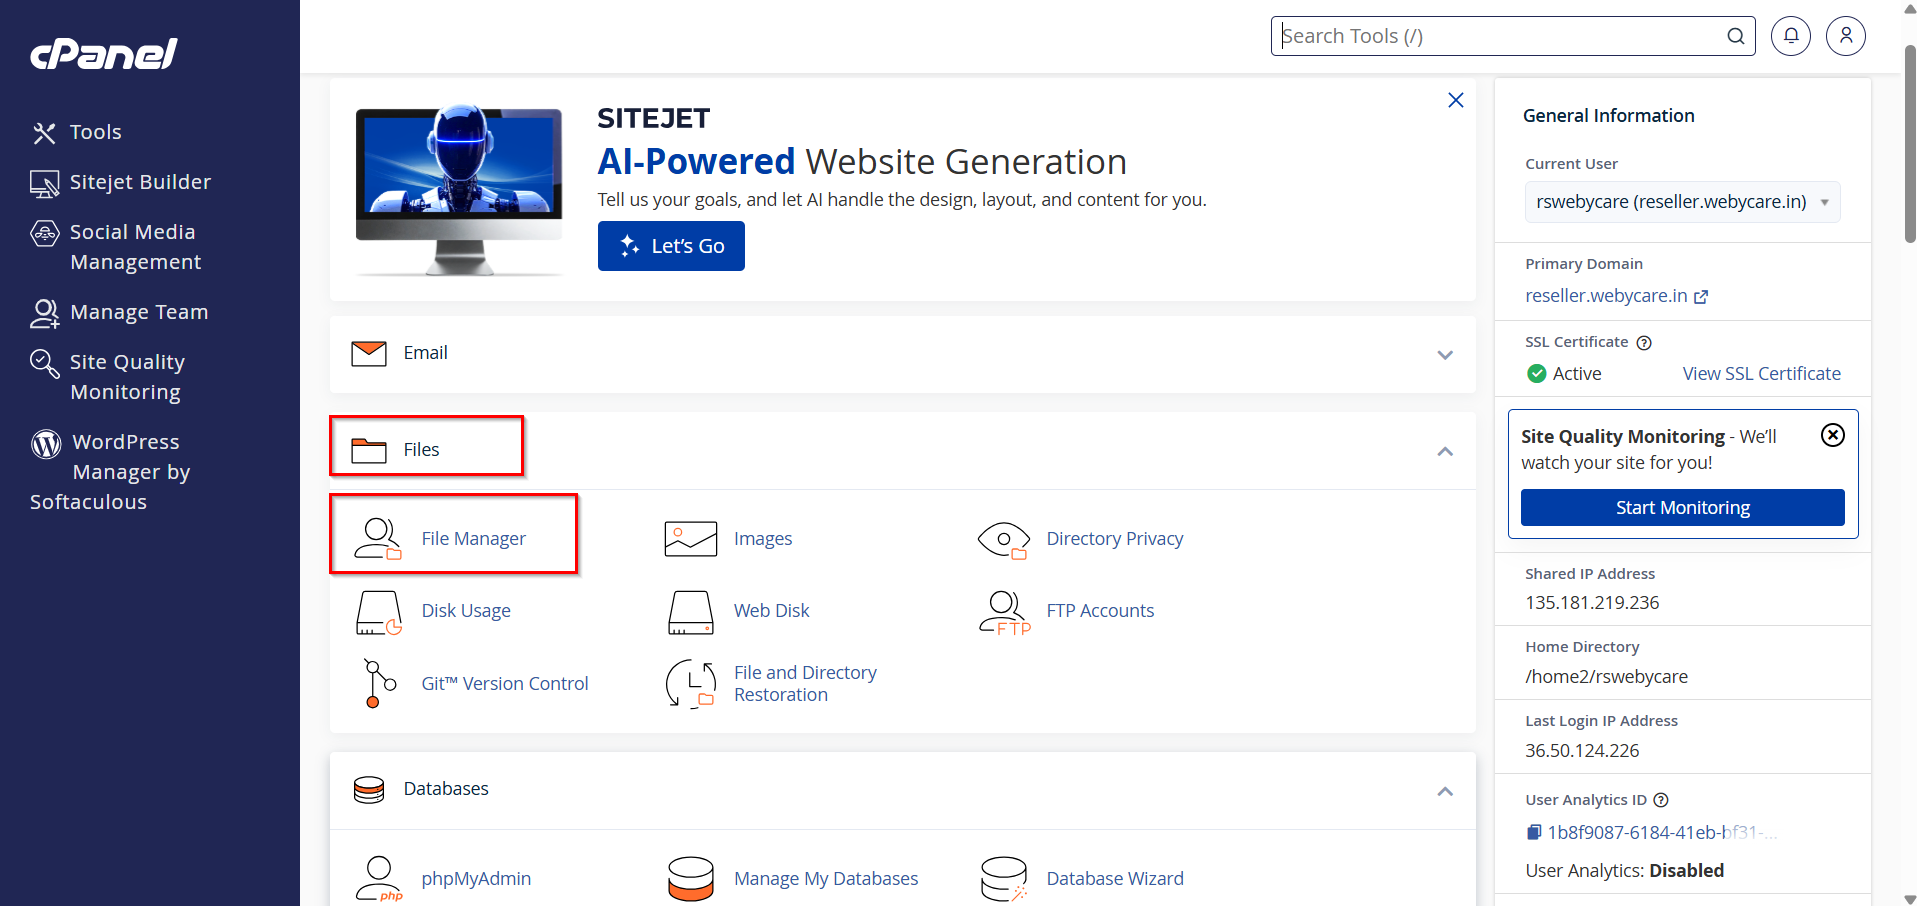
Inside cPanel, navigate to the Files section and click on File Manager.
The File Manager allows you to access and edit your website files directly from the browser.
Step 3: Locate the wp-config.php File
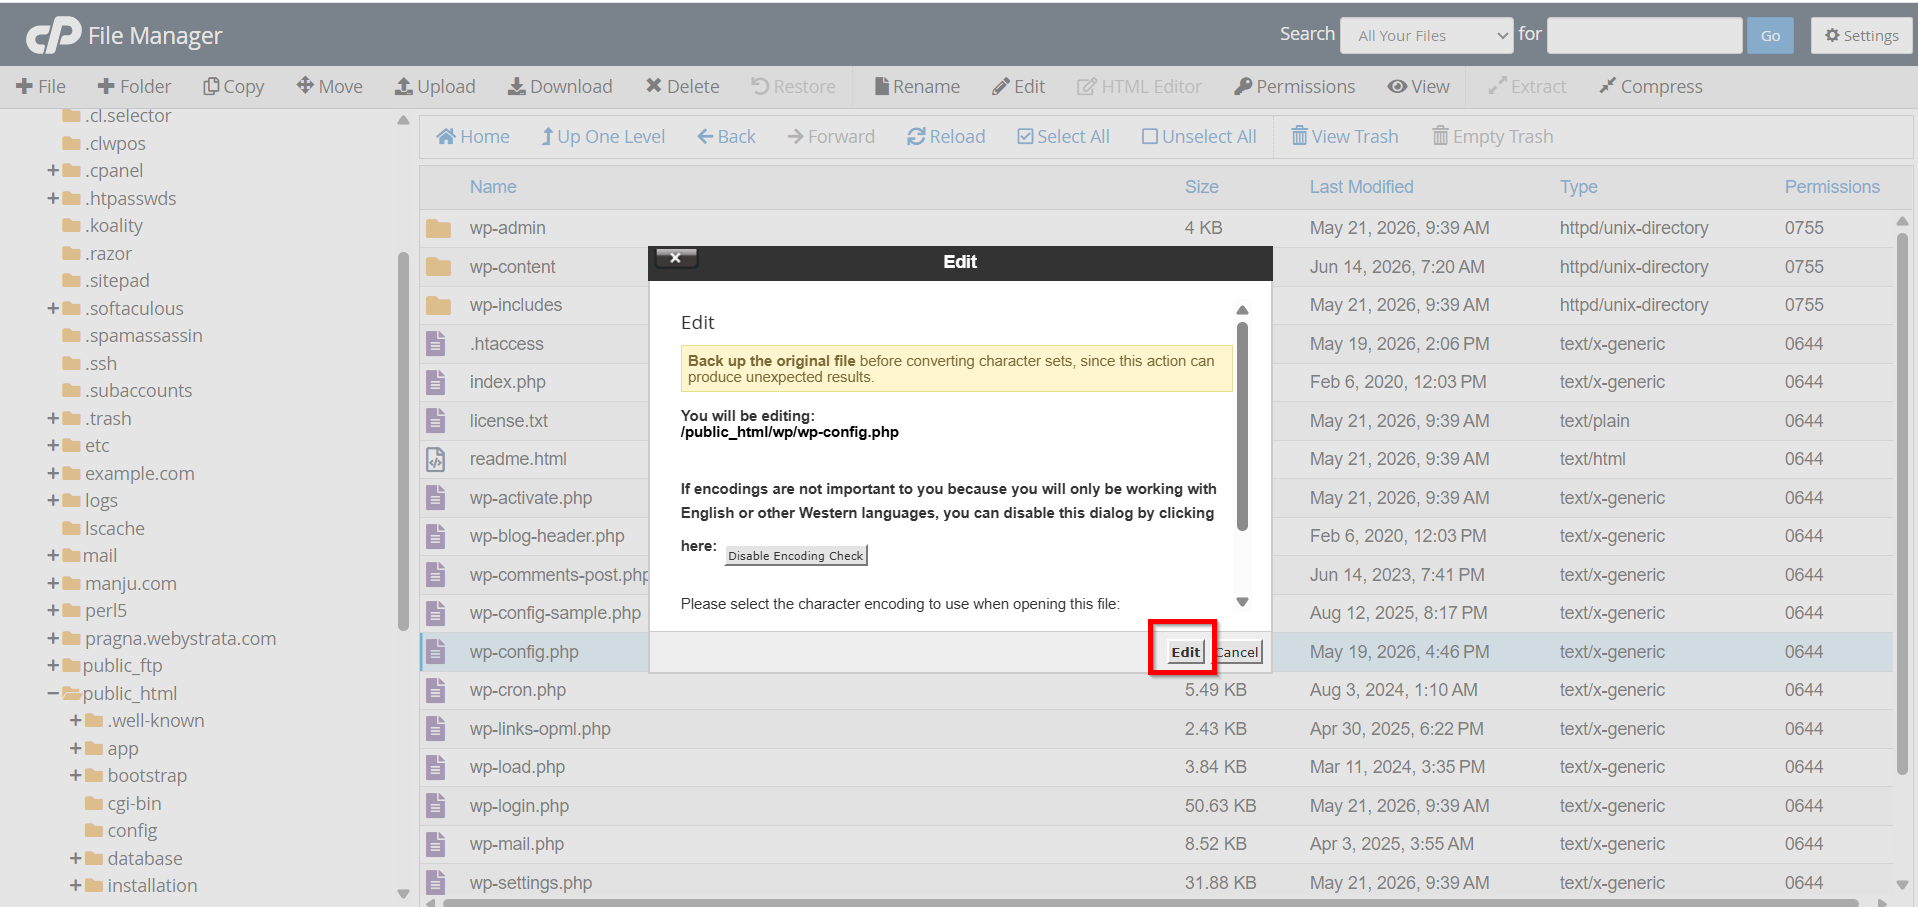
Browse to your WordPress installation directory:
- Main domain:
public_htmlthen click on folder wp in which all the files will stored in it

- Locate the file named:
wp-config.php
Select the file and click Edit from the top menu or you can Right-Click the file

Step 4: Open the File Editor
A popup window may appear asking for file encoding preferences.
Simply click Edit to continue.
The file editor will now display the contents of your wp-config.php file.
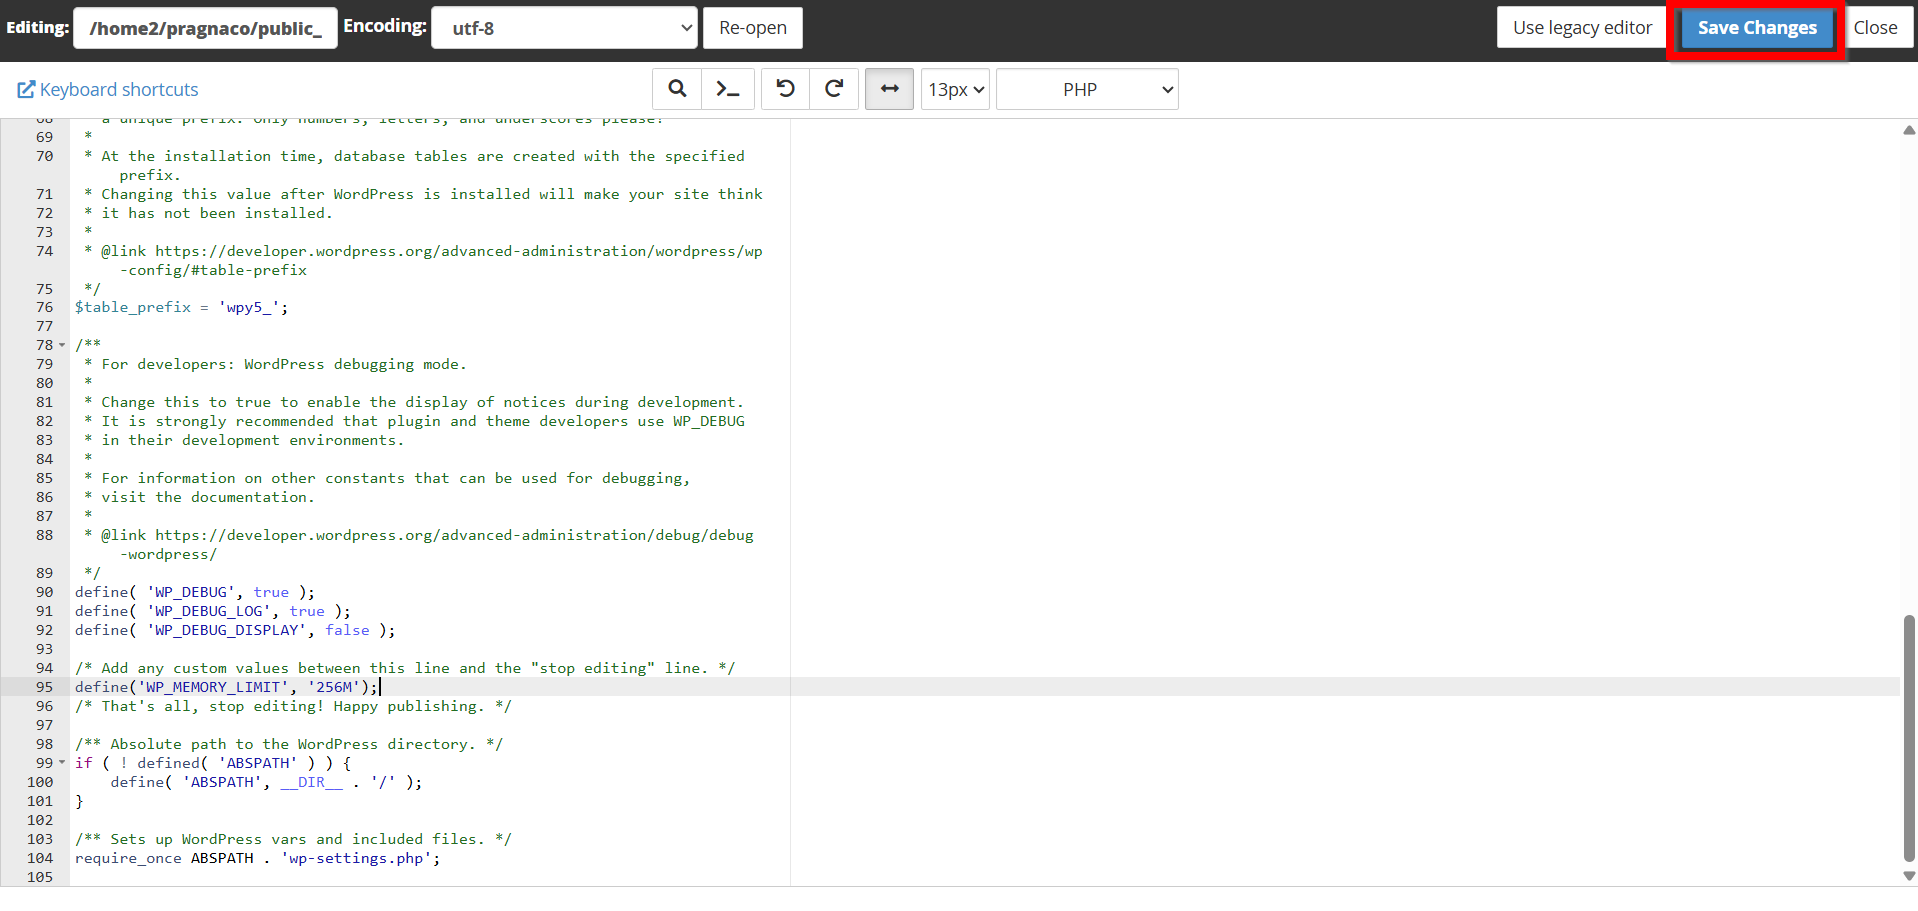
Step 5: Add the Memory Limit Code
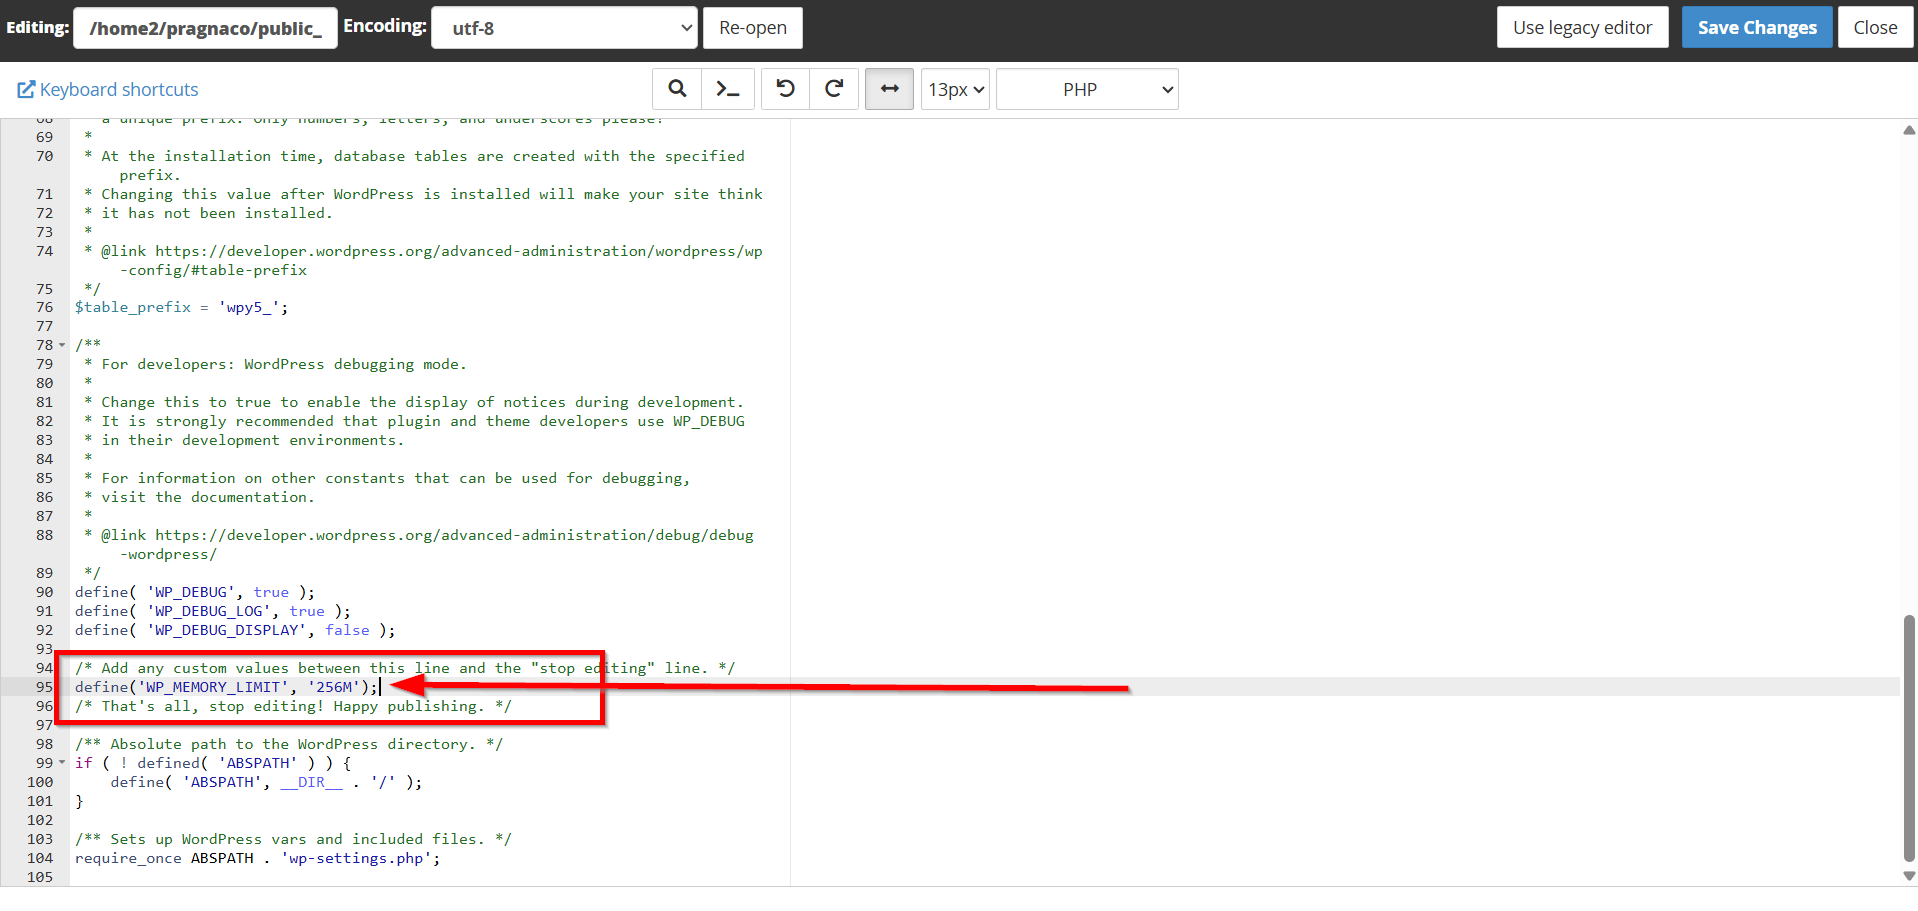
Scroll through the file and find the following line:
/* That's all, stop editing! Happy blogging. */
Just above this line, add:
define('WP_MEMORY_LIMIT', '256M');
Your file should look similar to this:
define('WP_MEMORY_LIMIT', '256M');

/* That's all, stop editing! Happy blogging. */
You can replace 256M with another value depending on your hosting plan and requirements.
Common memory limits include:
-
128M
-
256M
-
512M
Step 6: Save Changes
After adding the code, click Save Changes.
A confirmation message will appear indicating that the file has been updated successfully.
Your new WordPress memory limit is now active.
How to Verify the Memory Limit Change
After saving the file, you can verify the updated memory limit by:
-
Logging into your WordPress Admin Dashboard.
-
Installing a plugin such as Site Health or Server Information.
-
Viewing the PHP and WordPress memory settings.
If the new value appears correctly, the update was successful.
Best Practices When Increasing Memory
-
Increase memory only when necessary.
-
Keep plugins and themes updated.
-
Remove unused plugins.
-
Optimize images and database performance.
-
Monitor resource usage regularly.
These practices help maintain a fast and stable WordPress website.
Benefits of Increasing the WordPress Memory Limit
Before proceeding, let's look at some advantages:
1. Prevent Memory Exhaustion Errors
2. Improve Website Performance
3. Support Larger Plugins and Themes
4. Smooth WordPress Updates
5. Better User Experience
6. Improved WooCommerce Functionality
7. Enhanced Website Stability
Conclusion
Running a WordPress website should not involve constant memory errors and performance problems. Updating the WordPress memory limit from cPanel is one of the easiest ways to resolve resource-related issues and improve overall site stability.
By editing the wp-config.php file and assigning a higher memory value, you can ensure smoother plugin operations, faster updates, improved performance, and a better experience for your visitors. Whether you manage a personal blog, business website, or WooCommerce store, increasing the WordPress memory limit is a simple yet powerful optimization that can keep your website running efficiently.
