
How To Add A Blogroll To Your WordPress Website
A blogroll is a collection of links to blogs or websites that you recommend to your visitors. These links may point to your own websites, partner blogs, industry resources, or other blogs that you regularly follow. Blogrolls have been a part of WordPress since its early days and remain a useful way to connect your audience with valuable content.
Adding a blogroll to your WordPress website can help improve user engagement and encourage visitors to explore related resources. It also helps build relationships with other website owners and creates a more resourceful experience for your readers.
What is Blogroll
A blogroll is a list of links to other blogs or websites that a blogger recommends to their visitors.
Originally, blogrolls were very popular on blogging websites and were usually displayed in the sidebar. They helped readers discover related blogs, trusted resources, partner websites, or other sites owned by the same person.
Example of a Blogroll
- Tech Insights
- WordPress Tutorials
- Digital Marketing Hub
- Web Development Tips
- My Portfolio Website
Each item in the list links to another website or blog.
How To Add A Blogroll In WordPress
Follow the steps below to create and display a blogroll on your WordPress website.
Step 1: Log In to Your WordPress Dashboard
Access your WordPress admin area by visiting:
https://yourdomain.com/wp-admin
Enter your username and password, then click Log In. You will be redirected to WordPress Dashboard.

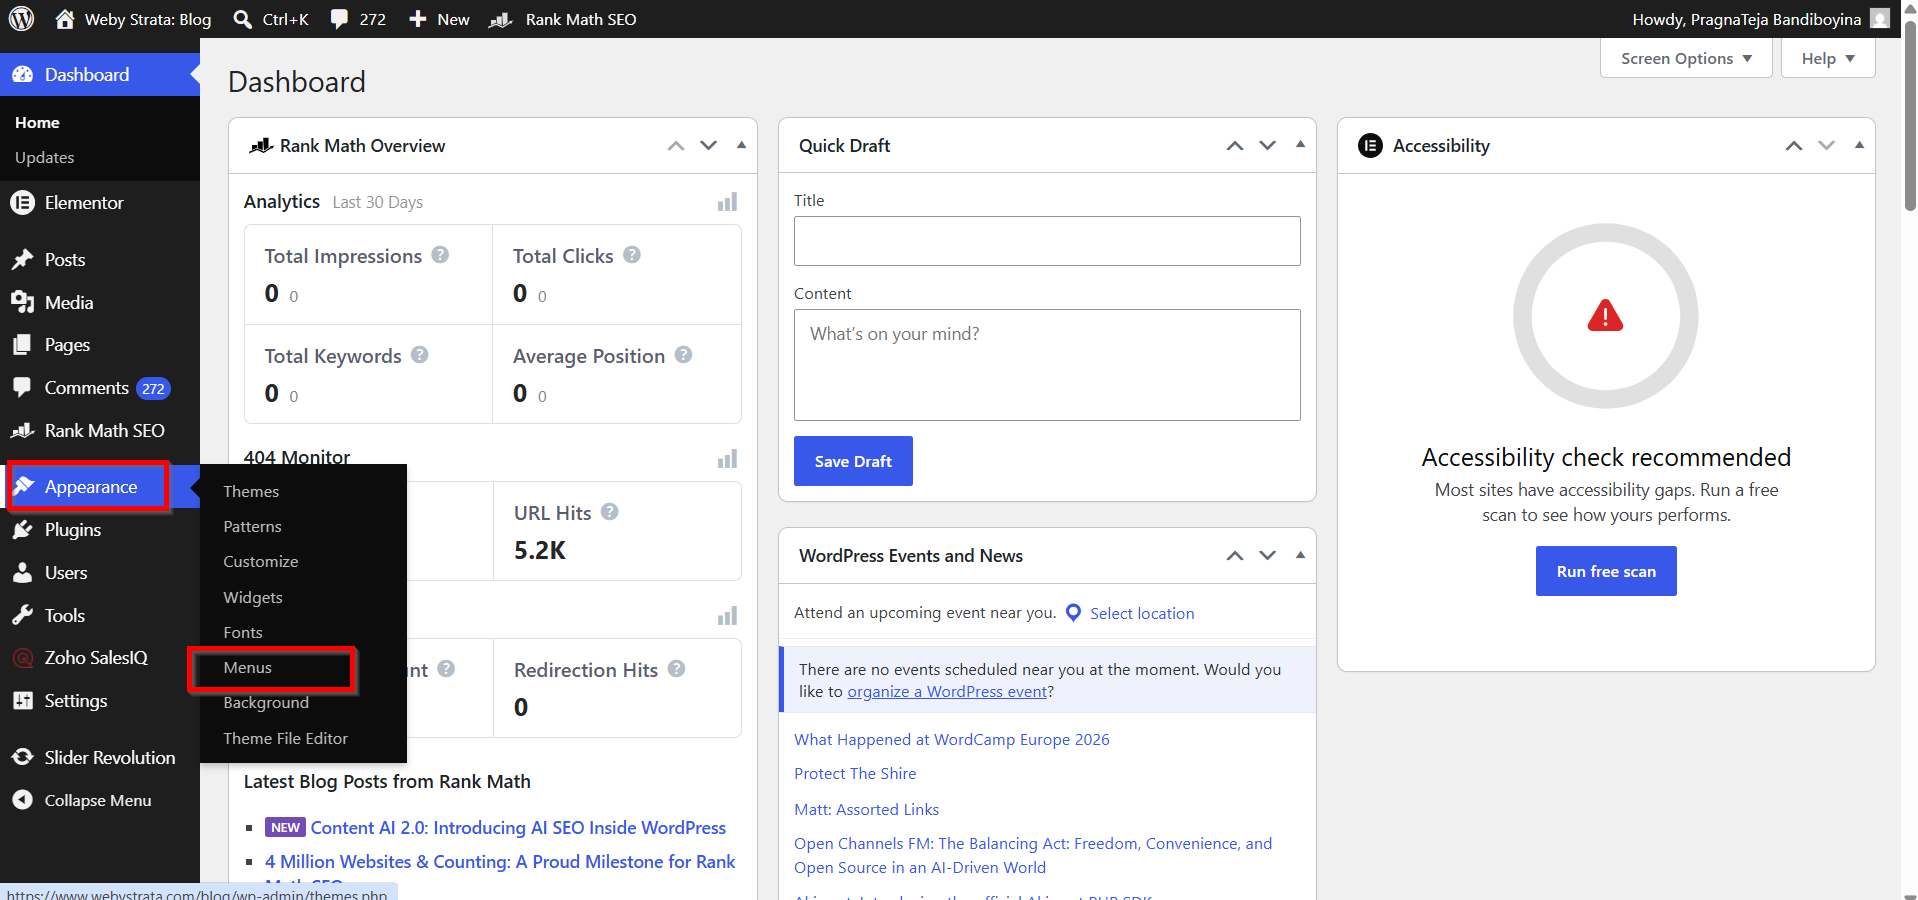
Step 2: Navigate to Menus
From the WordPress dashboard, go to:
Appearance → Menus
This section allows you to create and manage custom menus.
Step 3: Create a New Menu
On the Menus page, click Create a New Menu.
You will be prompted to enter a menu name. Type a name such as:
Blogroll
You may choose any name that helps you identify the menu later.
Click Create Menu to continue.

Step 4: Add Custom Links
On the left-hand side of the screen, locate the Custom Links section and click it to expand.
You will see two fields:
-
URL
-
Link Text
Enter the website address you want to include in your blogroll in the URL field.
In the Link Text field, enter the name of the blog or website.
For example:
-
URL:
https://exampleblog.com -
Link Text: Example Blog
Click Add to Menu.
The link will now appear in the menu structure on the right side of the screen.

Step 5: Add More Blog Links
Repeat the previous step for every blog or website you want to include in your blogroll.
You can add as many links as needed.
You can also drag and drop menu items to arrange them in your preferred order.
Step 6: Save the Menu
After adding all desired links, click Save Menu.
Your blogroll menu is now ready.

Step 7: Display the Blogroll
To make the blogroll visible on your website:
Go to:
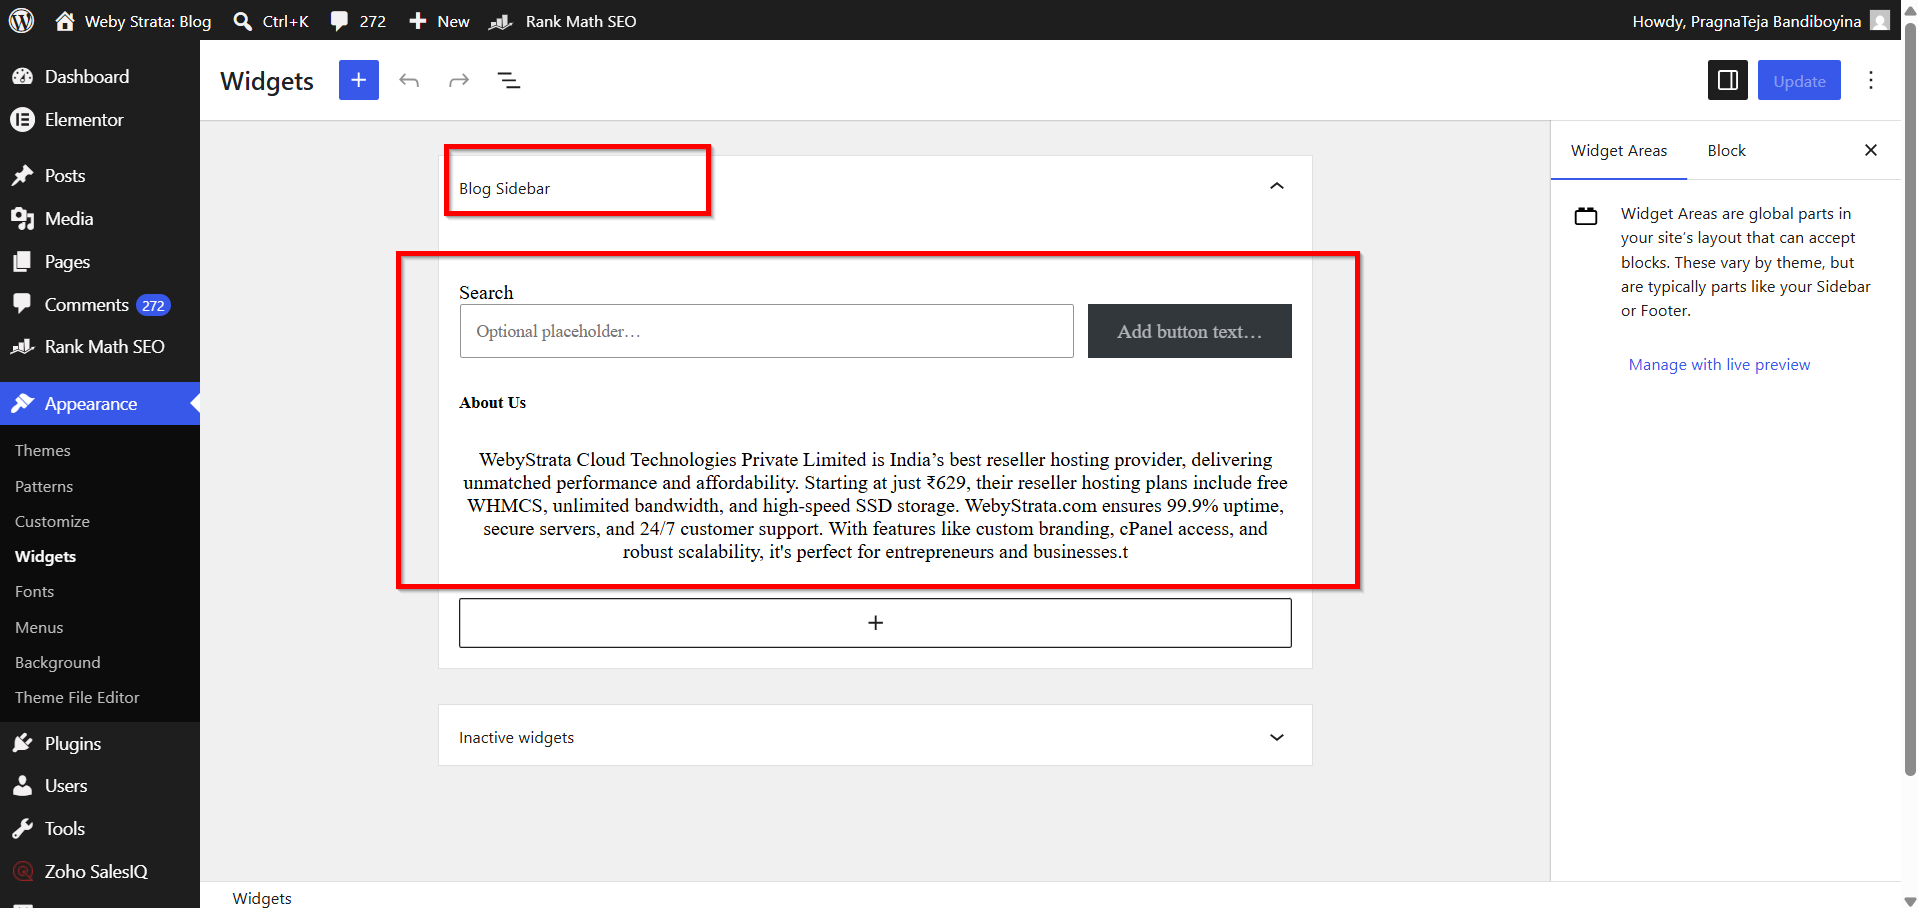
- Appearance → Widgets

- Add a Navigation Menu widget to your sidebar, footer, or any widget-enabled area.
Select the Blogroll menu you created and save the widget.
Visitors will now be able to see and access the links in your blogroll.
Benefits of Adding a Blogroll
1. Improves User Experience
2. Increases Engagement
3. Strengthens Networking
4. Showcases Authority
5. Promotes Your Other Websites
6. Helps Visitors Find Relevant Content
7. Easy to Maintain
Conclusion
A blogroll is a simple yet effective feature that allows you to share useful blogs and websites with your audience. By creating a custom menu and displaying it through a widget, you can quickly add a professional blogroll to your WordPress website. Regularly updating your blogroll with high-quality resources can improve user engagement and provide additional value to your visitors.
