
How to Update WordPress Installation
Keeping your WordPress installation updated is one of the most important maintenance tasks for any website owner. WordPress updates often include security patches, performance improvements, bug fixes, and new features that help keep your website secure and running smoothly.
In this guide, you will learn how to update your WordPress installation directly from the WordPress Dashboard.
Why Update WordPress?
Updating WordPress regularly offers several advantages:
-
Improves website security by fixing known vulnerabilities.
-
Enhances performance and stability.
-
Provides access to new features and functionality.
-
Ensures compatibility with plugins and themes.
-
Fixes bugs and issues found in previous versions.
Before performing any update, it is recommended to create a complete backup of your website files and database.
Step 1: Log in to Your WordPress Dashboard
Open your website's WordPress admin area by visiting:
https://yourdomain.com/wp-admin
Enter your username and password, then click Log In.

Step 2: Open the Updates Page
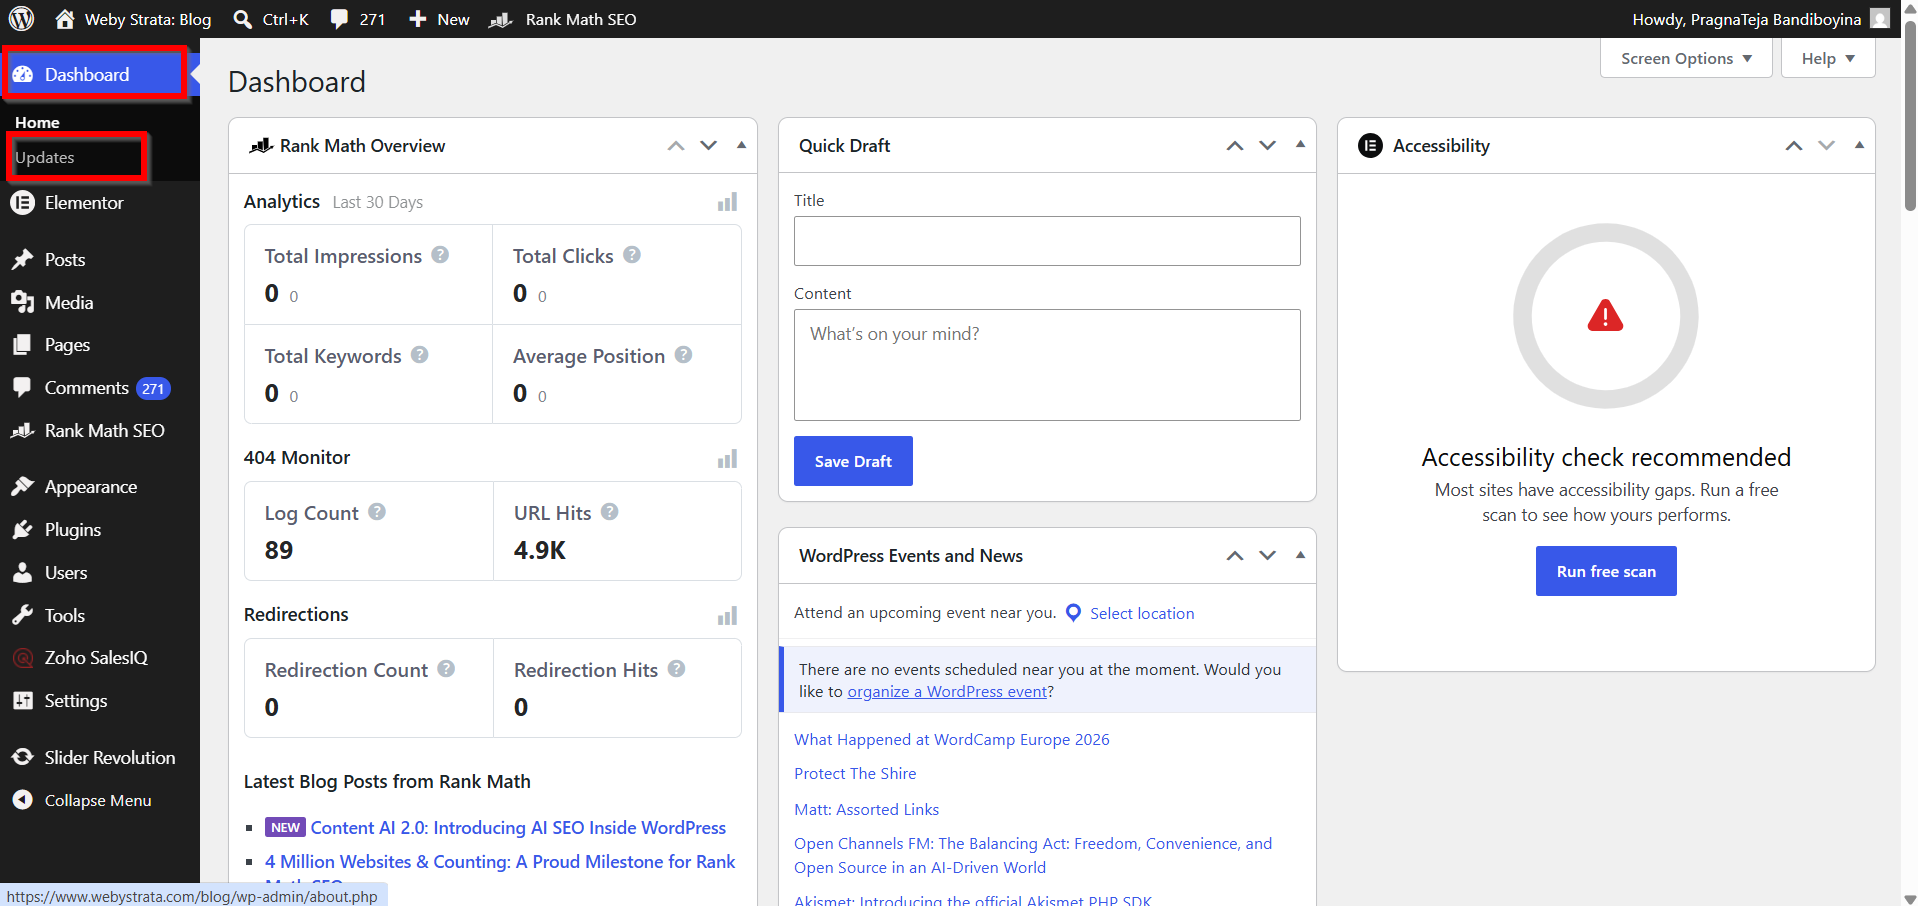
After logging in, locate the left-hand navigation menu.
Click on:
Dashboard → Updates
The Updates page displays the current version of WordPress installed on your website and checks whether a newer version is available.
Step 3: Check for Available Updates
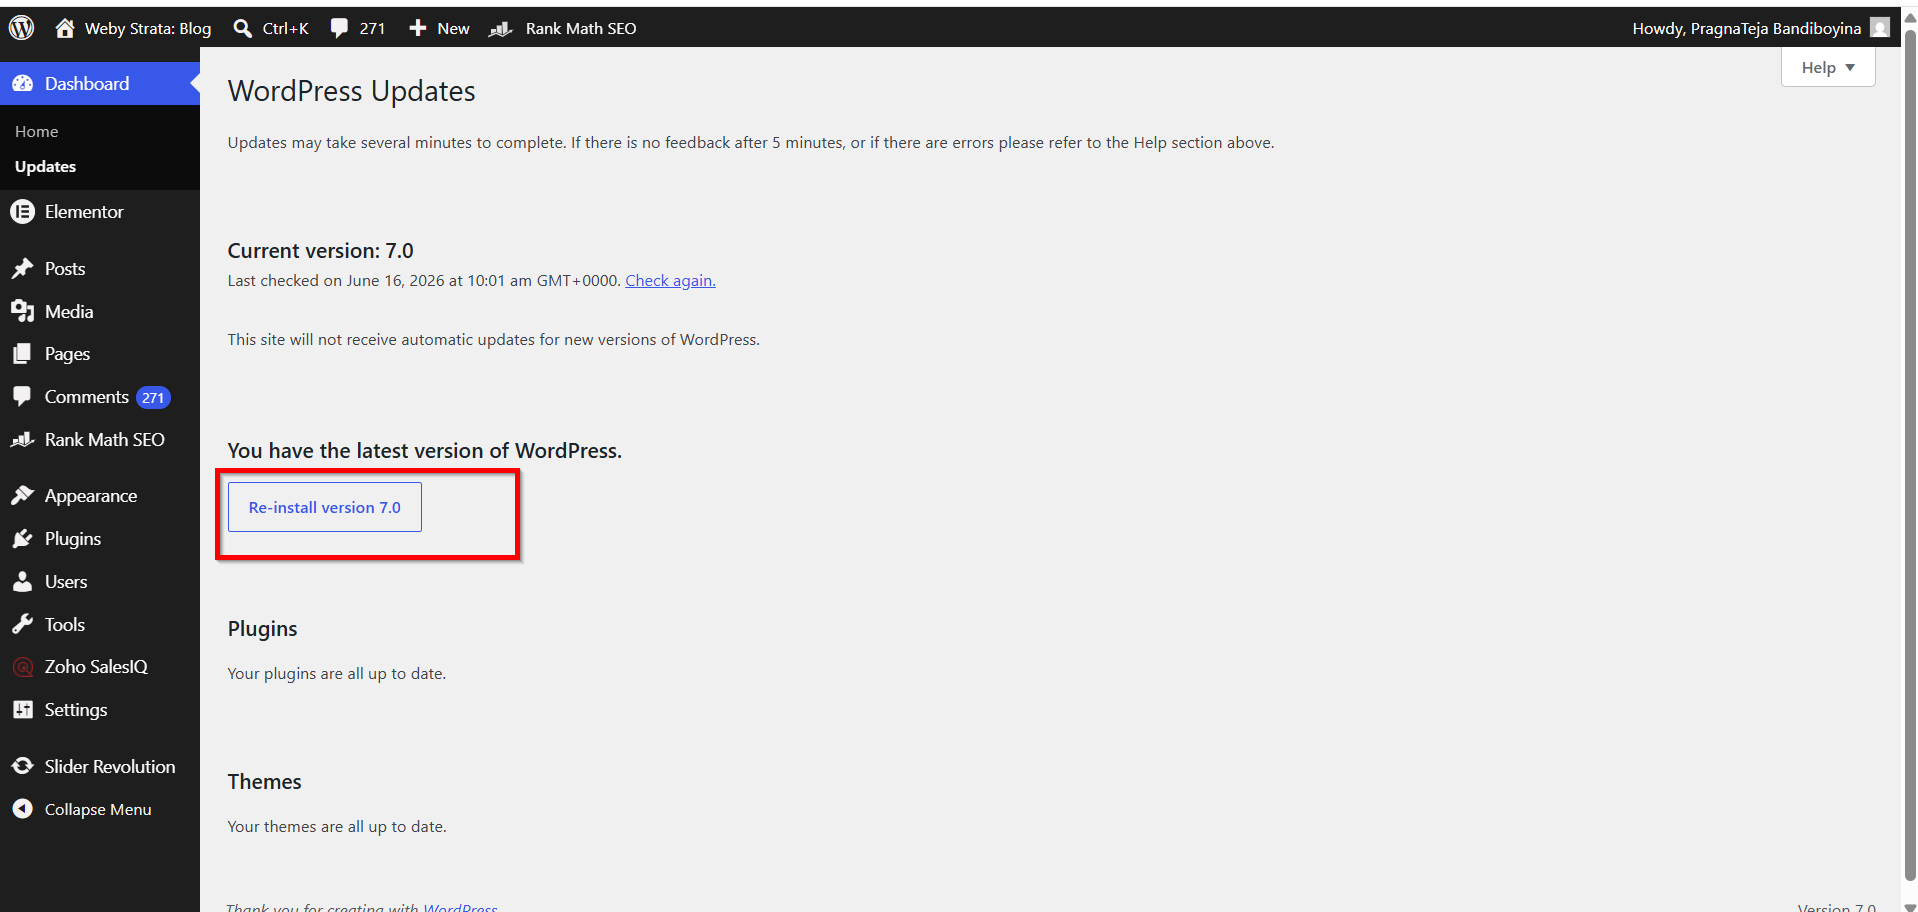
On the Updates page, click the Check Again button.
This forces WordPress to contact the update server and verify whether your installation is running the latest version.
If your website is already updated, you will see a message similar to:
"You have the latest version of WordPress."
This confirms that your installation is current and no further action is required.

Step 4: Update WordPress (If Available)
If a new WordPress version is available, WordPress will display an update notification along with an Update Now button.
Click Update Now to begin the update process.
WordPress will automatically:
-
Download the latest version.
-
Install the update.
-
Update the core files.
-
Verify the installation.
The process may take a few moments depending on your server speed and internet connection.
Do not close the browser window until the update has completed successfully.
Step 5: Reinstall WordPress (Optional)
In some cases, WordPress files may become corrupted or an update may not complete correctly.
If WordPress recommends a reinstall, you may see a Re-install Now button.
Clicking this button will:
-
Download a fresh copy of the current WordPress version.
-
Replace the core WordPress files.
-
Preserve your content, themes, plugins, and settings.
The reinstallation process usually takes a few minutes to complete.
Once finished, your website will be running a clean copy of the latest WordPress version.
Verify the Update
After the update is complete:
-
Return to the Dashboard.
-
Visit a few pages on your website.
-
Check that plugins and themes are functioning properly.
-
Clear any website or browser cache if necessary.
This helps ensure that your website is working correctly after the update.
Benefits of Updating Your WordPress Installation
- Enhanced Website Security
- Improved Performance
- Access to New Features
- Better Compatibility
- Bug Fixes and Greater Stability
- Support for Modern Web Technologies
- Improved User Experience
Conclusion
Updating your WordPress installation is a simple yet essential task that helps maintain website security, performance, and compatibility. By navigating to Dashboard → Updates, checking for updates, and updating WordPress, plugins, and themes regularly, you can keep your website running efficiently and protected from potential security threats.
Following these steps will ensure your WordPress installation remains up to date and continues to deliver the best experience for your visitors.
