Steps to Create a Custom WordPress 404 Error Page
When visitors try to access a page that no longer exists or enter an incorrect URL, they are presented with a 404 Error Page. By default, many websites display a generic error message that provides little information and can leave users confused. A custom WordPress 404 error page helps improve the visitor experience by clearly explaining the issue and guiding users back to useful content on your website.
A well-designed 404 page can reduce bounce rates, maintain professionalism, and even help visitors continue browsing your website instead of leaving immediately. In this guide, you will learn how to create and configure a custom WordPress 404 error page using cPanel and the .htaccess file.
What is a 404 Error?
A 404 error occurs when a web server cannot find the page requested by a visitor. This can happen for several reasons:
-
The page has been deleted.
-
The URL was entered incorrectly.
-
A link points to a non-existent page.
-
The page has been moved without proper redirection.
-
Website restructuring has changed page URLs.
Instead of displaying a generic server error, a custom 404 page provides a better user experience and keeps visitors engaged with your website.
Create a Simple Custom 404 Error Message
Follow these steps to create a basic custom 404 page using the .htaccess file.
Step 1: Log in to cPanel
Access your hosting account and log in to cPanel.
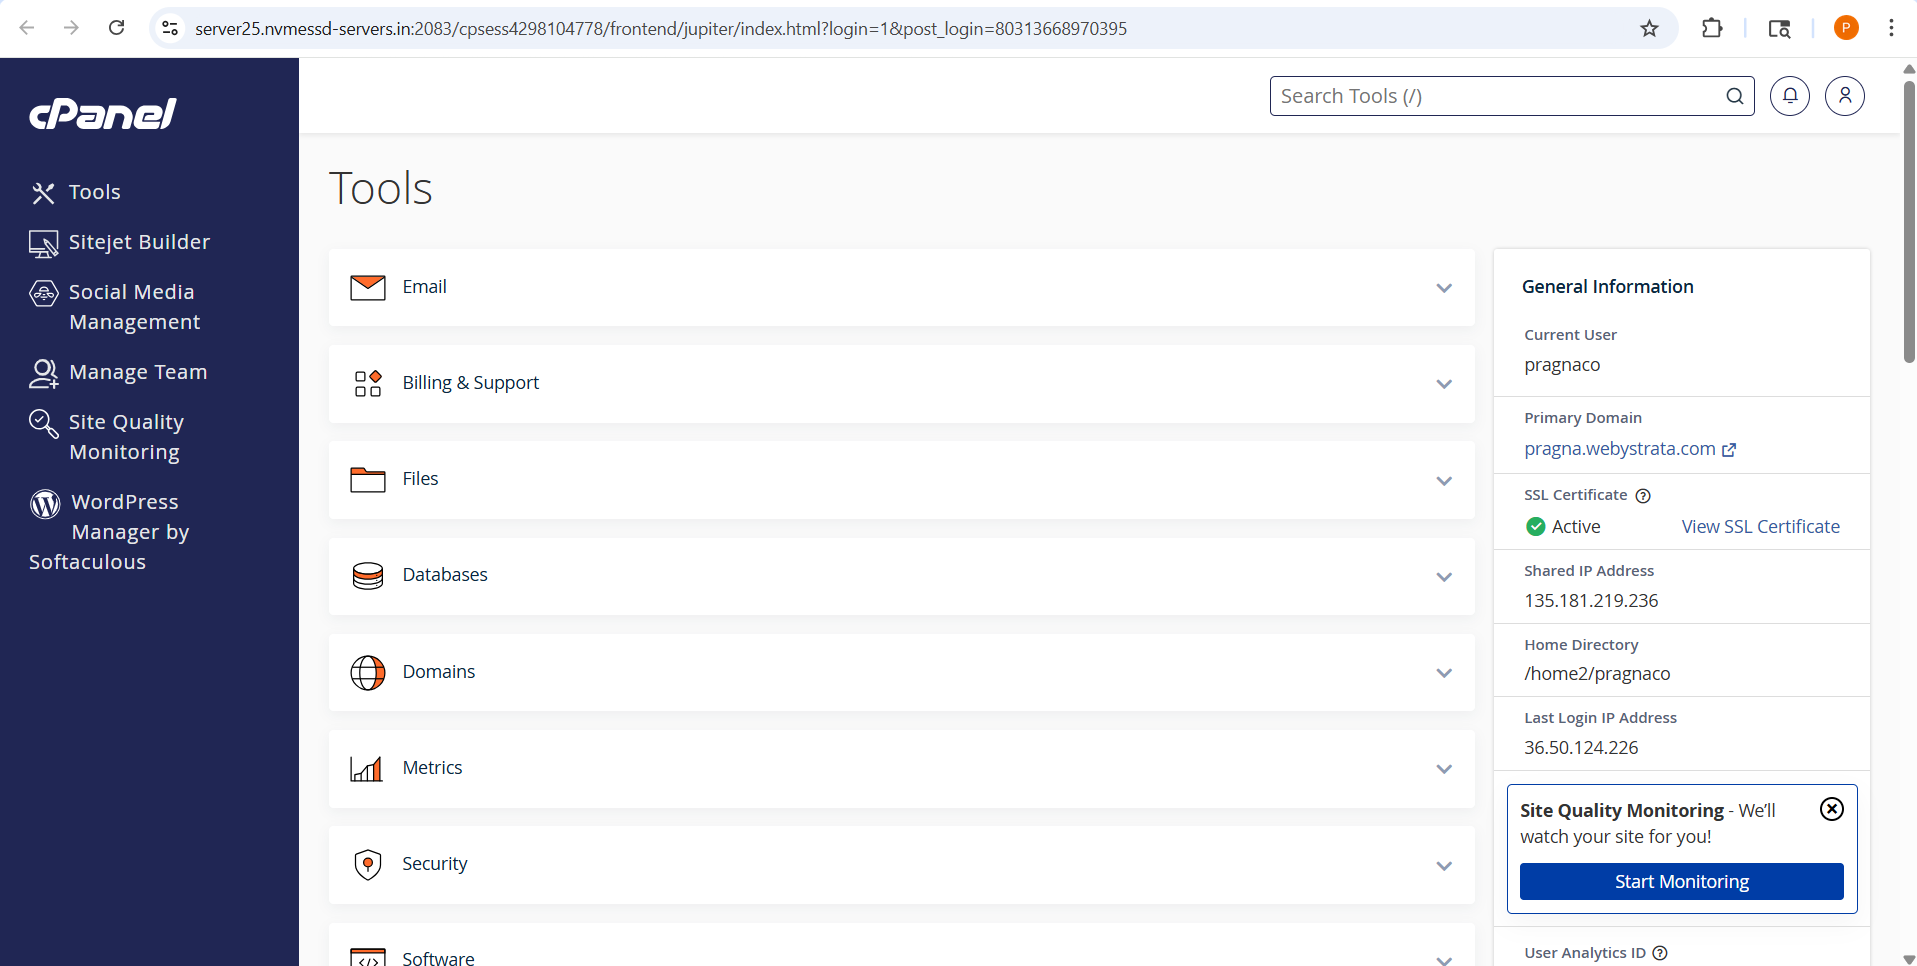
Step 2: Open File Manager
Navigate to the Files section and click File Manager.

Step 3: Open the Website Root Directory
Locate and open the public_html directory, which contains your website files.

Step 4: Enable Hidden Files
Click the Settings button in the upper-right corner of File Manager.
Enable:
Show Hidden Files (dotfiles)
Click Save.

Step 5: Edit the .htaccess File
Locate the .htaccess file.
-
Right-click the file.
-
Select Edit.
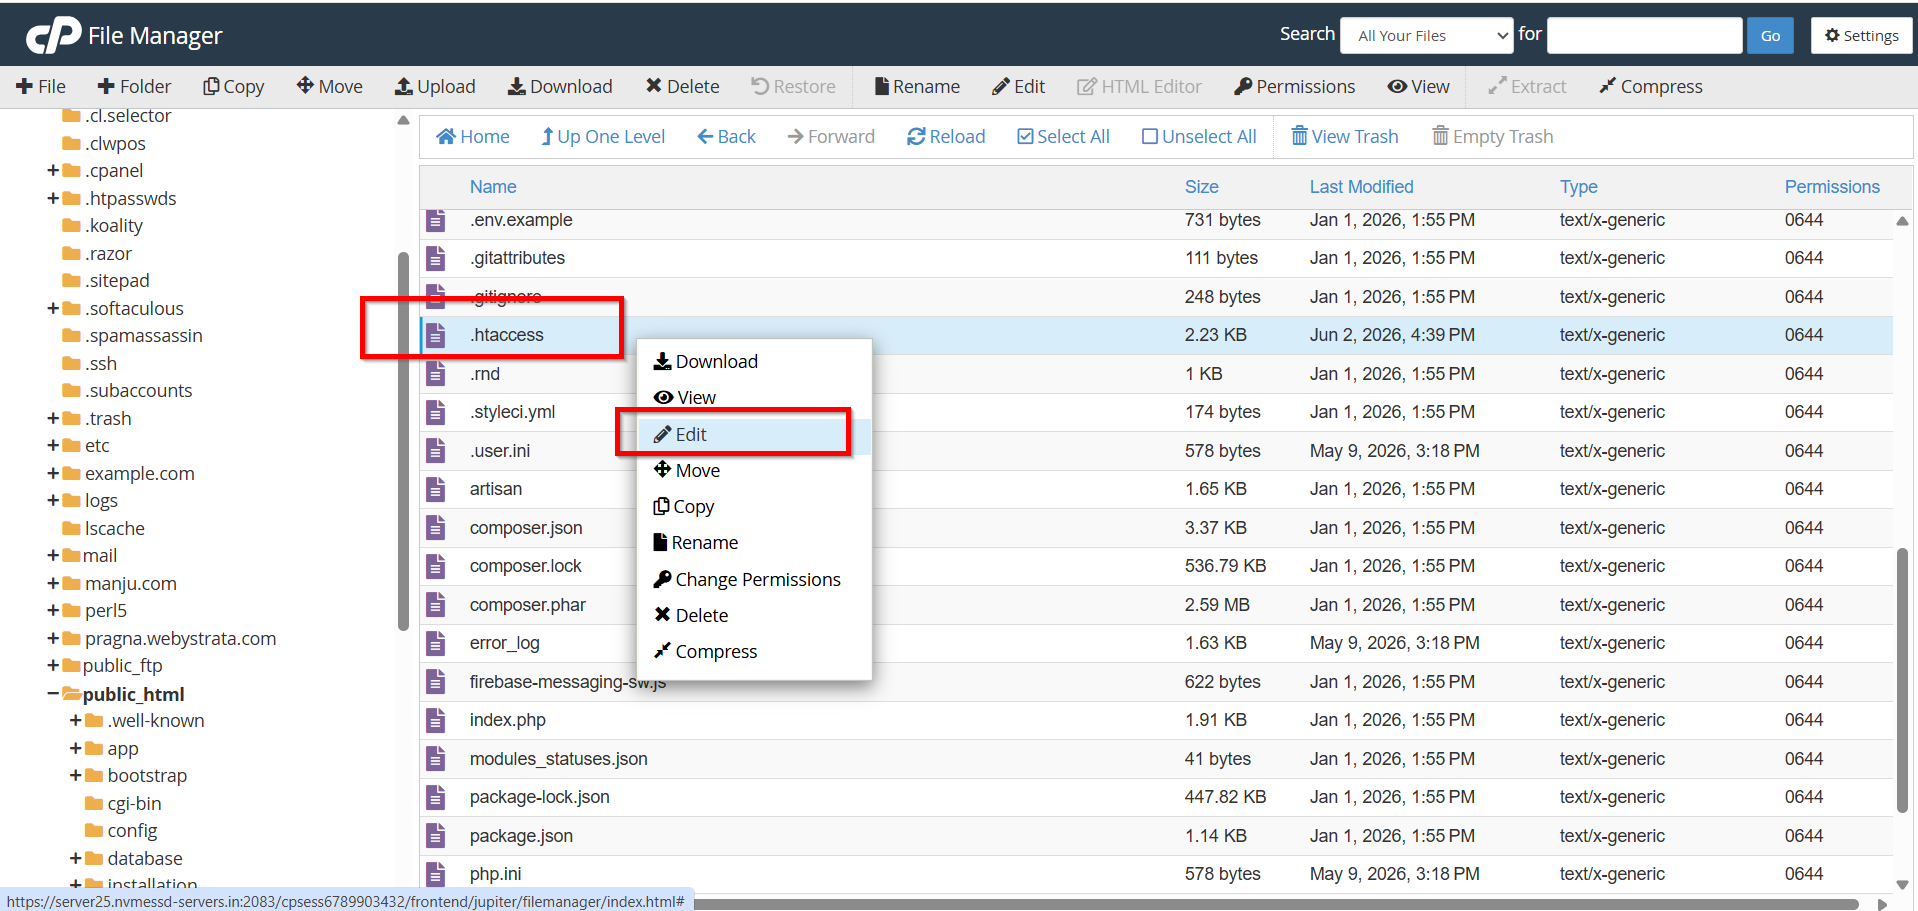
- Again Click Edit
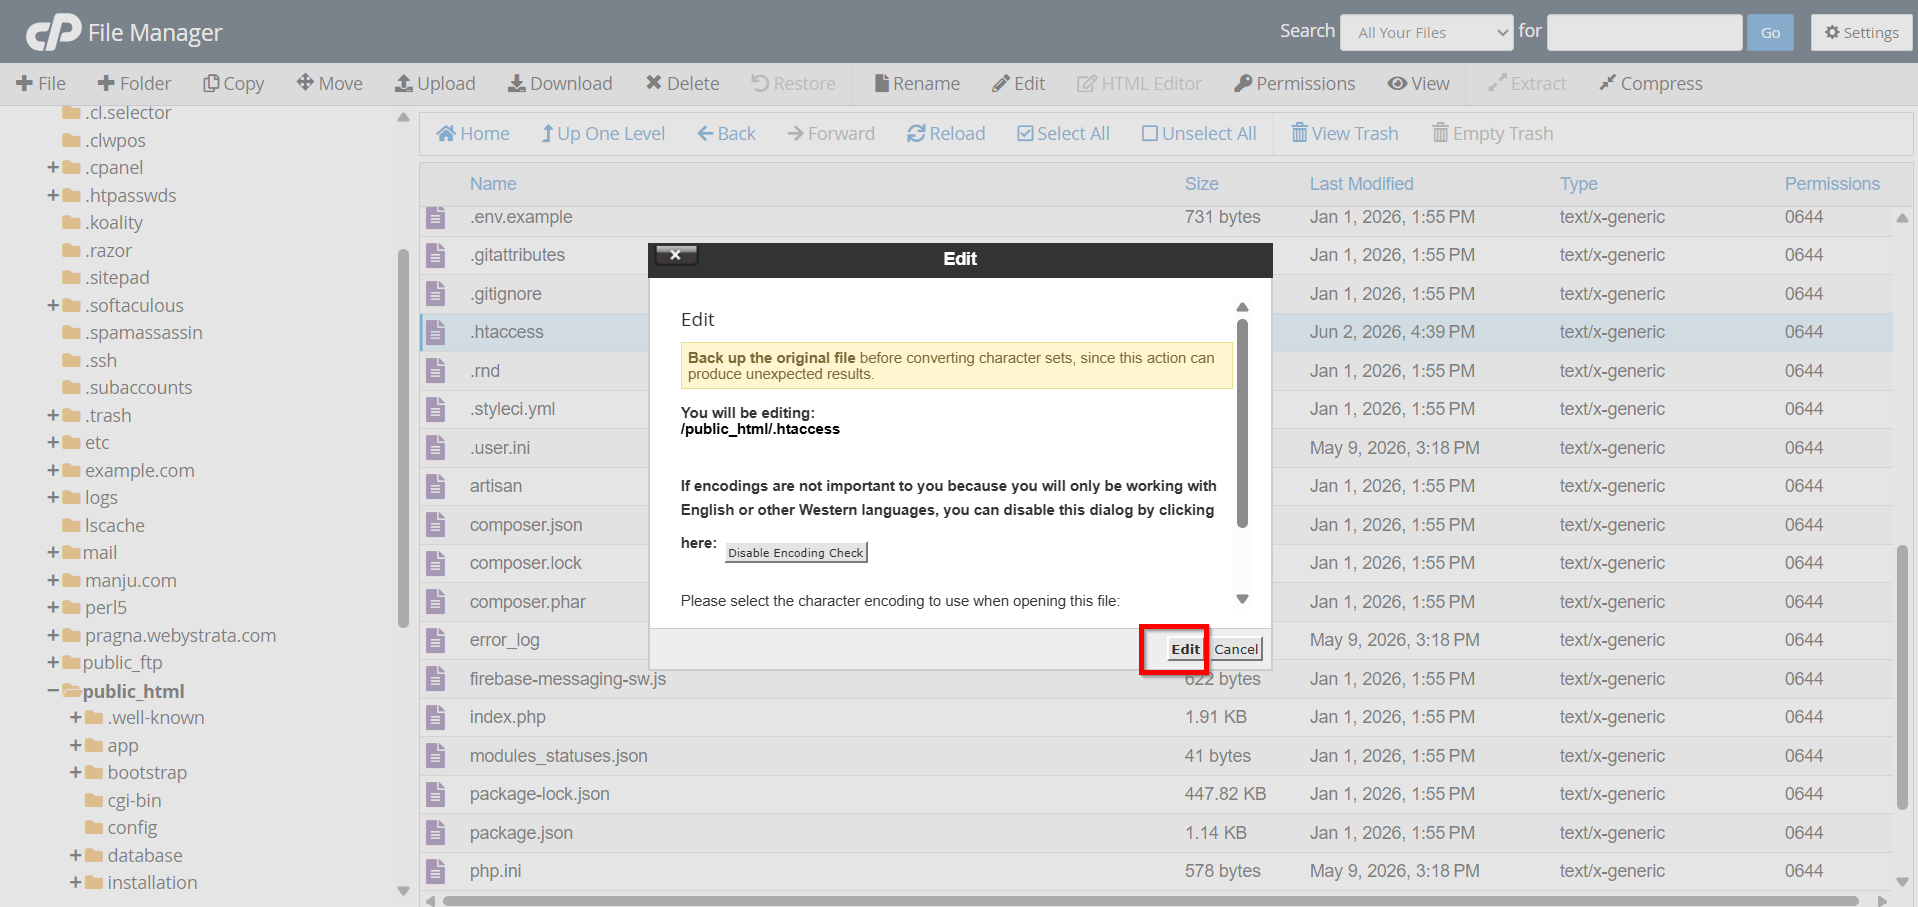
If the file does not exist:
-
Click + File.
-
Create a new file named
.htaccess.
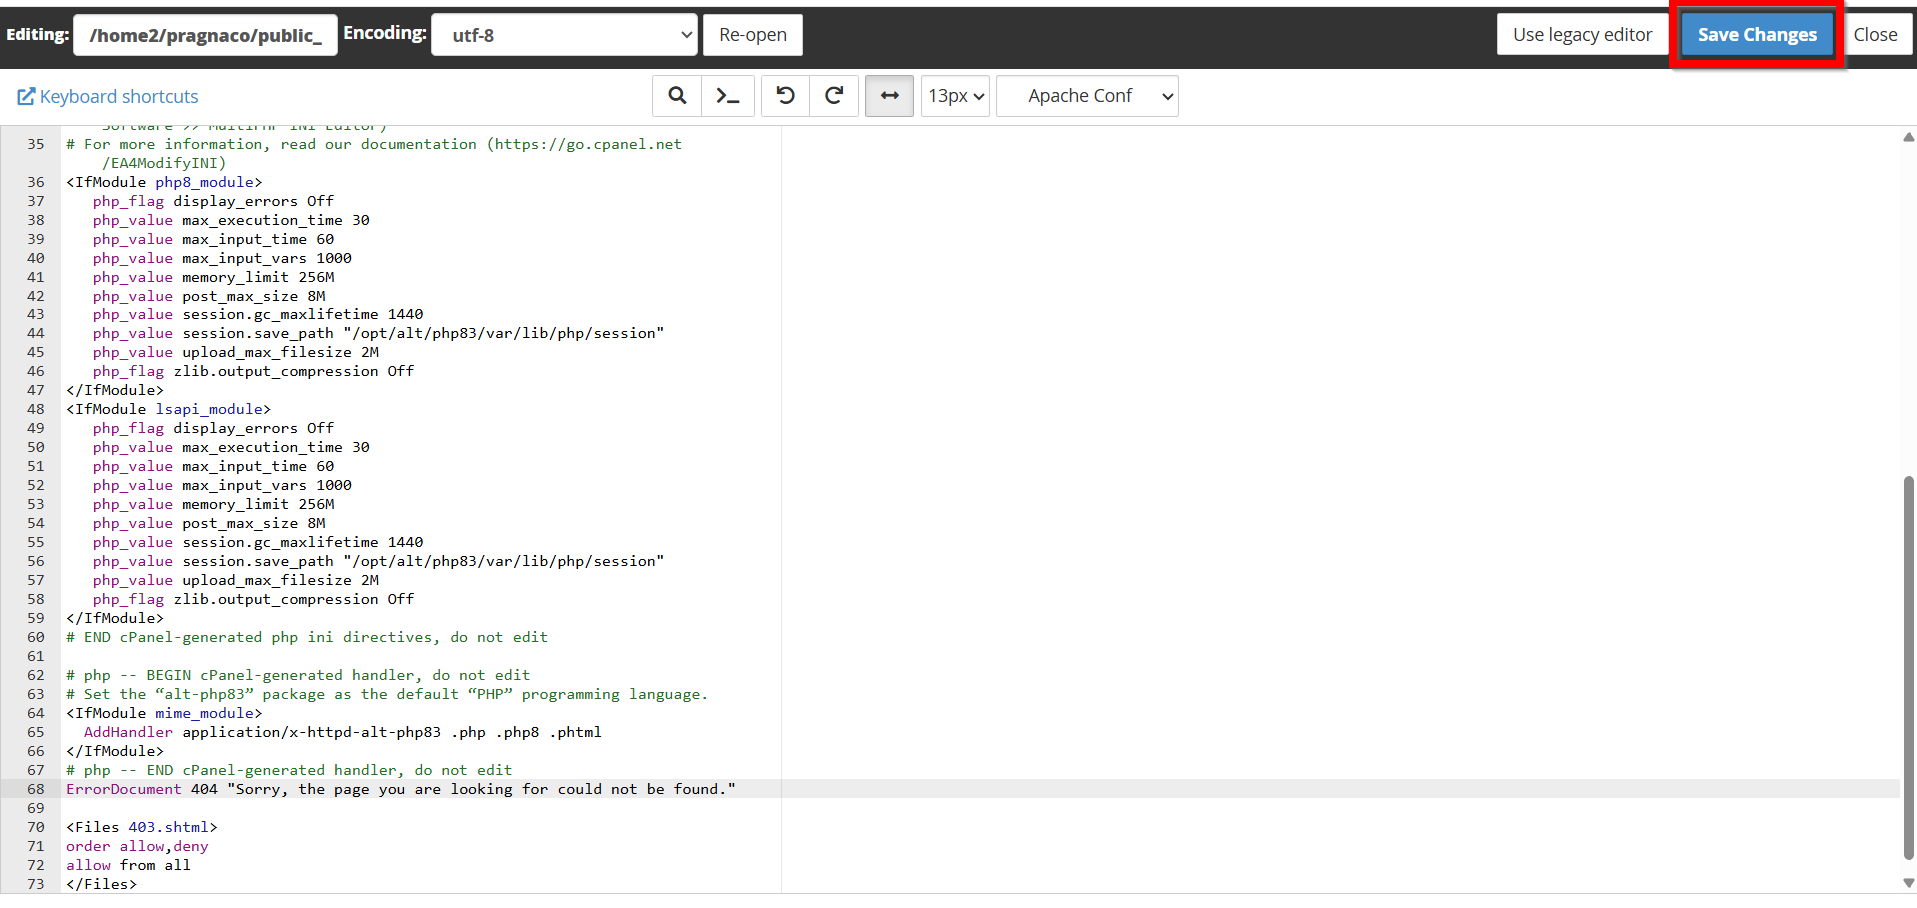
Step 6: Add the Custom Error Message
Insert the following line:
ErrorDocument 404 "Page not found"
You can customize the message according to your preference.
Example:
ErrorDocument 404 "Sorry, the page you are looking for could not be found."
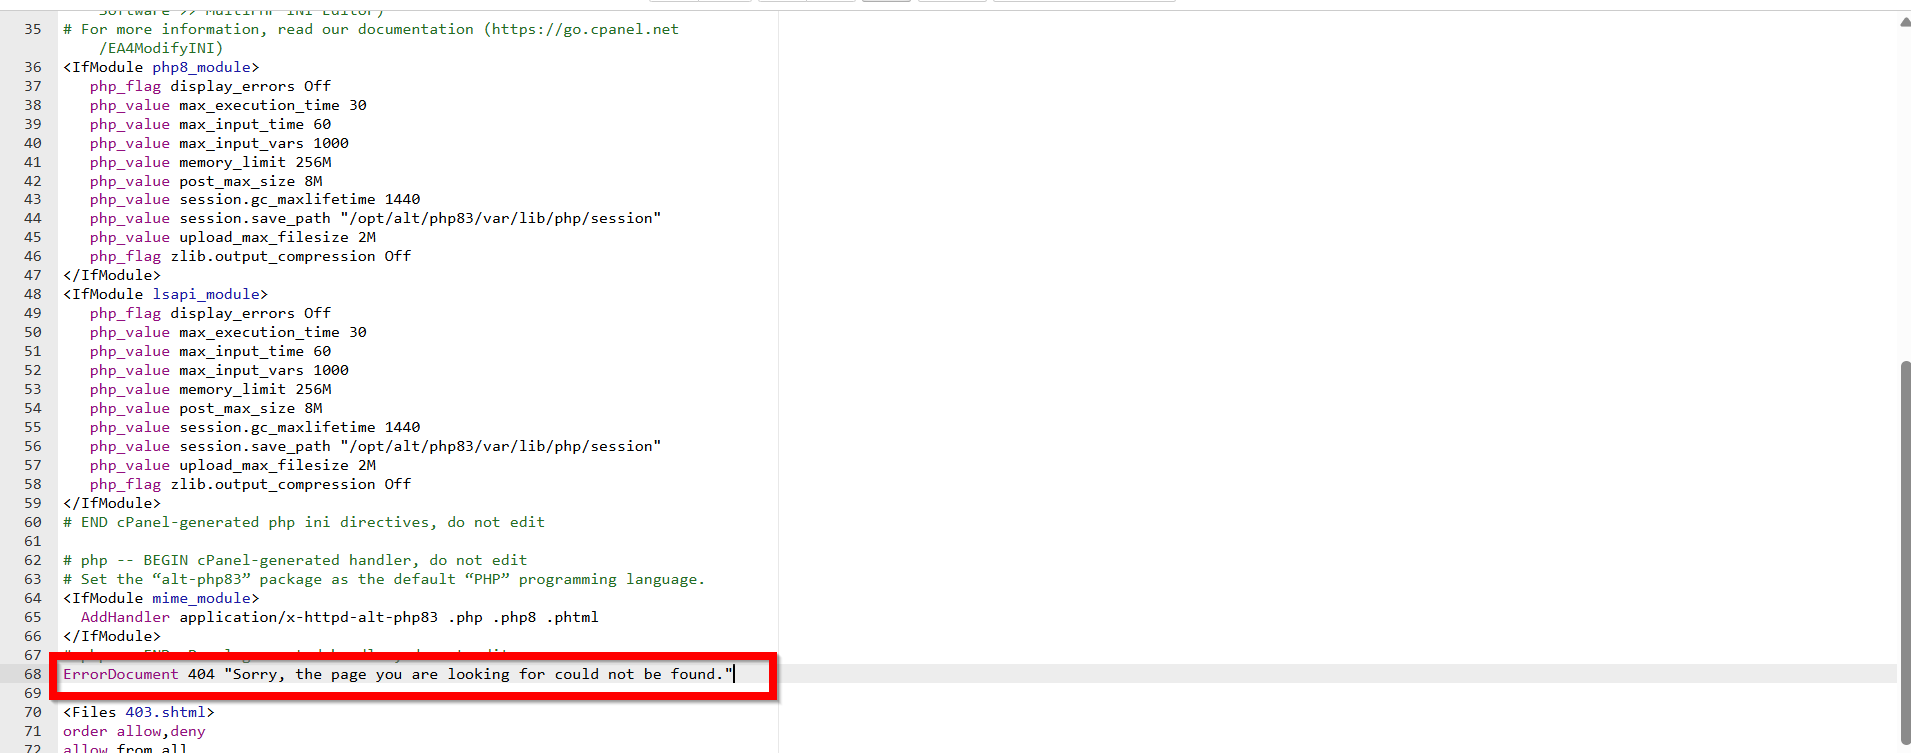
Step 7: Save Changes
Click Save Changes to apply the configuration.
Your website will now display the custom message whenever a visitor encounters a 404 error.
Testing Your Custom 404 Page
After configuration, it is important to verify that the page works correctly.
-
Open your website in a browser.
-
Enter a URL that does not exist.
Example:
https://yourdomain.com/test-page-not-found
-
Press Enter.
If configured correctly, your custom 404 page should appear.
Benefits of Creating a Custom 404 Page
Creating a custom error page offers several advantages:
1. Improved User Experience
2. Reduced Bounce Rate
3. Professional Appearance
4. Better Website Navigation
5. Increased Engagement
Conclusion
Creating a custom WordPress 404 error page is a simple but valuable improvement for any website. Rather than showing visitors a generic error message, a custom page helps explain the issue, maintains a professional appearance, and provides useful navigation options. Whether you choose a simple text message or a fully designed HTML page, implementing a custom 404 page can significantly improve user experience and keep visitors engaged with your website.