How to Switch Your WordPress Database URLs to HTTPS Using a Plugin
After installing an SSL certificate on your WordPress website, one important task remains: updating all website URLs stored in your database from HTTP to HTTPS. If these URLs are not updated properly, visitors may encounter mixed-content warnings, broken images, insecure page notifications, or other website issues.
Fortunately, WordPress provides an easy way to update these URLs using a plugin called Better Search Replace. This plugin helps you safely search for old HTTP URLs and replace them with secure HTTPS URLs throughout your WordPress database.
In this guide, you'll learn how to switch your WordPress database URLs to HTTPS using the Better Search Replace plugin.
Why Update Database URLs to HTTPS?
When a WordPress website is initially installed, all URLs are typically stored with the HTTP protocol. After installing an SSL certificate and enabling HTTPS, many of these URLs may still point to the old HTTP version.
Updating these URLs provides several benefits:
-
Eliminates mixed-content warnings
-
Improves website security
-
Enables the SSL certificate to function correctly
-
Enhances visitor trust
-
Improves SEO rankings
-
Ensures images, scripts, and stylesheets load securely
Before making any database changes, it is highly recommended to create a complete backup of your website and database.
Prerequisites
Before proceeding, ensure you have:
-
A working WordPress website
-
An active SSL certificate installed
-
Administrator access to WordPress
-
A recent backup of your database
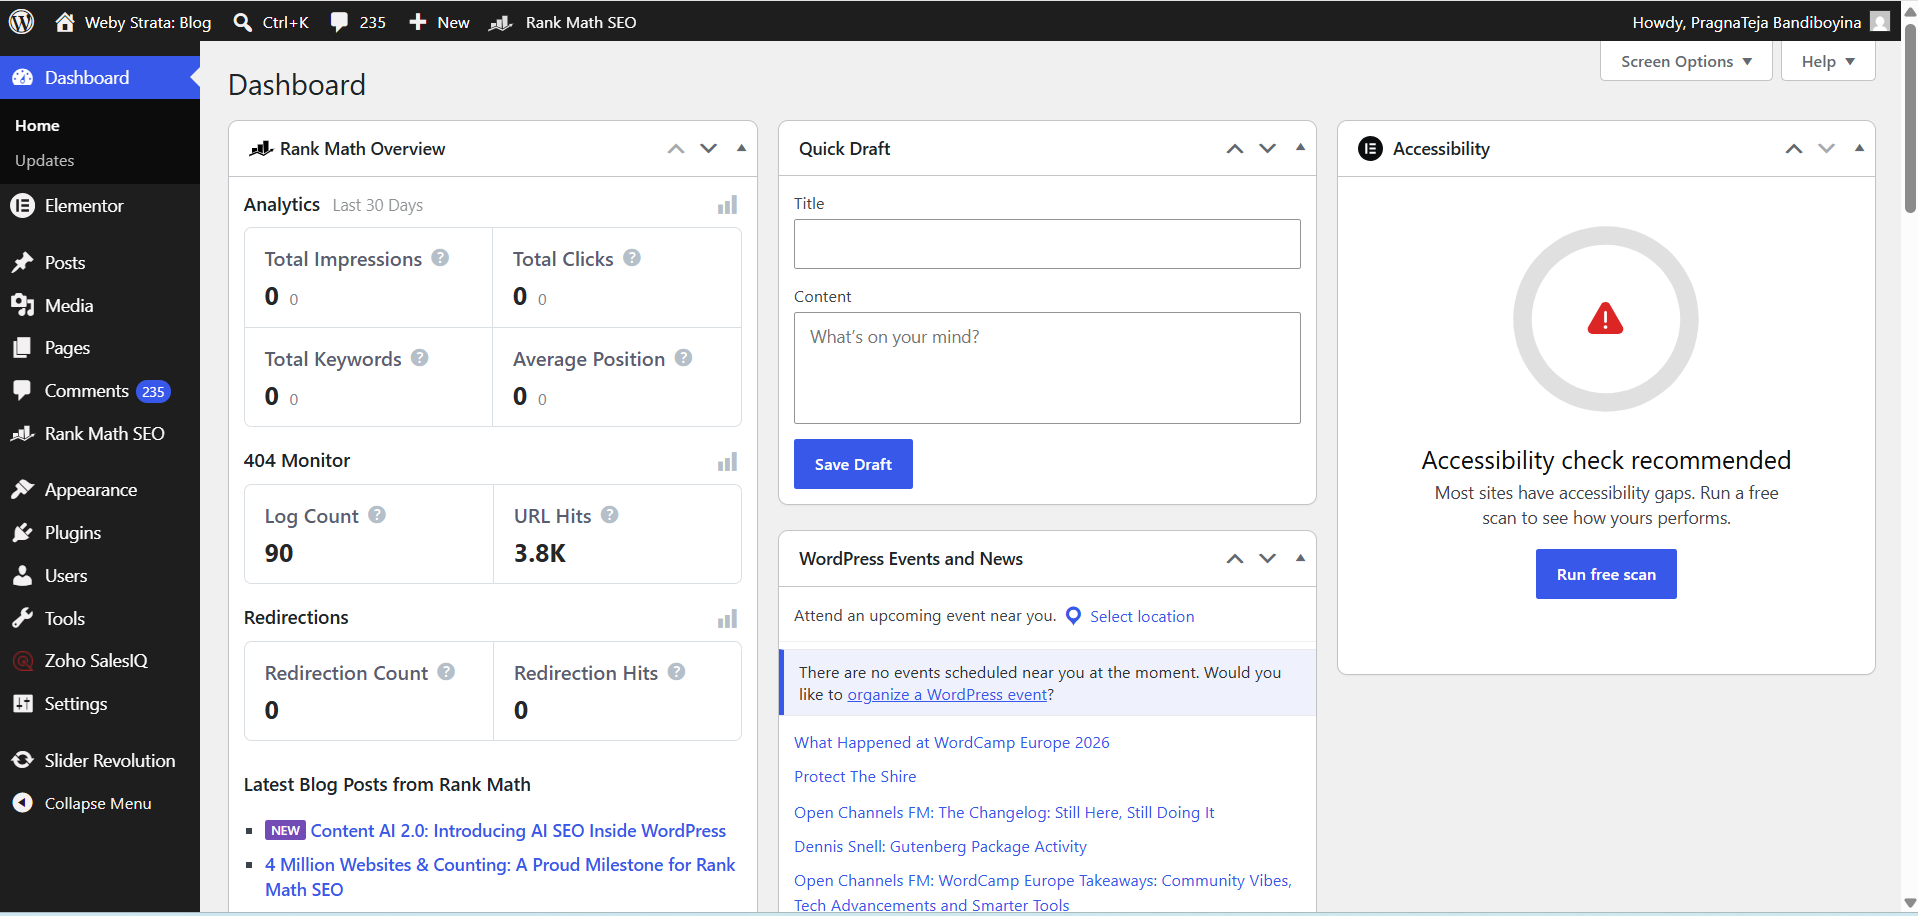
Step 1: Login to Wordpress
Log in to your WordPress Admin Dashboard Using Username and Password
Step 2: Install the Better Search Replace Plugin
Navigate to:
- Plugins → Add Plugin

In the search box, type:
- Better Search Replace
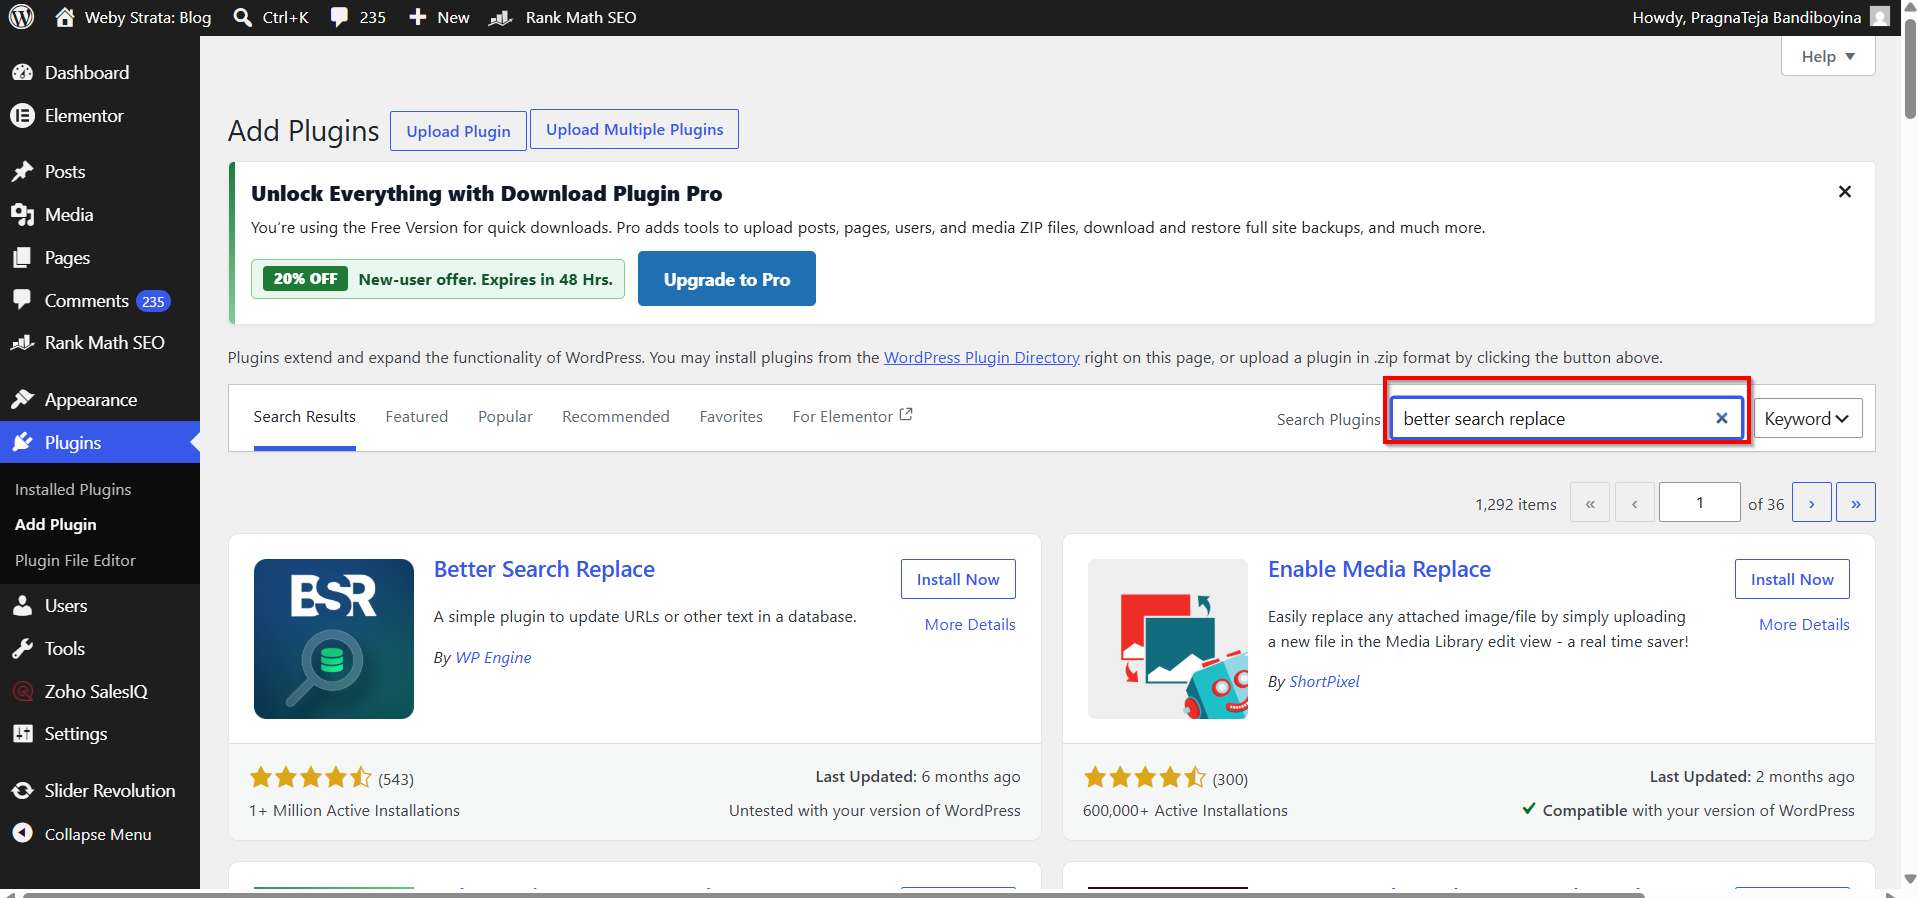
Locate the plugin and click:
- Install Now

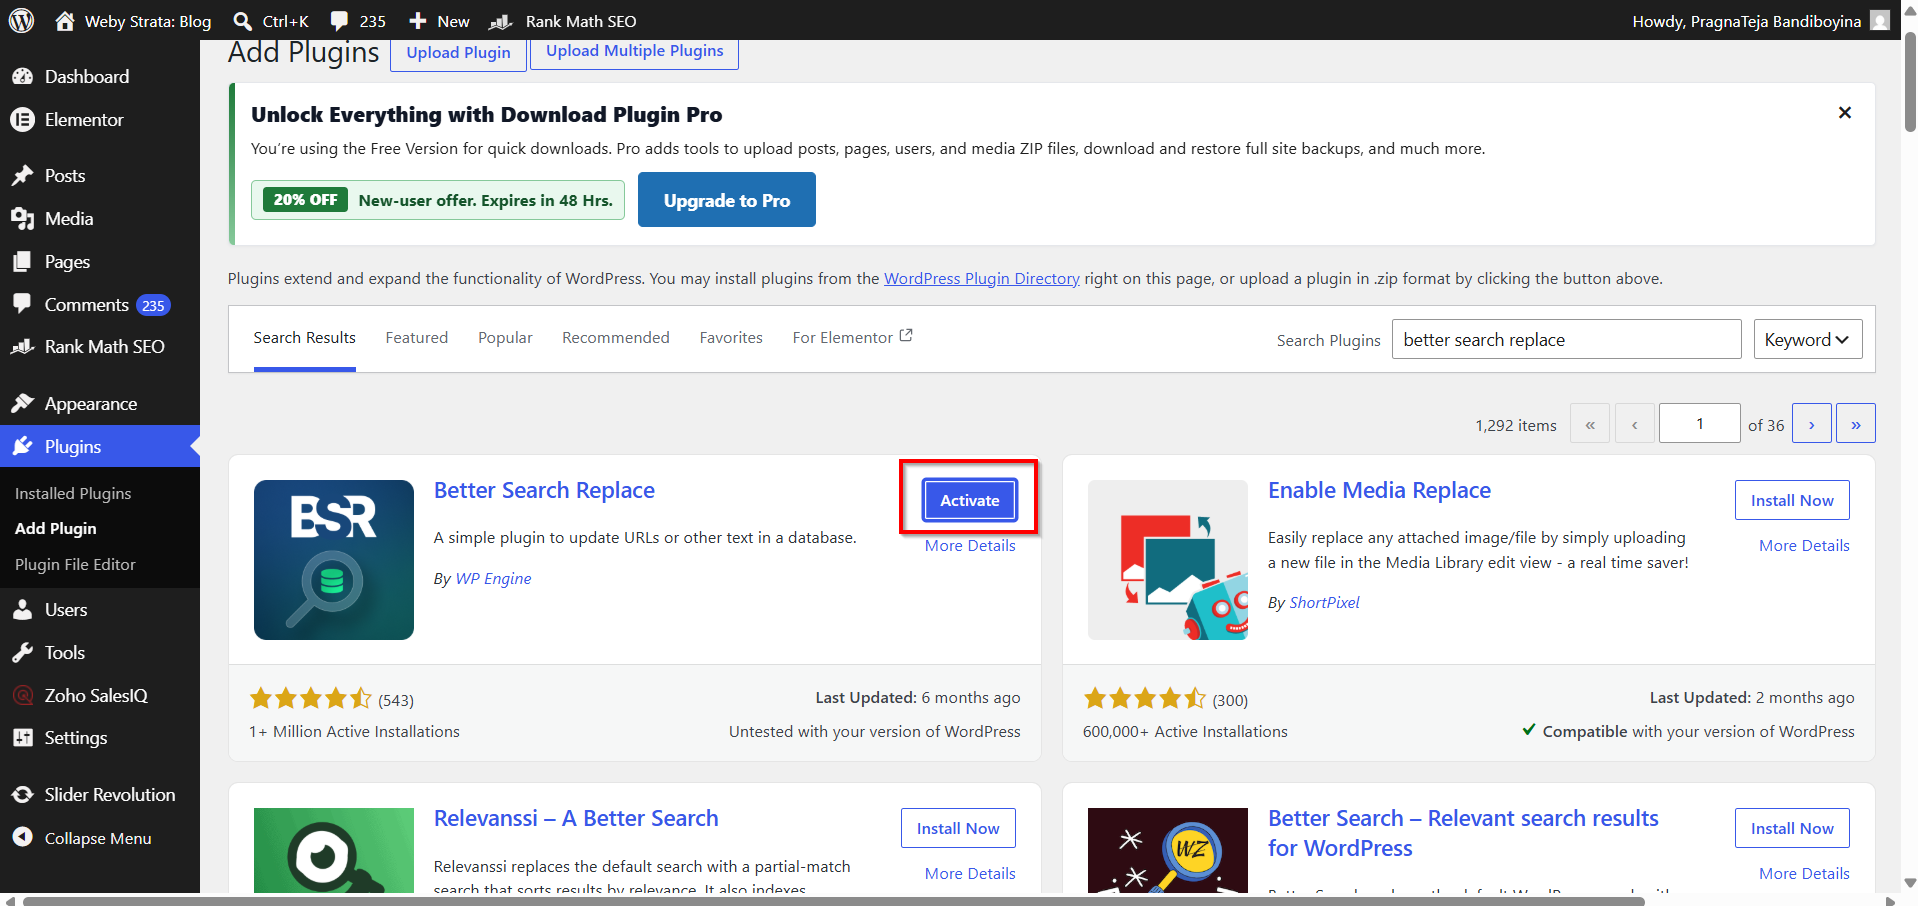
Once installation is complete, click:
- Activate
The plugin is now ready to use.
Step 3: Open Better Search Replace
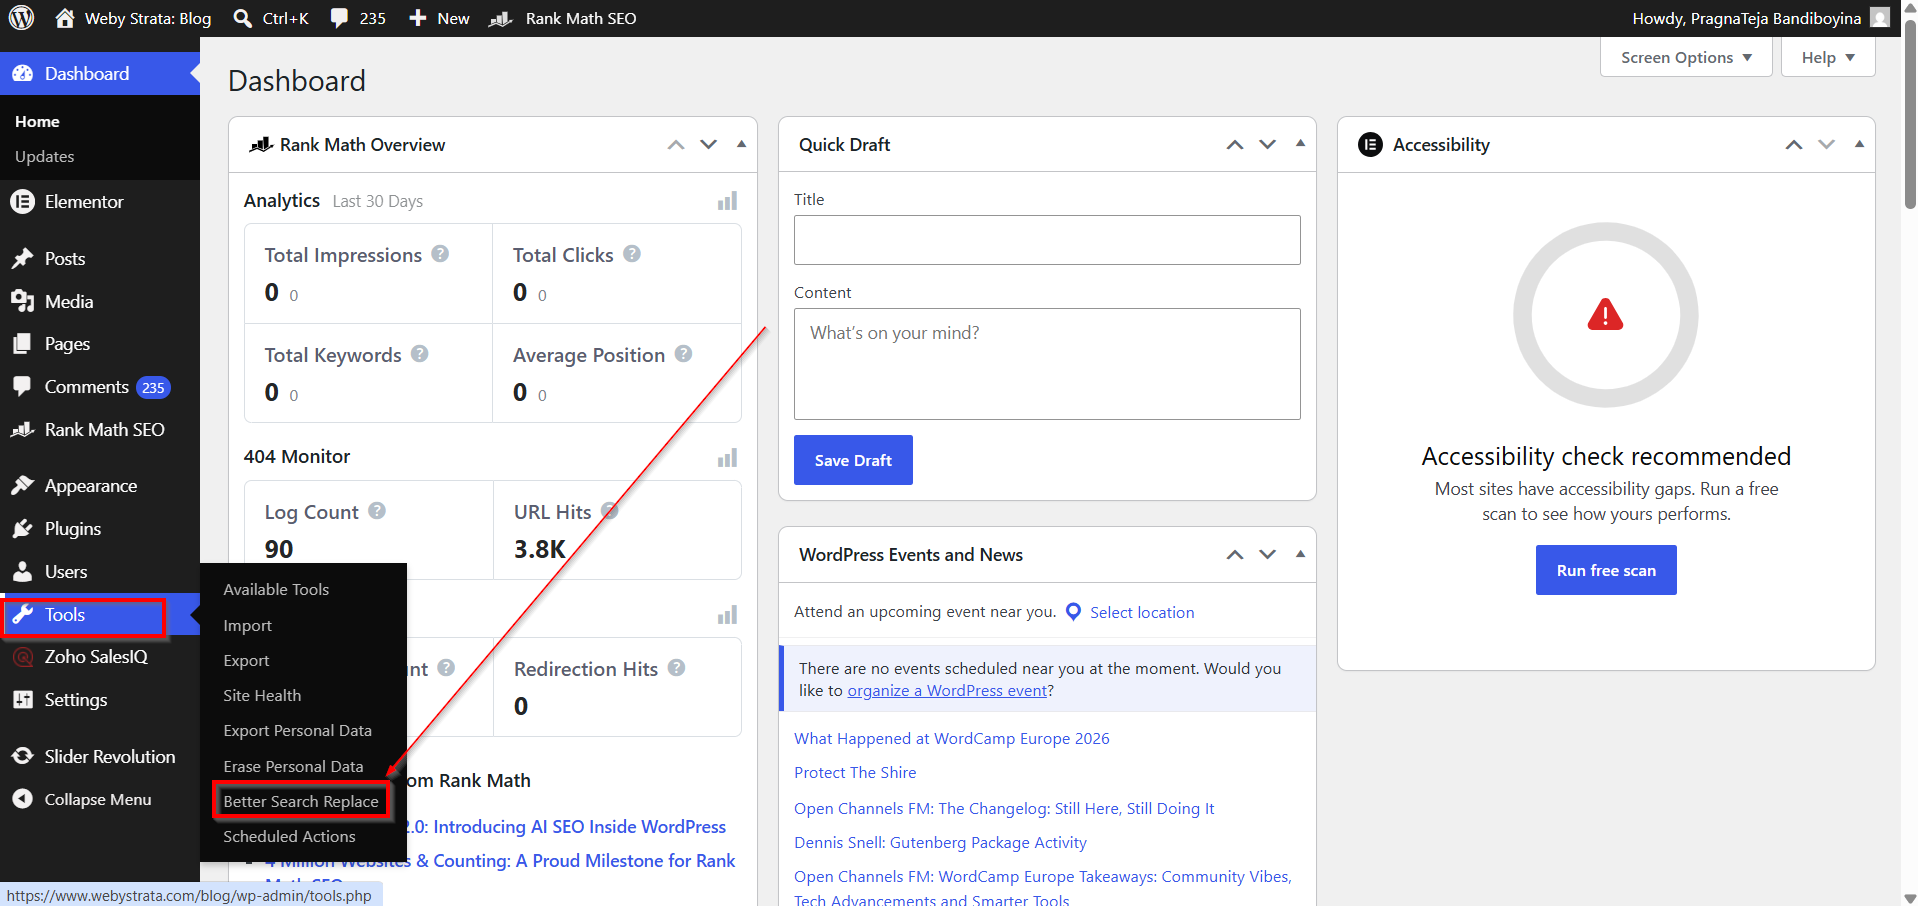
From the WordPress dashboard menu, navigate to:
Tools → Better Search Replace
The plugin interface will open and display several options for updating your database.
Step 4: Enter the Search and Replace Values
You will see two important fields:
Search For
Enter your existing HTTP website URL.
Example:
http://example.com
Replace With
Enter your secure HTTPS URL.
Example:
https://example.com
Be sure to enter the exact URLs to avoid missing any database entries.
Select All Database Tables
Under the Select Tables section, choose all available tables.
Selecting all tables ensures every reference to your old HTTP URL is identified and updated throughout the database.
This includes:
-
Posts
-
Pages
-
Media links
-
Theme settings
-
Plugin settings
-
Widgets
-
Custom tables

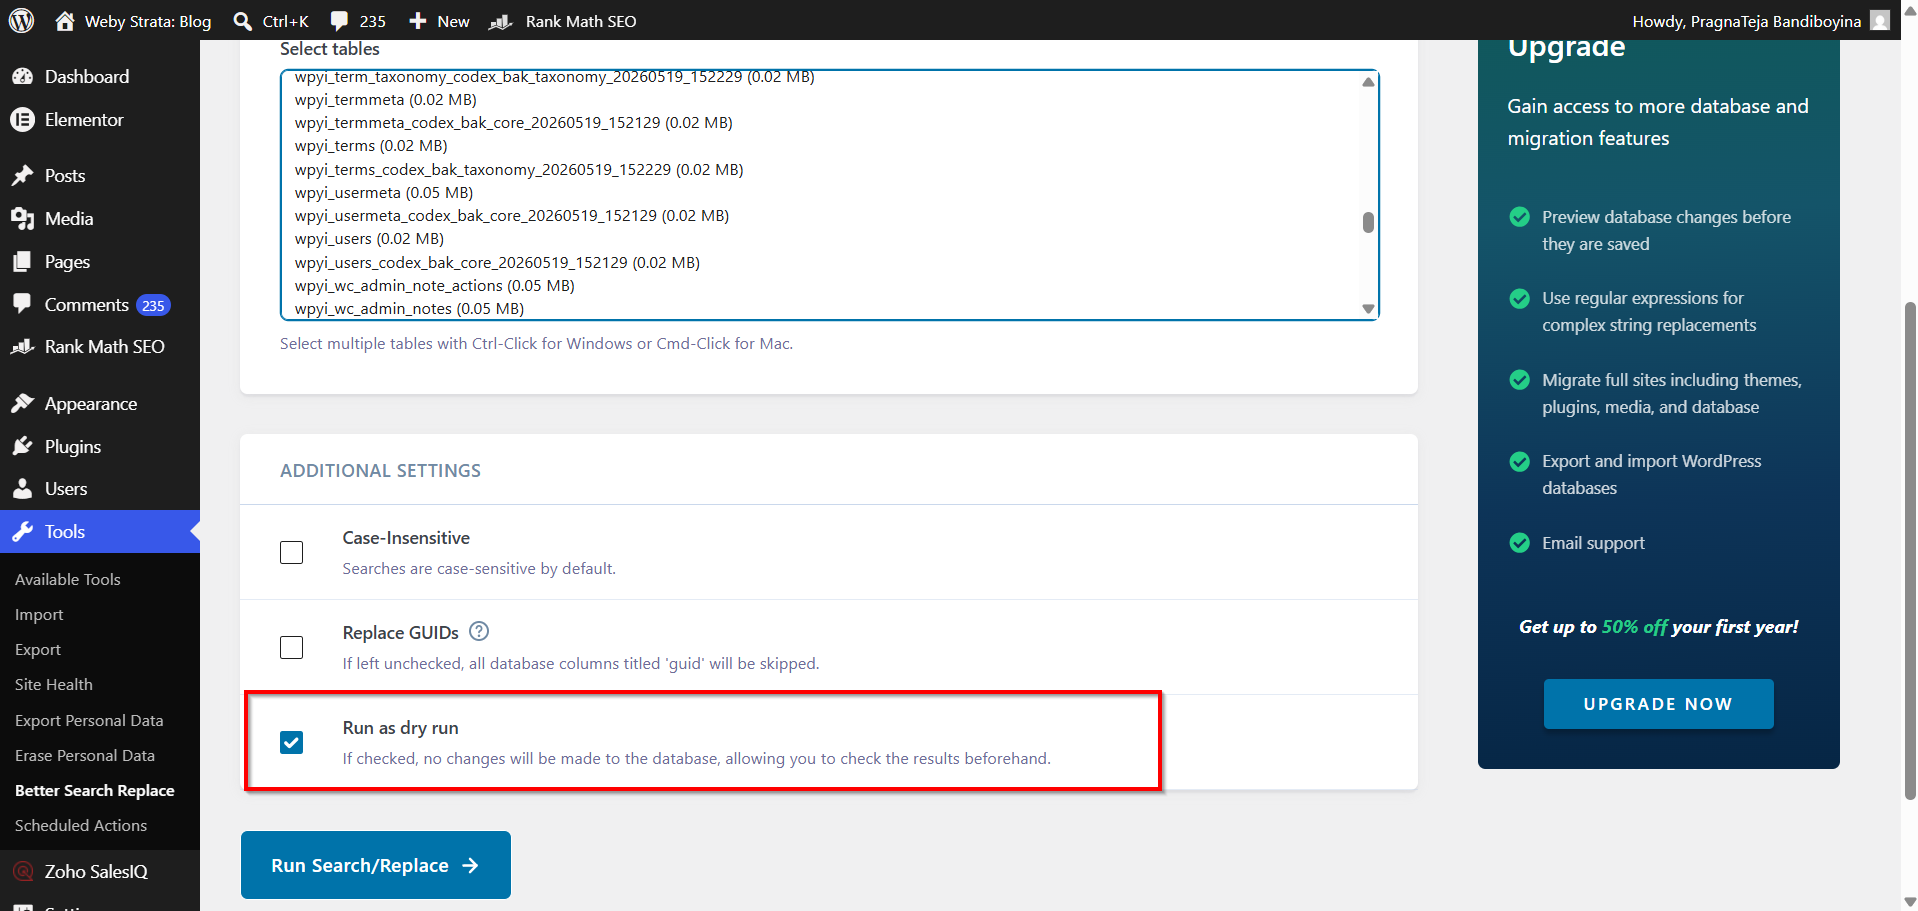
Step 5: Run a Dry Run First
Before making actual changes, enable the option:
Run as Dry Run
A dry run allows the plugin to scan the database and show how many changes would be made without modifying any data.
This helps verify that the correct URLs are being targeted.
After enabling Dry Run, click:
Run Search/Replace
The plugin will display a report showing the number of potential replacements.
Review the results carefully.
Step 6: Perform the Actual Search and Replace
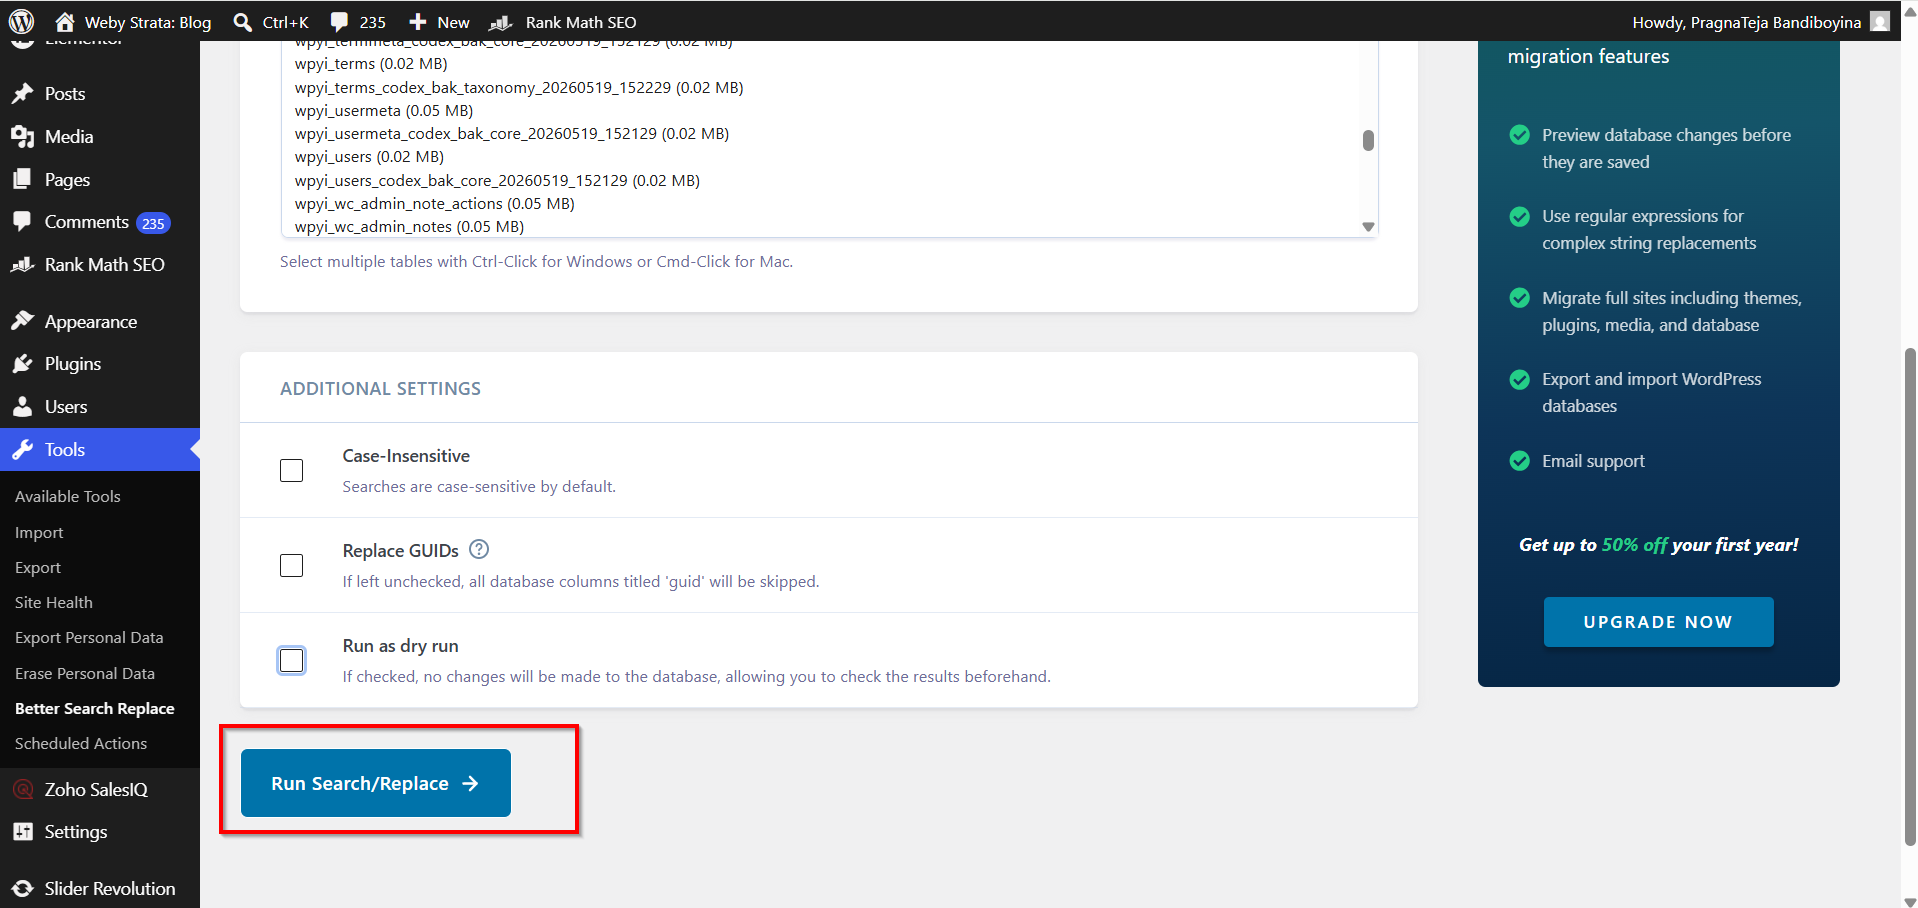
If the dry run results look correct:
-
Return to the Better Search Replace screen.
-
Uncheck Run as Dry Run.
-
Click Run Search/Replace again.
The plugin will now update all matching URLs within the selected database tables.
Depending on the size of your website, this process may take a few moments.
Once completed, you will receive a confirmation message showing how many records were updated.
Step 7: Verify Your Website
After the replacement process is complete:
-
Visit your website.
-
Browse several pages.
-
Check images and media files.
-
Test forms and functionality.
-
Verify that links are loading over HTTPS.
You should now see the secure padlock icon in your browser's address bar.
Common Issues and Solutions
- Images Still Loading Over HTTP
- SSL Padlock Not Appearing
- Broken Links After Replacement
Benefits of Using Better Search Replace
The Better Search Replace plugin offers several advantages:
-
User-friendly interface
-
No manual database editing required
-
Supports serialized data
-
Safe dry-run testing
-
Quick database-wide updates
-
Suitable for beginners and advanced users
Because it handles WordPress serialized data properly, it is significantly safer than manually editing database records through phpMyAdmin.
Conclusion
Switching your WordPress database URLs from HTTP to HTTPS is an essential step after installing an SSL certificate. By using the Better Search Replace plugin, you can safely update all database references without manually editing tables or running SQL queries.
Always start with a database backup, perform a dry run first, and carefully verify your website after the replacement process. Once completed, your website will be fully aligned with your SSL certificate, providing a more secure browsing experience for your visitors and improving your site's overall SEO performance.