
How to Increase PHP Memory Limit in cPanel
Increasing the PHP memory limit in cPanel helps improve website performance and prevents memory exhausted errors. You can easily increase the memory allocation using the PHP Selector options available in cPanel by following the simple steps below.
Step 1: Login to cPanel from Client Area
First, login to your client area account.
After logging in:
- Go to Services
- Click on My Services
- Select your active hosting service
- Click on Login to cPanel

Step 2: Open the “Select PHP Version” Option
After logging into cPanel:
- Scroll down to the Software section.
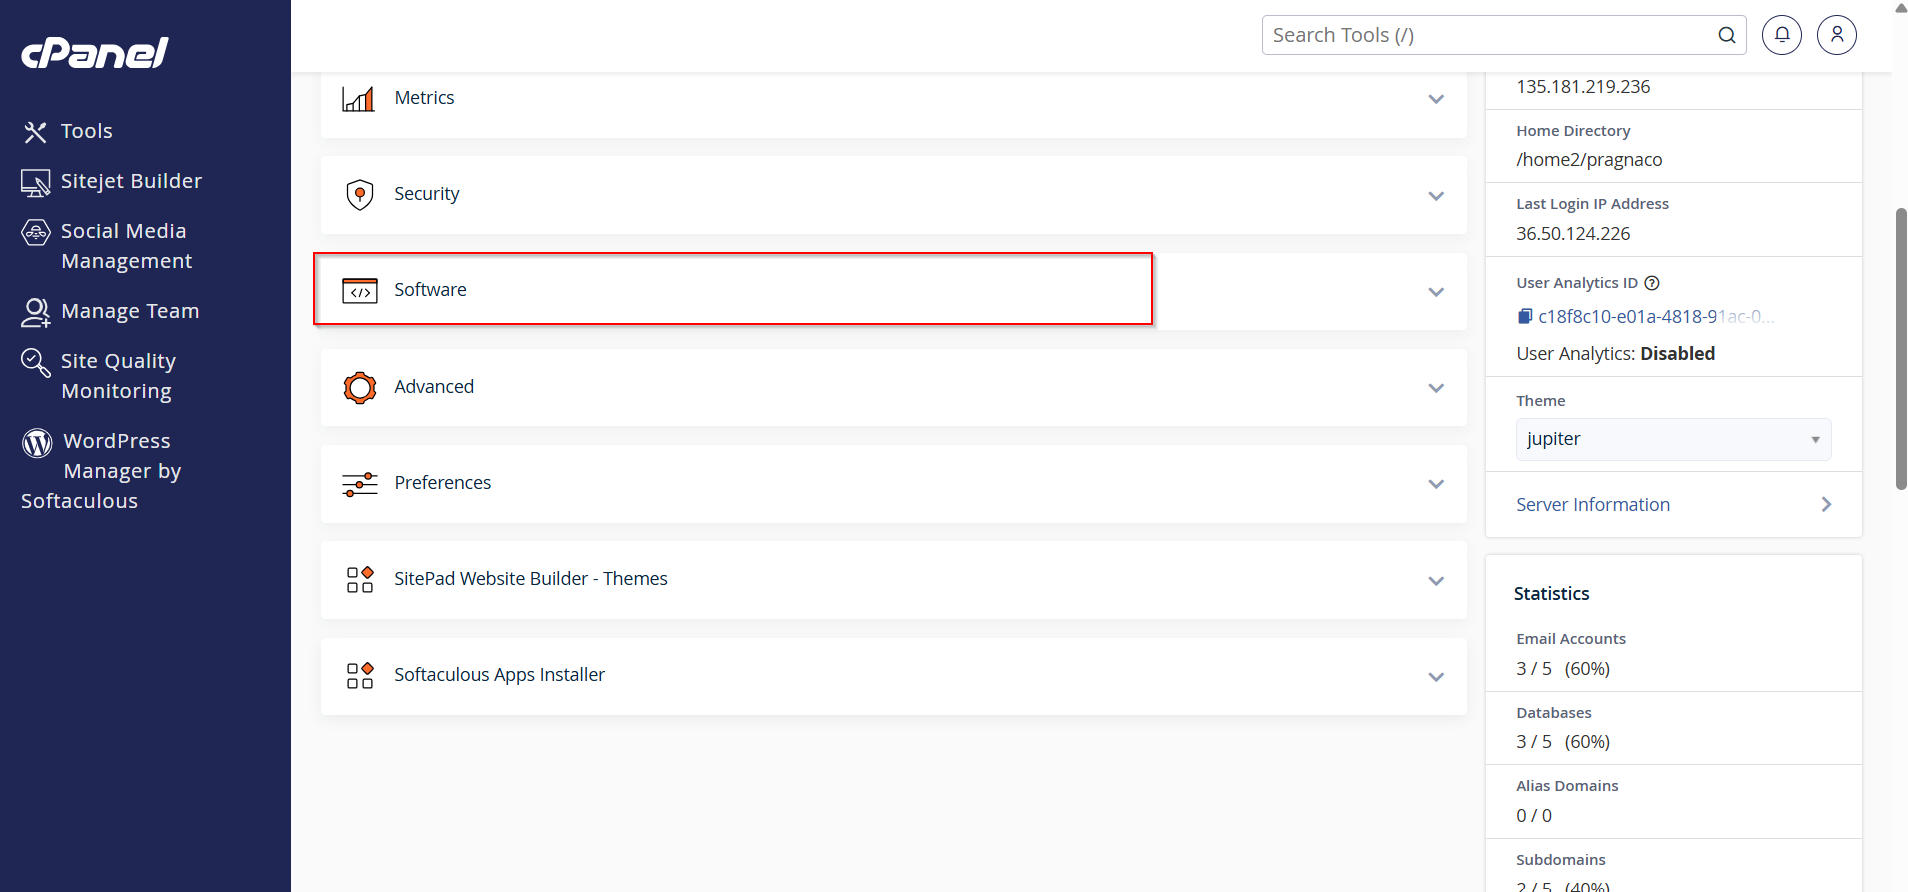
2. Click on Select PHP Version.
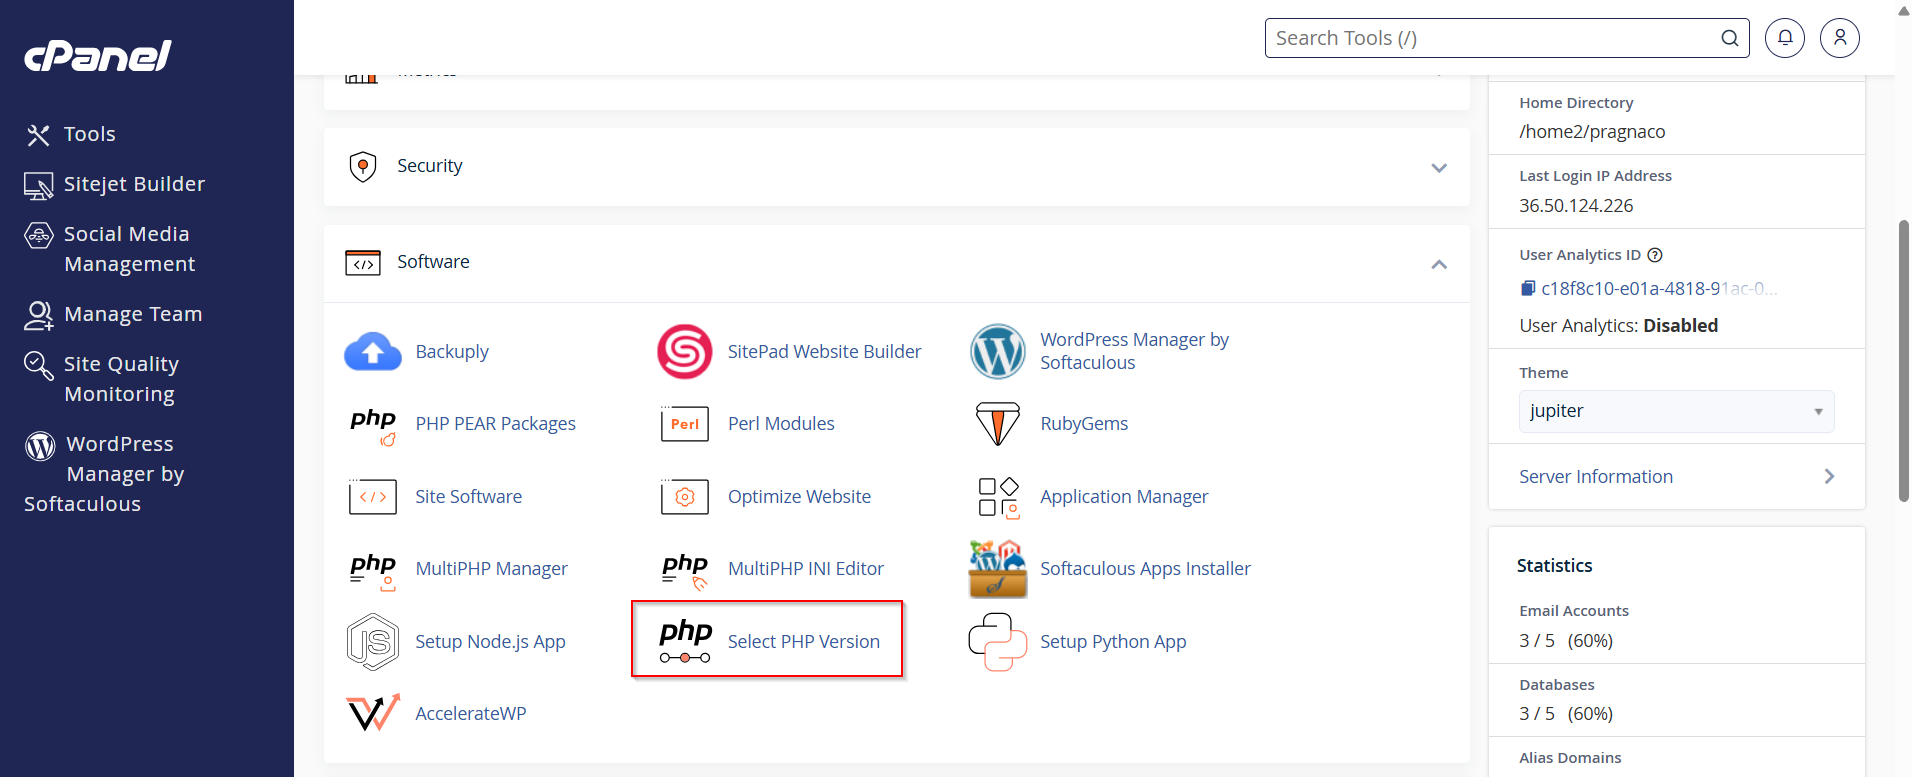
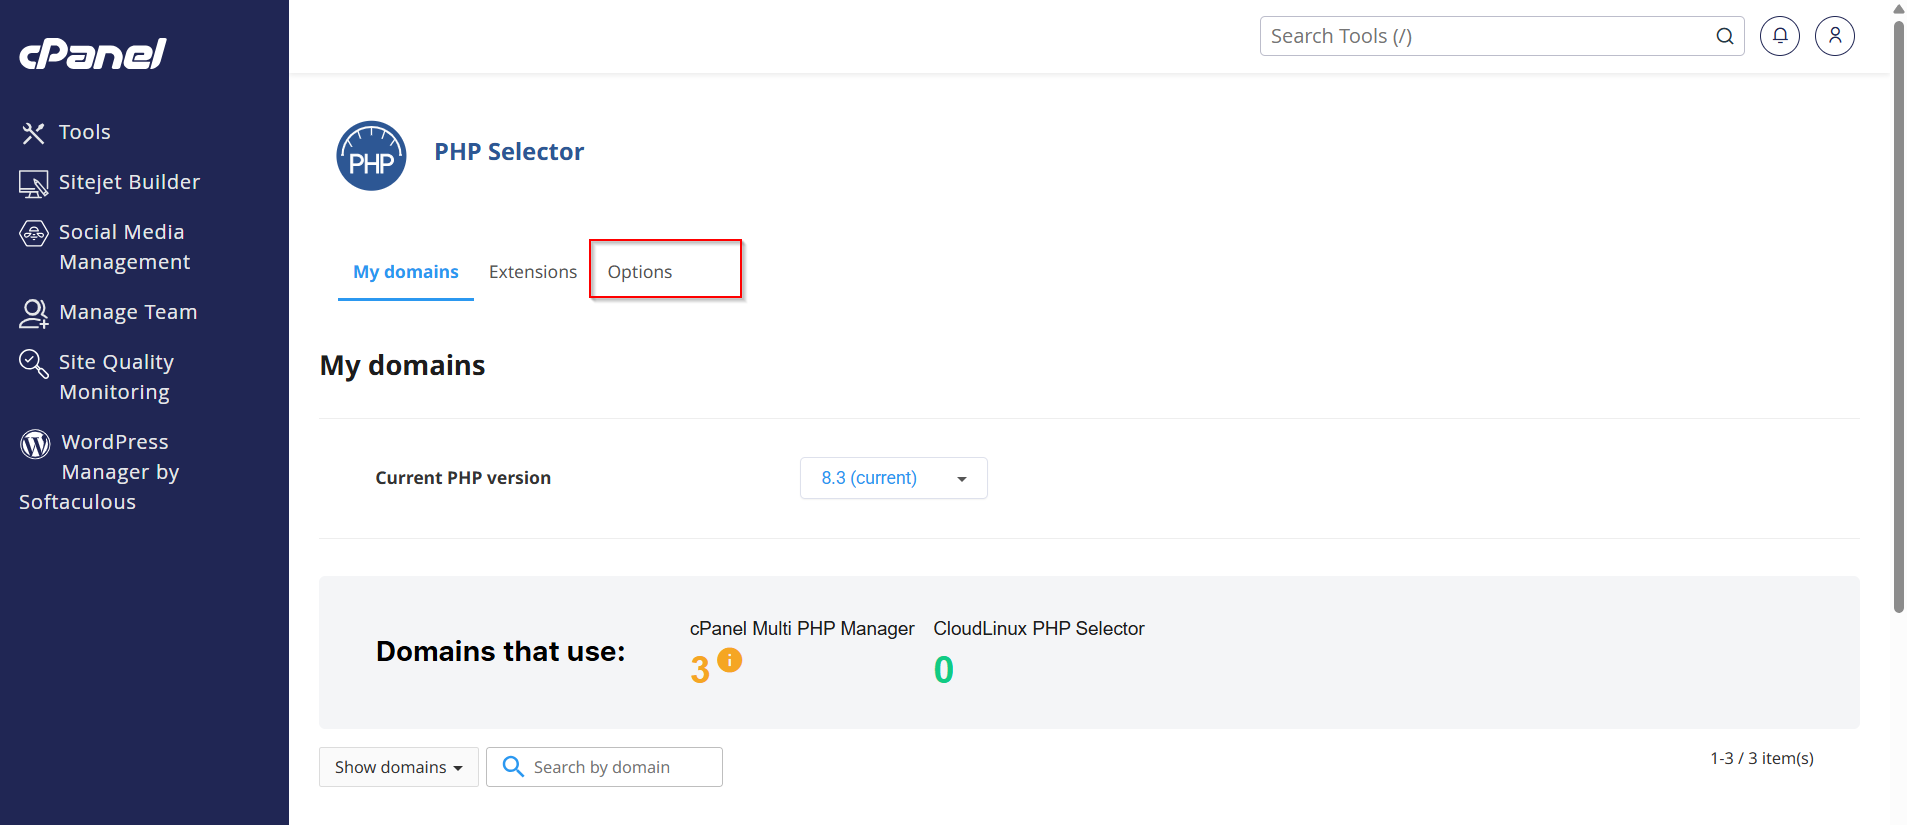
Step 3: Open PHP Options
Inside the PHP Selector page:
- Click on the Options tab.
- You will see different PHP configuration settings.
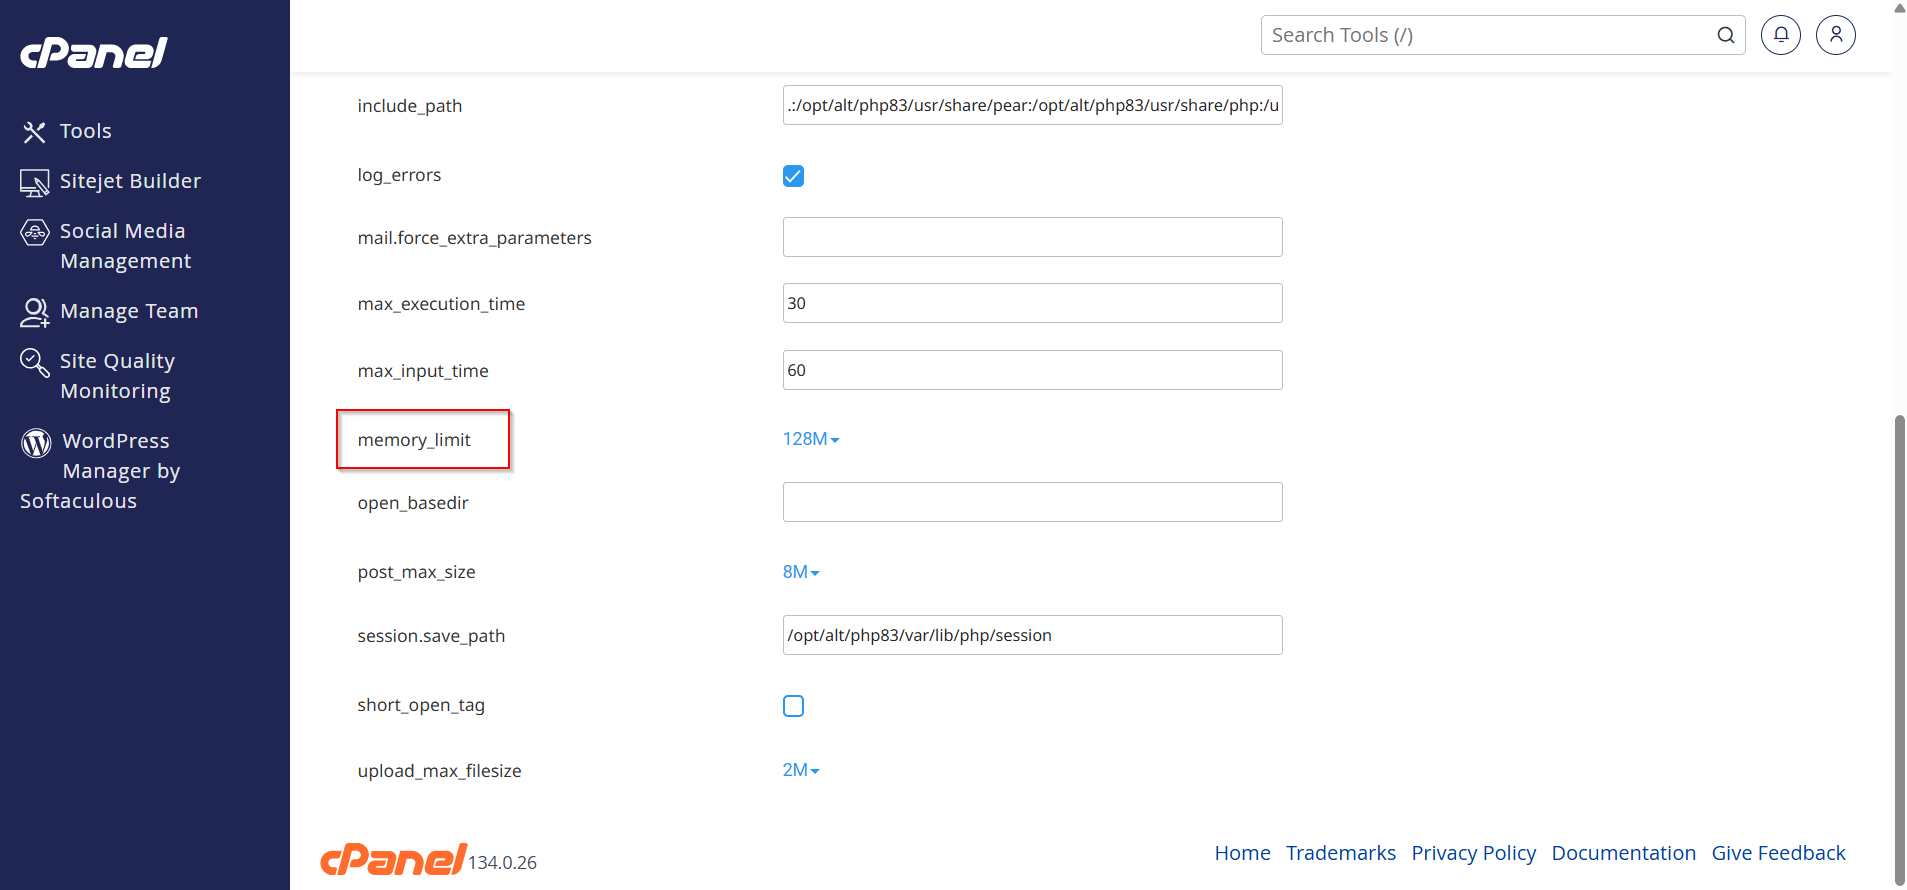
Step 4: Find the memory_limit Setting
Look for the option called:
memory_limit
This controls how much memory PHP scripts can use on your hosting account.
Common values include:
- 128M
- 256M
- 512M
Step 5: Increase the Memory Limit
- Click on the current value beside
memory_limit. - Select a higher value such as 256M or 512M.

Step 6: Verify the Changes
After updating the value:
- Refresh the page.
- Confirm that the new memory limit is displayed.
Your PHP memory limit has now been increased successfully.

Why Increase PHP Memory Limit?
Increasing the PHP memory limit can help fix issues like:
- Website loading errors
- WordPress memory exhausted errors
- Plugin installation failures
- Slow website performance
- Large import/export problems
Conclusion
Increasing the PHP memory limit in cPanel is a simple process that helps improve website performance and prevents memory-related errors. By using the PHP Selector options in cPanel, you can quickly increase the memory allocation for your website.
