
How to Change PHP Version in cPanel
PHP is the backbone of most websites, including CMS platforms like WordPress and billing systems such as WHMCS. Using an outdated PHP version can slow down your website, cause errors, and create security risks.
In this guide, you will learn how to change PHP version in cPanel quickly and safely.
Step 1: Login to cPanel from Client Area
First, login to your client area account.
After logging in:
- Go to Services
- Click on My Services
- Select your active hosting service
- Click on Login to cPanel

Step 2: Select Software
- In cPanel dashboard, under tools
- Click on Software
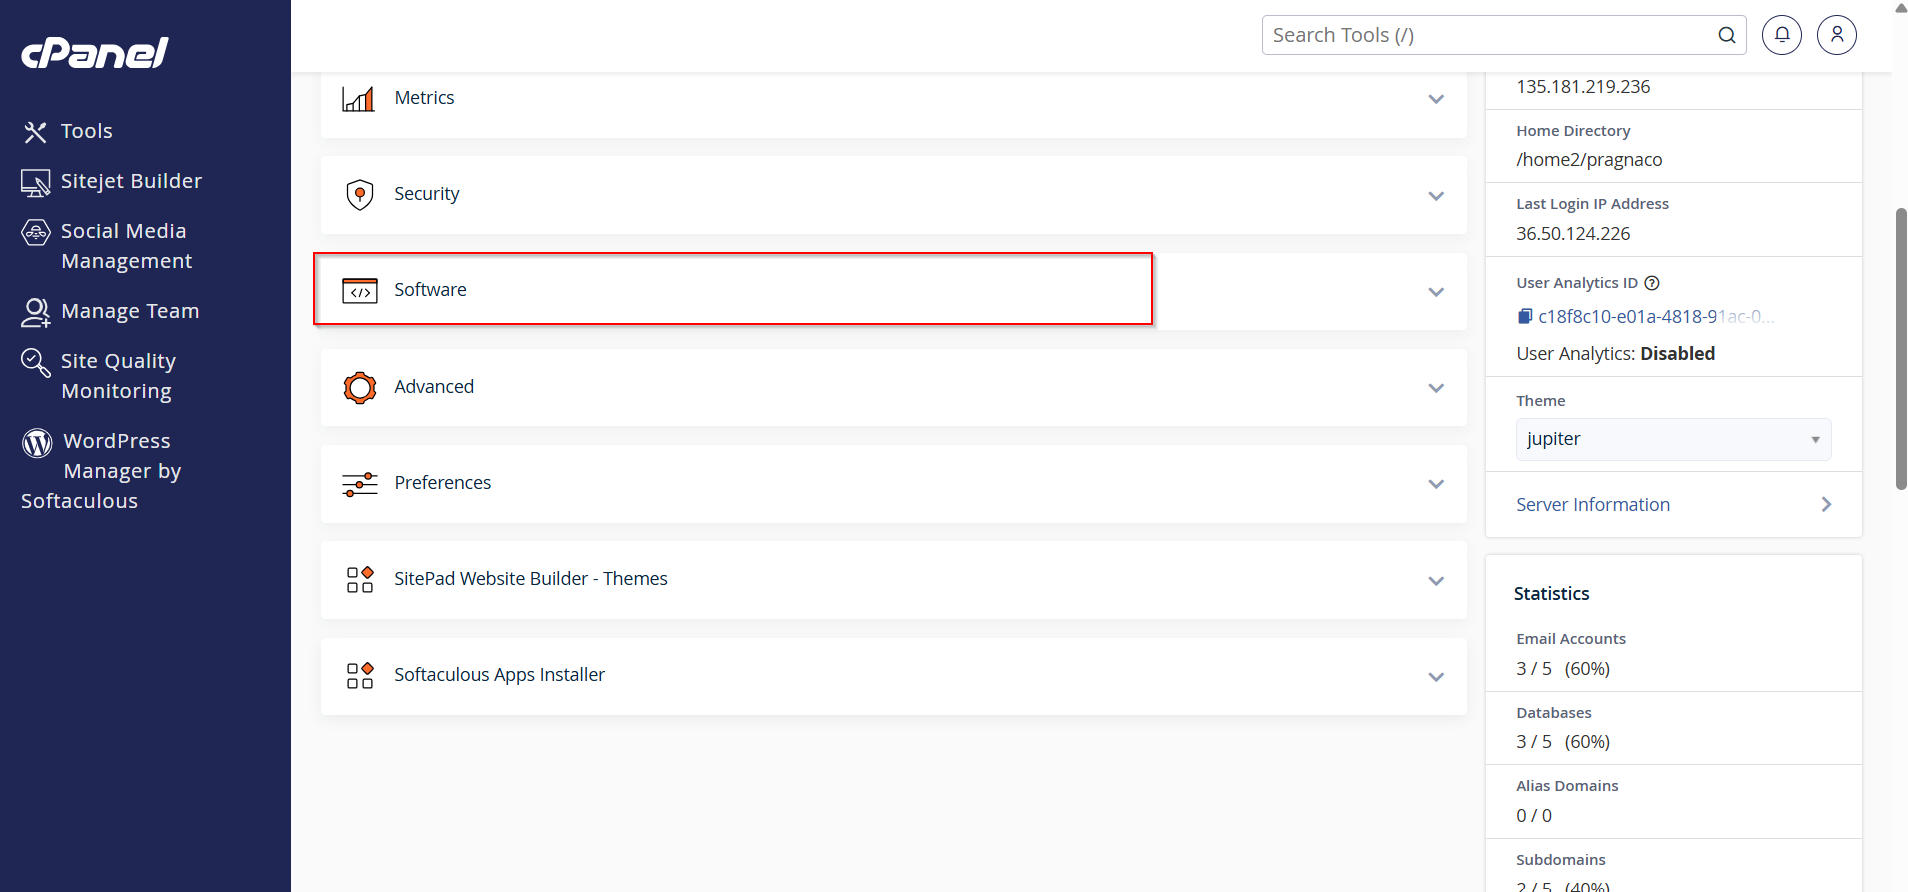
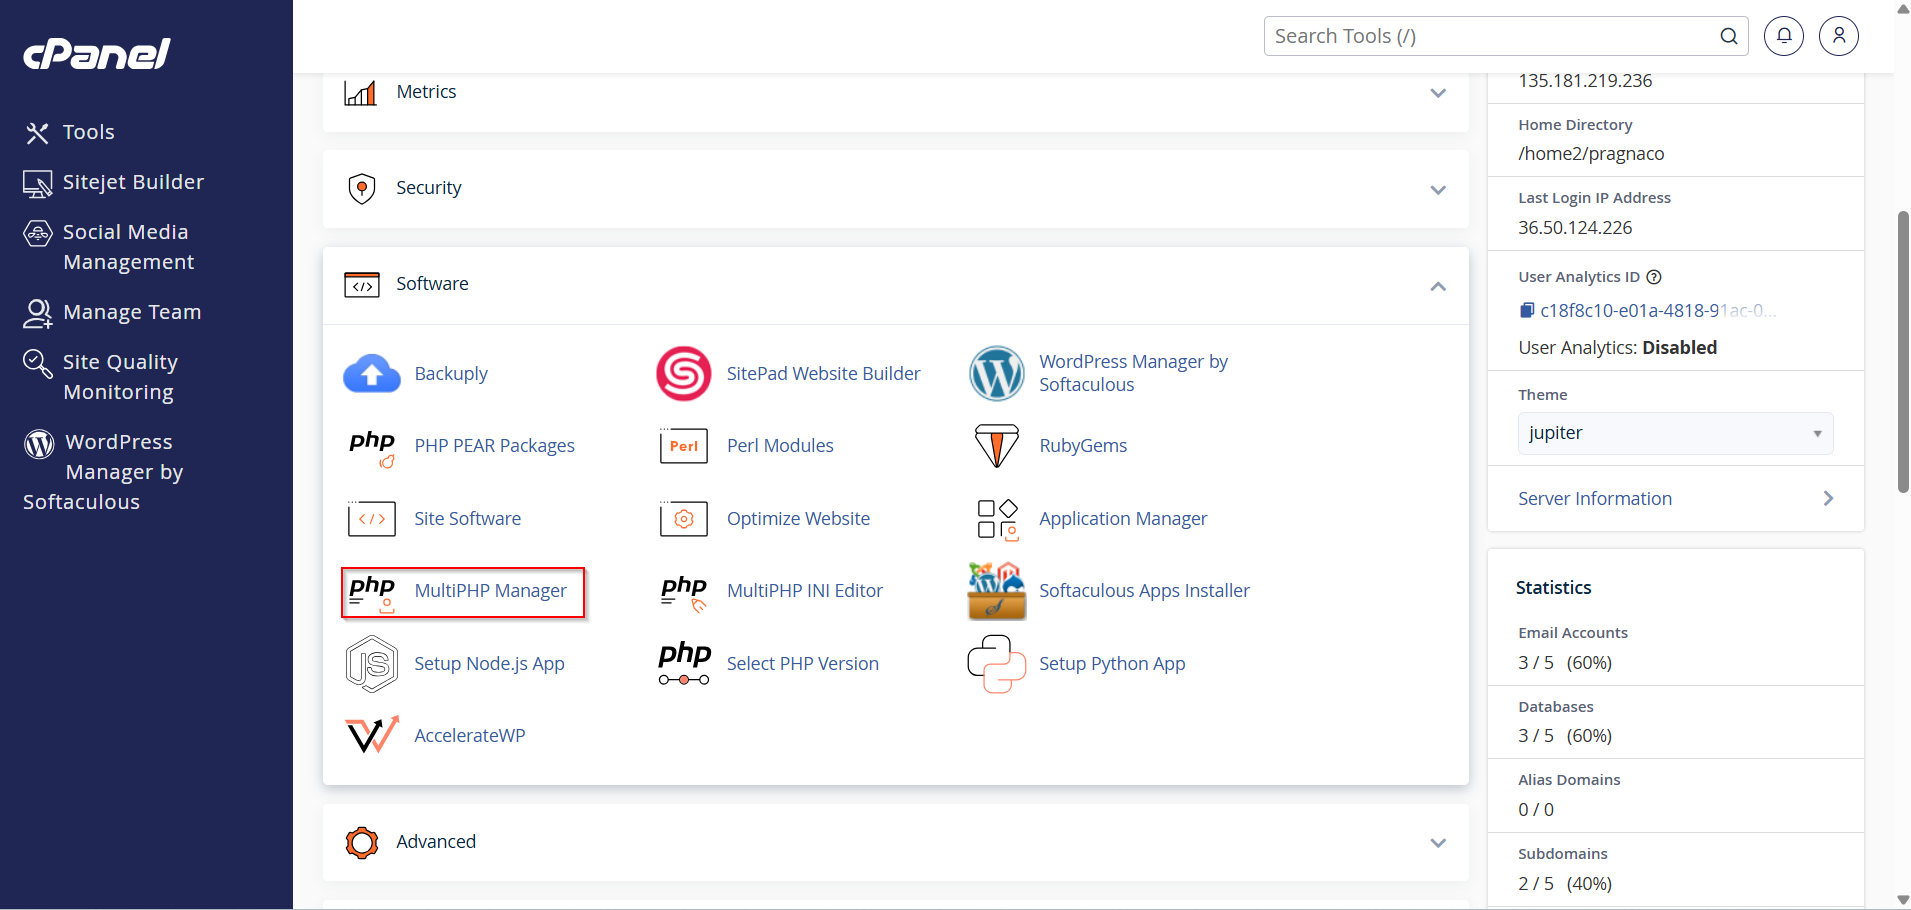
Step 2: Select MultiPHP Manager (or ) search for it in search bar
- Click on MultiPHP Manager
or
- In cPanel dashboard, search for MultiPHP Manager in Search Tools(/)
- Click on it
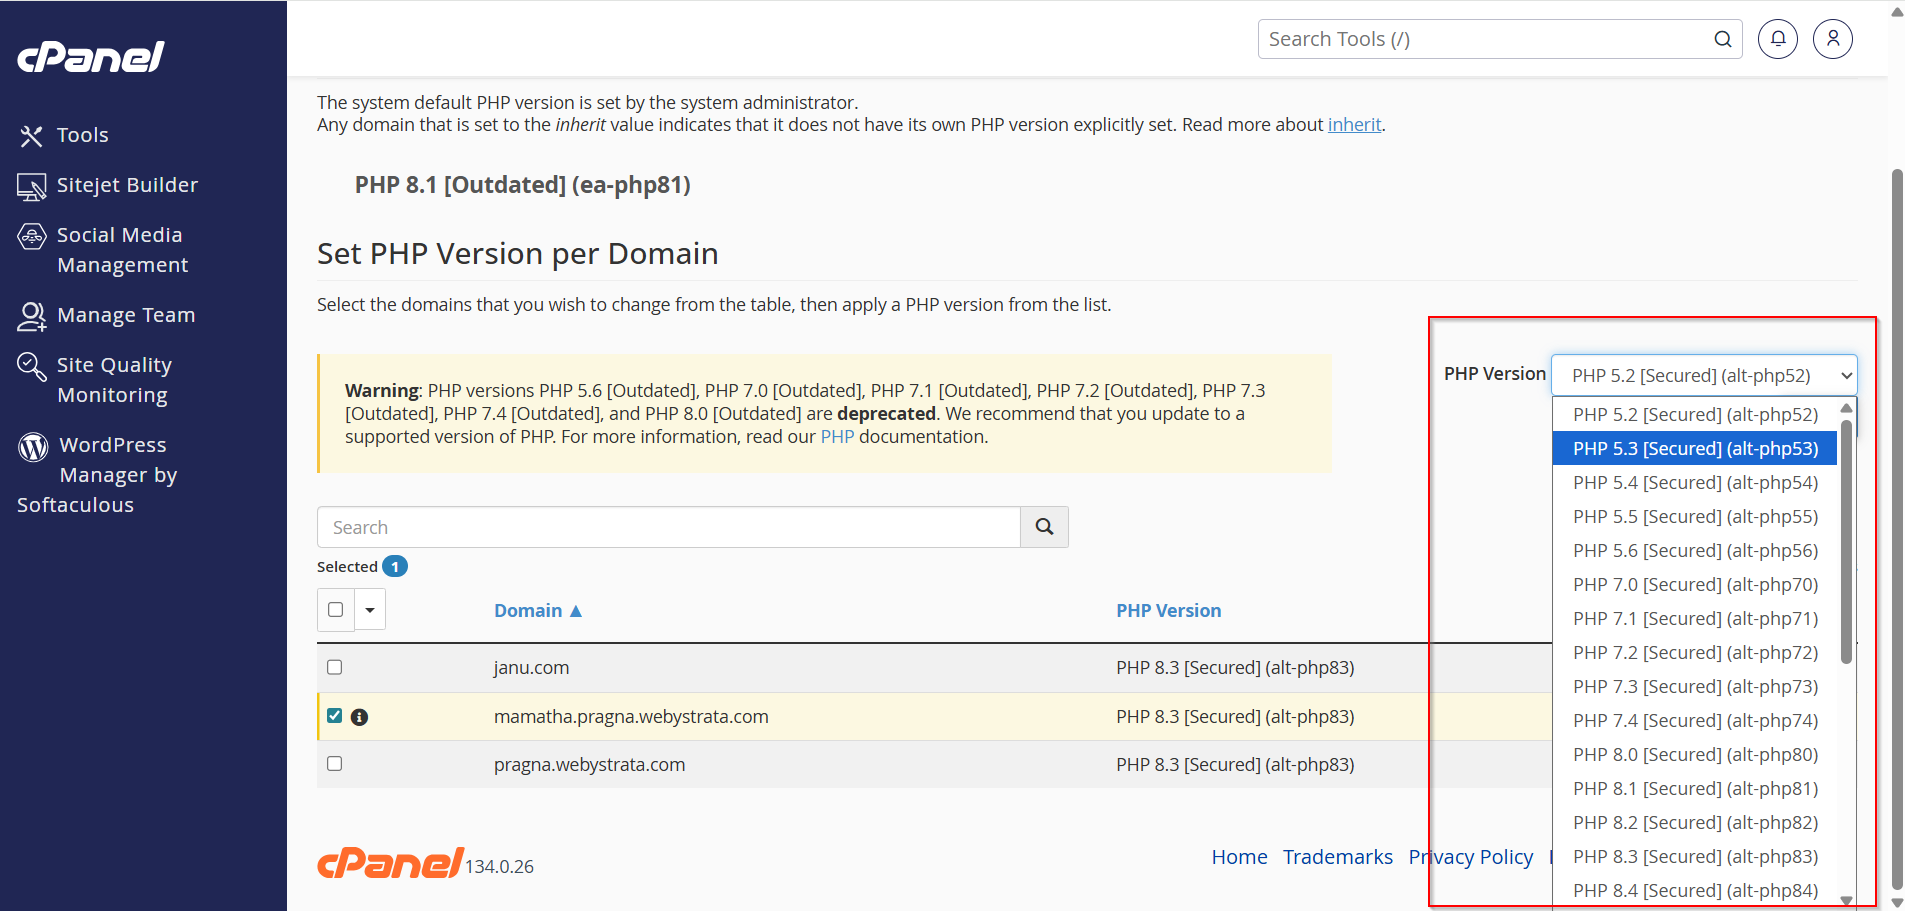
Step 3: Select Your Domain
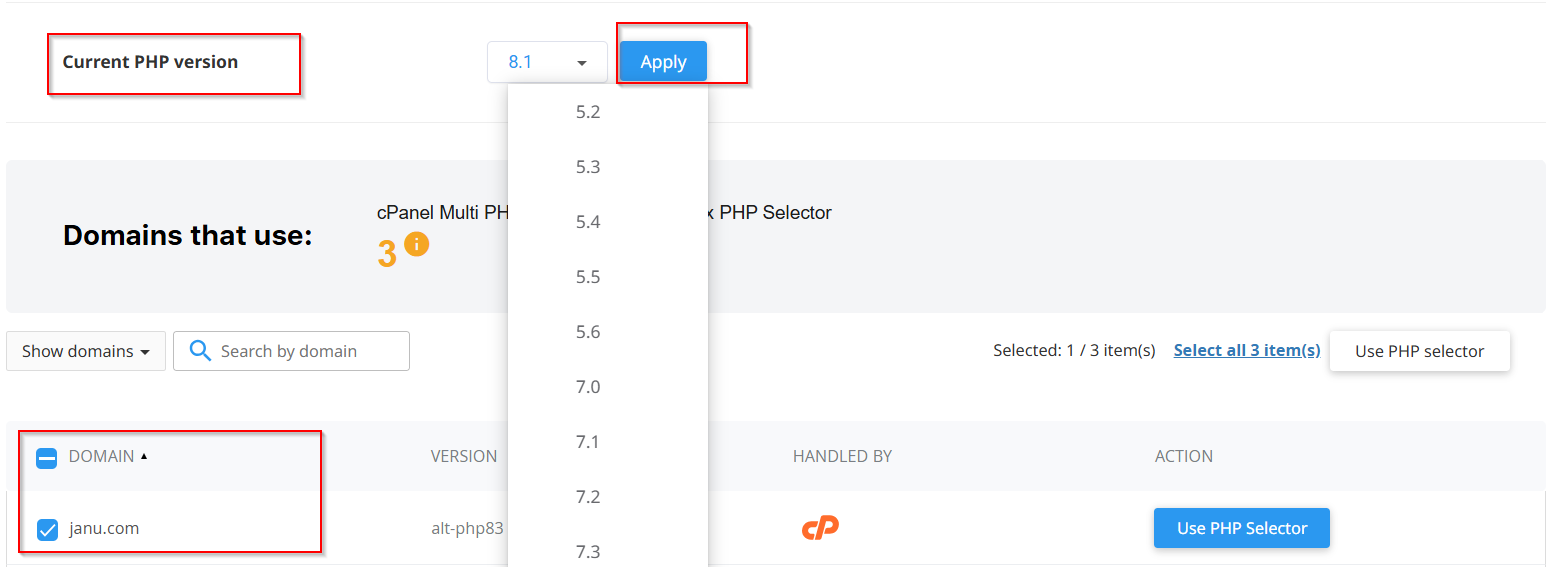
- You will see a list of domains
- Tick the domain you want to change PHP version for

Step 4: Choose PHP Version
- On the right side, you will see a dropdown menu
- Select the required PHP version (example: PHP 8.1, 8.2, etc.)
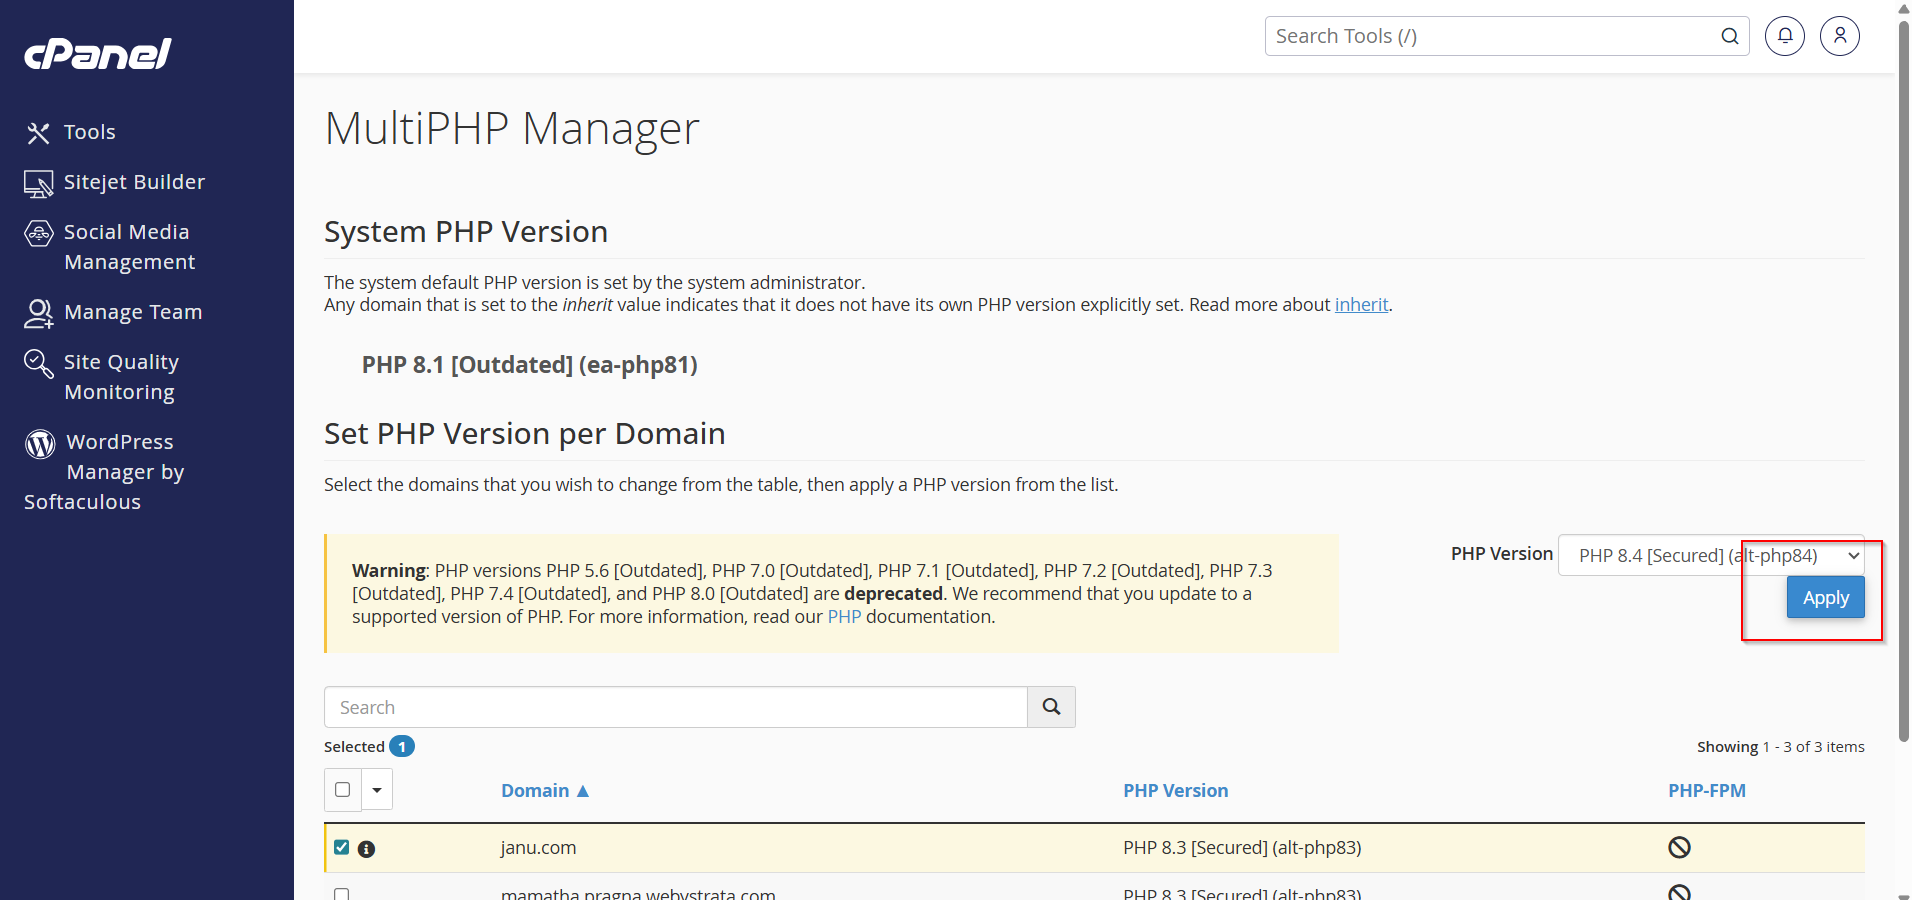
Step 5: Apply Changes
- Click Apply
- Wait for confirmation message
Your PHP version is now updated successfully.
Alternative Method (If MultiPHP Manager is Not Available)
Some hosting providers use Select PHP Version option:
- Go to Software
- Select PHP version
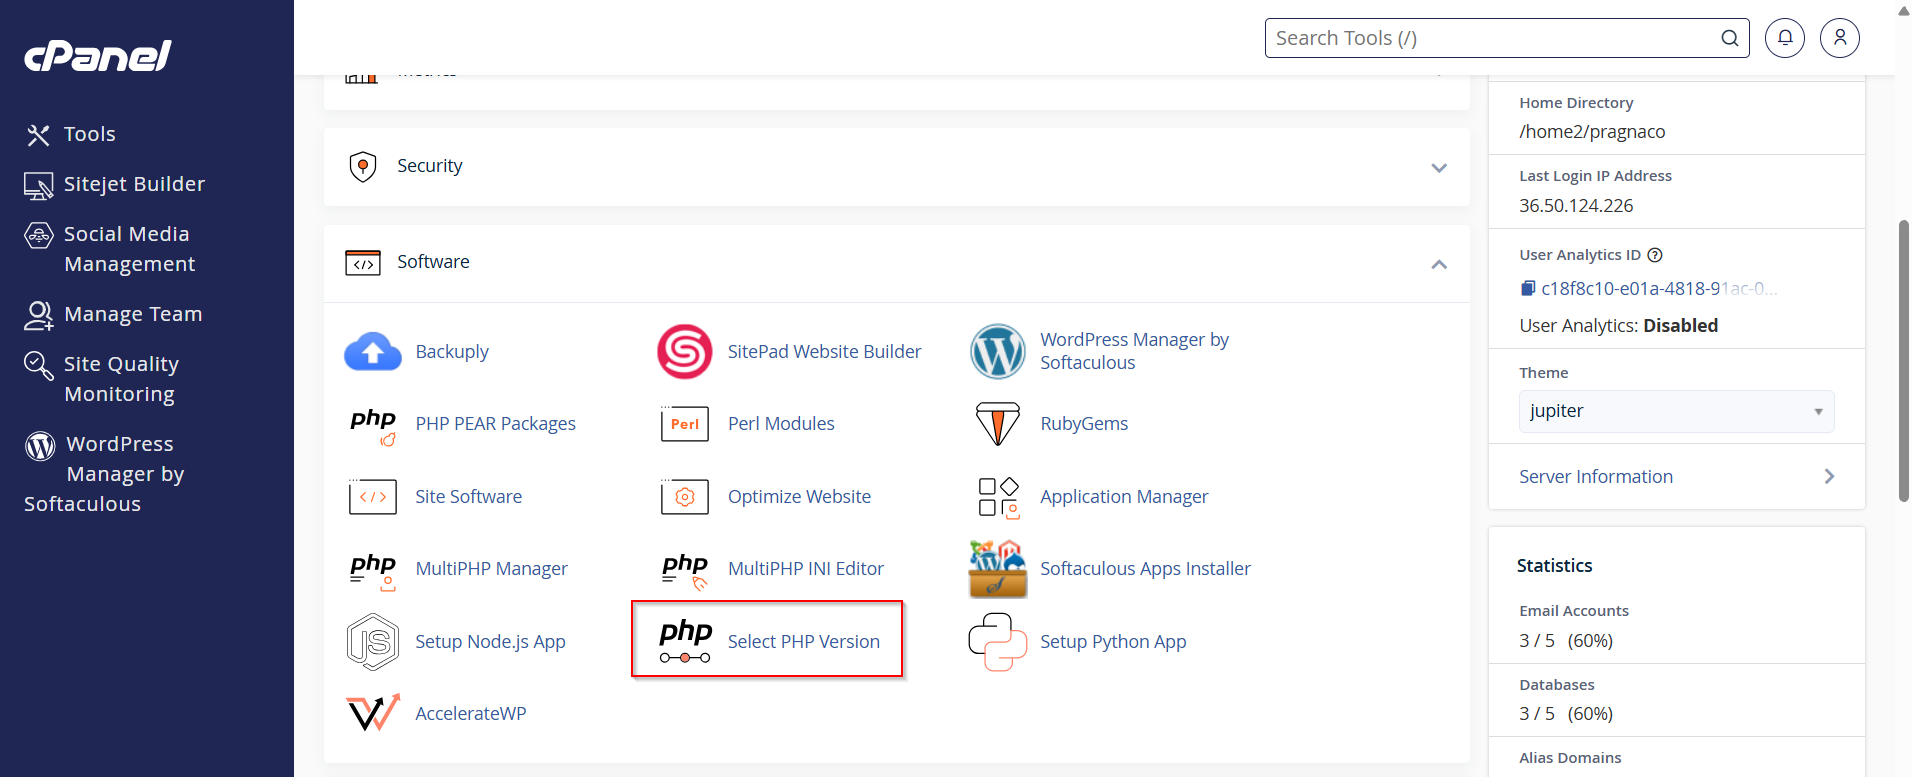
- select the domain
- Choose PHP version from dropdown
- Click Set as current and click Apply
Best PHP Version Recommendation
- PHP 8.1 or 8.2 → Recommended for modern websites
- Avoid PHP 5.x and 7.0 (deprecated and insecure)
Conclusion
Changing PHP version in cPanel is a simple but powerful step to improve website performance and security. Always ensure compatibility before upgrading, especially for systems like WHMCS.
