
How to Configure SSH Using cPanel
SSH (Secure Shell) is a secure network protocol that allows users to remotely access and manage their hosting accounts through a command-line interface. Unlike traditional FTP connections, SSH encrypts all data transmitted between your computer and the server, making it a highly secure method for server administration.
In this guide, you'll learn how to configure SSH using cPanel, generate SSH keys, authorize access, and connect securely to your hosting account.
What Is SSH?
SSH (Secure Shell) is a cryptographic network protocol that enables secure communication between a client computer and a remote server.
With SSH access, you can:
- Manage files directly from the command line
- Run scripts and cron jobs
- Install software and applications
- Execute Linux commands
- Securely transfer files using SCP or SFTP
- Manage Git repositories
- Troubleshoot hosting issues
Because SSH encrypts all communication, it provides significantly better security than unsecured remote access methods.
Prerequisites
Before proceeding, ensure:
- Your hosting provider allows SSH access.
- SSH Access is enabled for your hosting account.
- You have access to your cPanel account.
- An SSH client is installed on your computer.
- Windows: PuTTY or Windows Terminal
- macOS: Terminal
- Linux: Terminal
Steps to Configure SSH using cPanel
Step 1: Login to cPanel from Client Area
First, login to your client area account.
After logging in:
- Go to Services
- Click on My Services
- Select your active hosting service
- Click on Login to cPanel

Step 2: Open SSH Access
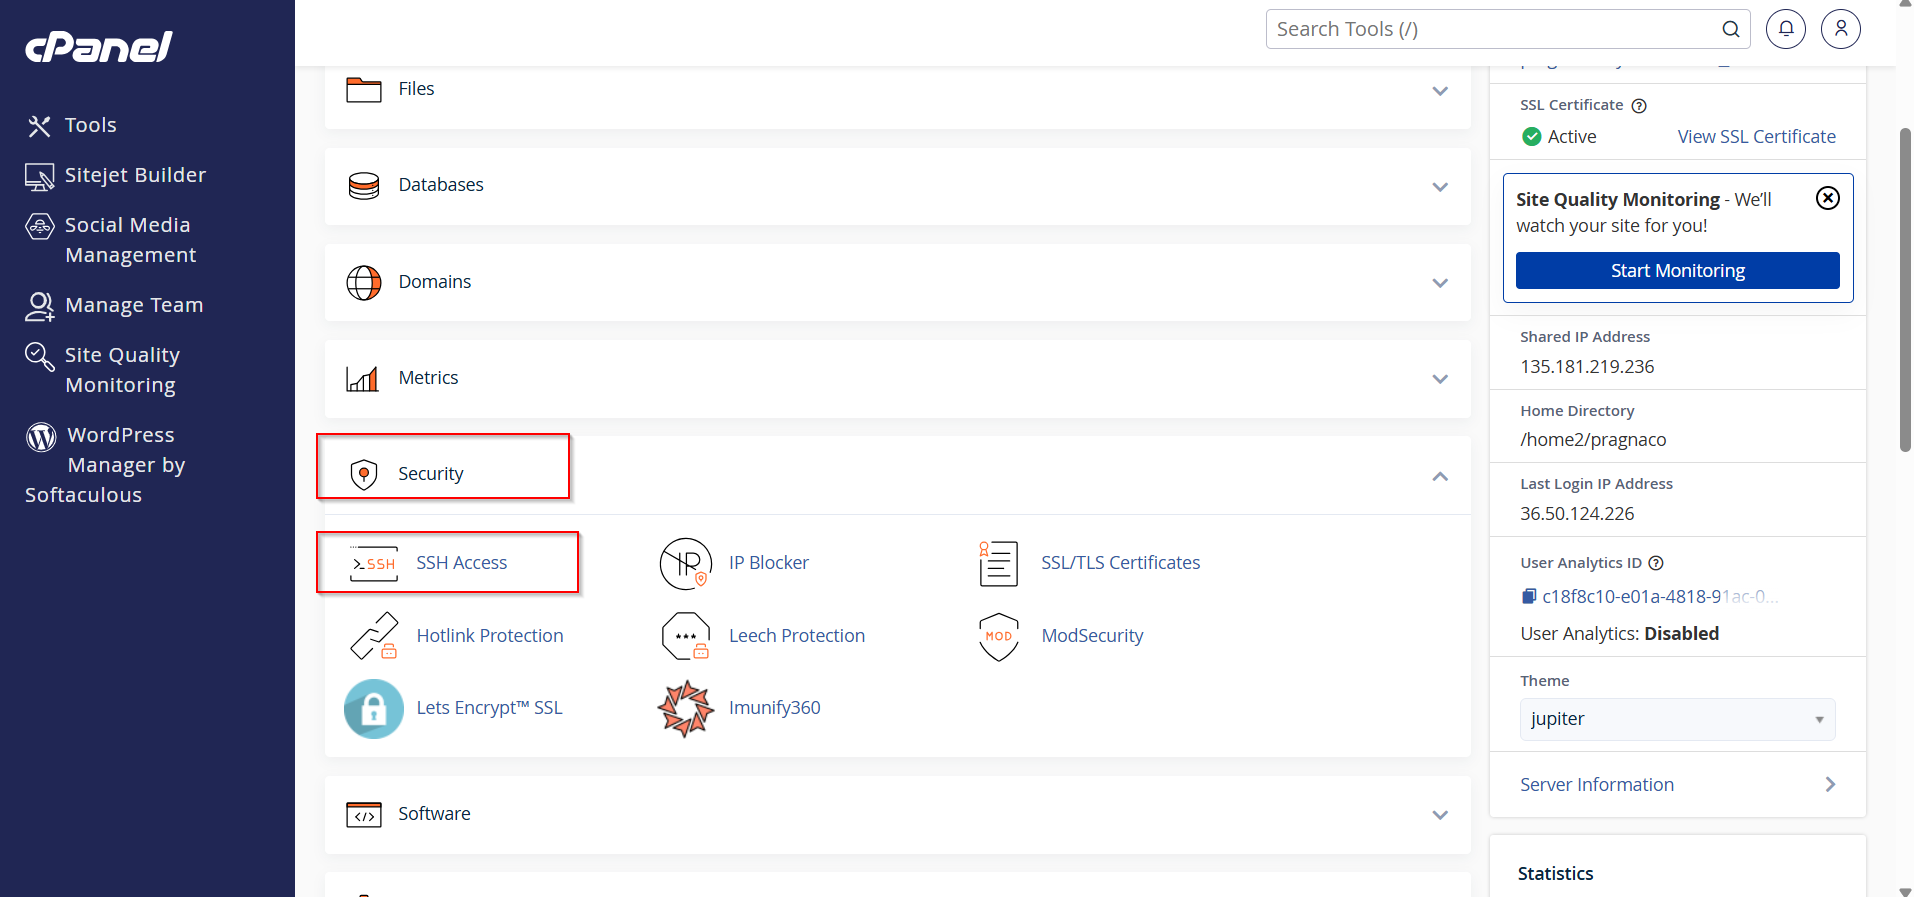
- Locate SSH Access under the Security section.
- Click SSH Access.
You will see options for managing SSH keys and configuring secure authentication.
Step 3: Generate a New SSH Key
- Click Manage SSH Keys.

2. Select Generate a New Key.

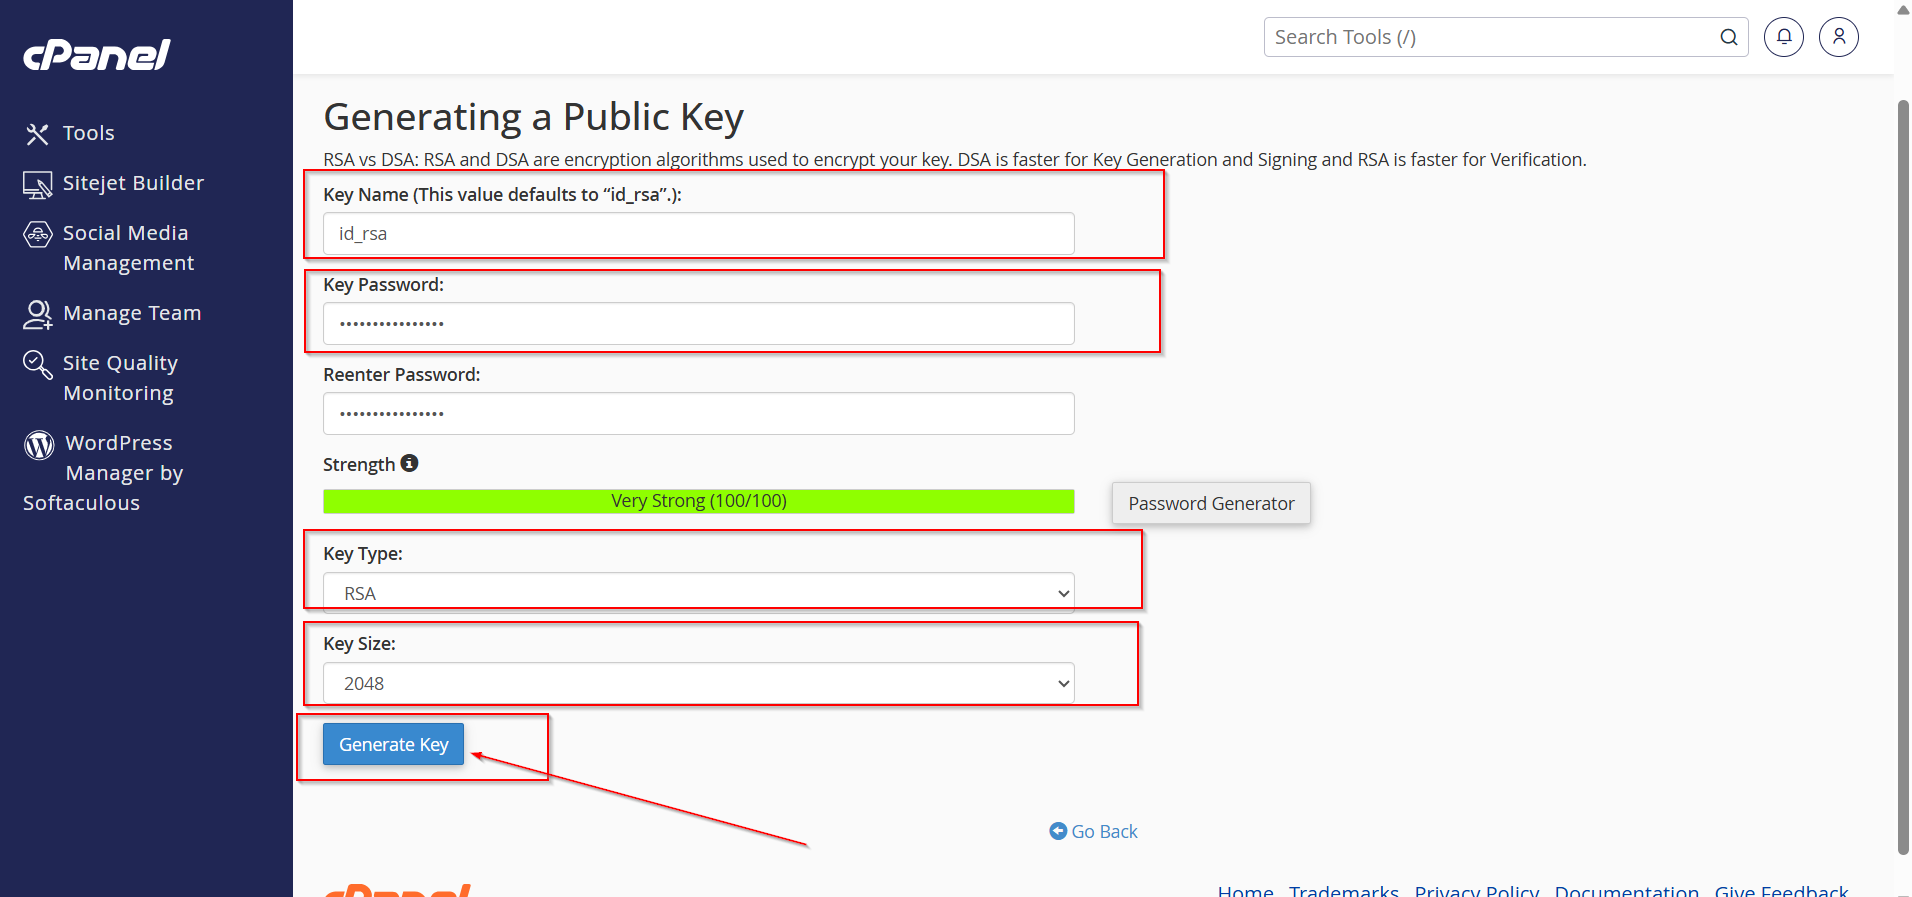
3. Enter the following information:
Key Name
Choose a recognizable name for the key.
Key Password
Create a strong passphrase for additional security.
Key Type
Choose RSA (recommended).
Key Size
Use at least 2048 bits. For better security, select 4096 bits if available
- Click Generate Key.
cPanel will create both:
- Public Key
- Private Key
Step 4: Authorize the SSH Key
After generating the key:
- Return to the Manage SSH Keys page.
- Locate the newly created public key.
- Click Manage.

4. Select Authorize.
Once authorized, the key becomes valid for SSH authentication.

Step 5: Download the Private Key
To connect from your local computer:
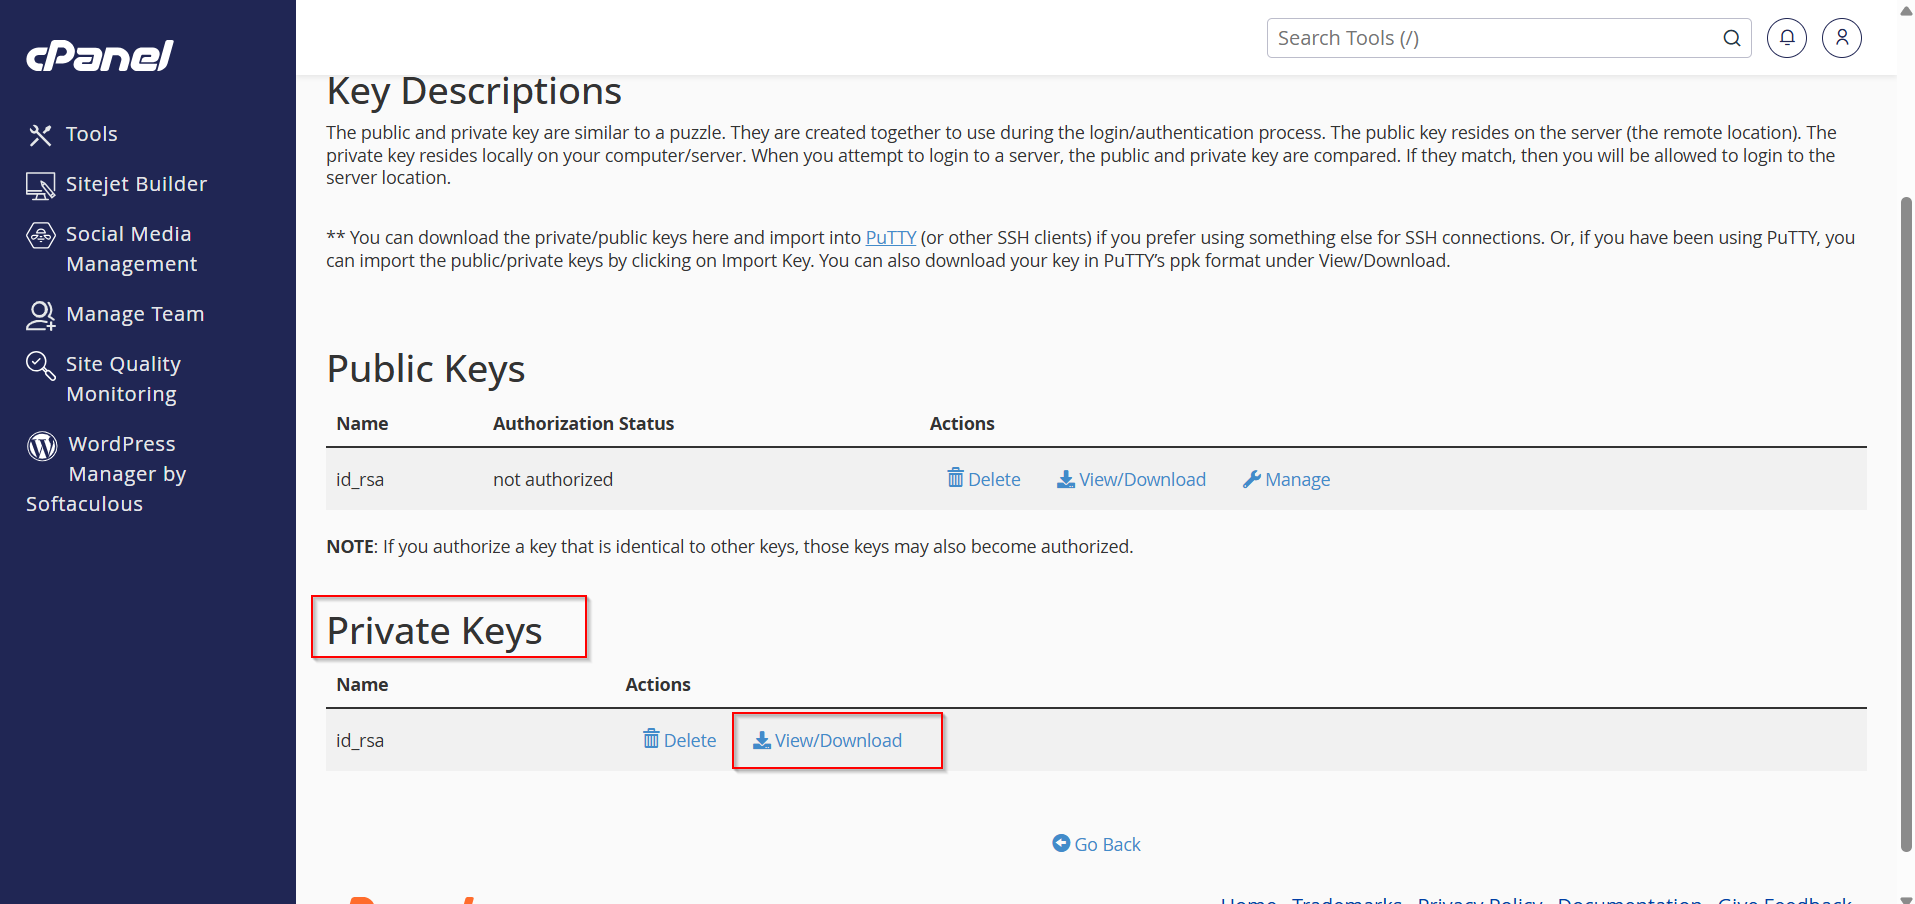
- Locate the private key.
- Click View/Download.
- Save the private key securely on your device.
Never share your private key with anyone.
Step 6: Convert the Key for PuTTY (Windows Only)
If you use PuTTY:
- Open the private key in cPanel.
- Click Convert.
- Download the converted
.ppkfile. - Save it in a secure location.
PuTTY requires the .ppk format for authentication.

Step 7: Connect to the Server Using SSH
For Windows (PuTTY)
- Open PuTTY.
- Enter your server hostname or IP address.
- Set Port to 22.
- Navigate to:
Connection → SSH → Auth
- Browse and select your private key (.ppk file).
- Click Open.
Benefits of Using SSH
- Enhanced Security
- Faster File Management
- Remote Administration
- Automation Capabilities
- Secure Authentication
Conclusion
Learning how to configure SSH using cPanel gives you secure remote access to your hosting account and unlocks powerful server management capabilities. By generating and authorizing SSH keys through cPanel, you can establish encrypted connections, execute commands efficiently, manage files securely, and perform advanced administrative tasks.
Following the steps outlined above will help you configure SSH access safely while maintaining strong security practices for your hosting environment.
