
How to View Error Logs in cPanel
Error logs are one of the most valuable tools for diagnosing website issues. Whether your website is showing a blank page, generating PHP warnings, experiencing server errors, or behaving unexpectedly, error logs can help you identify the root cause quickly. cPanel provides a built-in Errors feature that allows website owners and administrators to view recent error messages without needing command-line access. In this guide, you'll learn how to view error logs in cPanel, understand common error messages, and use logs effectively to troubleshoot website problems.
Step 1: Login to cPanel from Client Area
First, login to your client area account.
After logging in:
- Go to Services
- Click on My Services
- Select your active hosting service
- Click on Login to cPanel

Step 2: Locate the Errors Tool
After logging in to cPanel:
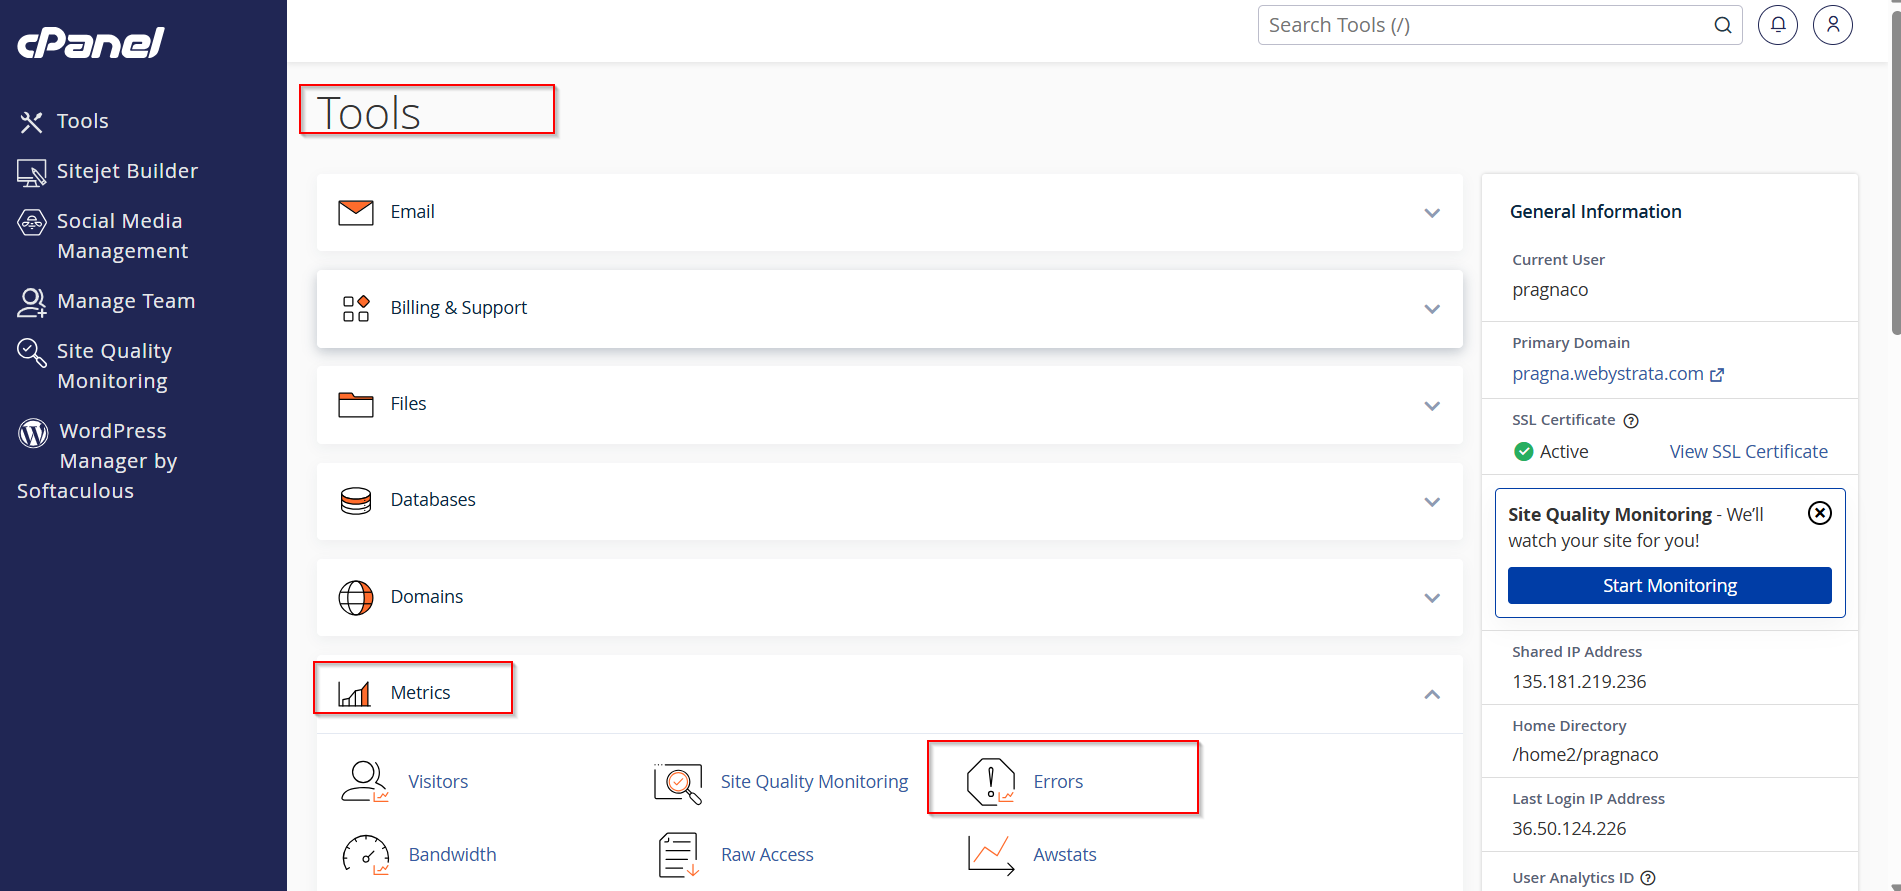
- Scroll down to the Metrics section.
- Click on Errors.
The Errors feature displays recent website and server errors recorded by your hosting account.
Step 3: View Recent Error Logs
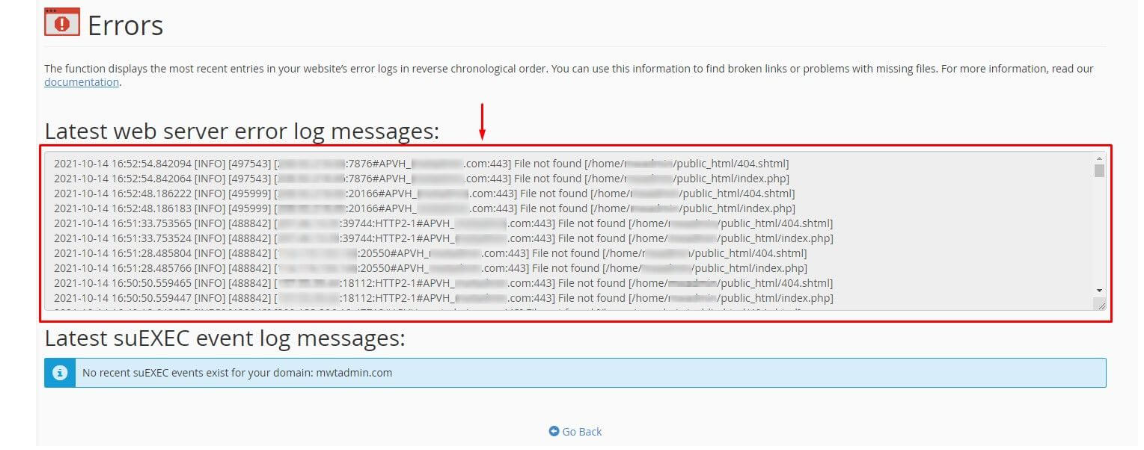
Once the Errors page opens, you will see a list of recent error messages.
The log entries typically contain:
- Date and time of the error
- Domain or website affected
- Error type
- File or script generating the error
- Additional details about the issue
Example:
[Mon Jun 02 10:15:22 2026] [error] File does not exist:
/home/username/public_html/images/logo.png
This example indicates that the website attempted to load a file that could not be found.
Step 4: Analyze the Error Details
Review the error messages carefully to identify the source of the problem.
Common issues include:
- Missing files or images
- Incorrect file permissions
- PHP warnings and fatal errors
- Broken links
- Script execution failures
- Application configuration problems
The error details often include the exact file path, making troubleshooting easier.
Step 5: Check Related Files
Using File Manager in cPanel:
- Navigate to the file path mentioned in the error log.
- Verify that the file exists.
- Check file permissions.
- Correct any missing or misconfigured files.
For PHP applications such as WordPress, this can help identify problematic plugins, themes, or custom code.

Step 6: Refresh and Monitor Logs
After making changes:
- Return to the Errors page.
- Refresh the page.
- Test your website again.
- Check whether new errors appear.
Monitoring logs after implementing fixes helps confirm that the issue has been resolved.

What the Errors Tool Shows
The cPanel Errors feature generally displays:
- Apache errors
- Website access errors
- Missing file errors
- Permission-related issues
- Recent server-side problems
It is intended for quick troubleshooting and usually shows only the most recent entries rather than complete server log files.
Conclusion
The Errors feature in cPanel provides a simple way to view recent website and server error messages without accessing the server through SSH. By regularly reviewing error logs, website owners can quickly identify issues, resolve problems, improve website performance, and ensure a better user experience.
