
How To Create A Subdomain Through cPanel?
A subdomain is a separate section of your main website that helps organize different types of content or services under the same domain name. For example, if your main domain is example.com, you can create subdomains like blog.example.com, shop.example.com, or support.example.com.
Using cPanel, creating a subdomain is simple and only takes a few minutes. Subdomains are commonly used for blogs, development environments, customer portals, landing pages, documentation websites, and online stores.
In this guide, you will learn how to create a subdomain through cPanel step by step.
What Is A Subdomain?
A subdomain is an additional part added before your primary domain name. It works like a separate website while still being connected to the main domain.
Examples Of Subdomains
blog.example.comstore.example.comclient.example.comsupport.example.com
Subdomains help website owners organize services and content more effectively.
Requirements Before Creating A Subdomain
Before you create a subdomain through cPanel, make sure:
- Your domain is properly connected to your hosting account
- DNS settings are active
- You have access to cPanel
- Your hosting plan supports subdomains
Steps To Create A Subdomain Through cPanel
Step 1: Login to cPanel from Client Area
First, login to your client area account.
After logging in:
- Go to Services
- Click on My Services
- Select your active hosting service
- Click on Login to cPanel

Step 2: Open The Domains
After logging in, scroll through the cPanel dashboard and locate the Domains section. Depending on your hosting provider and cPanel version, you may see options such as:
-
Domains
-
Subdomains
-
Zone Editor

- Click on the Domains

Step 3: Click On Create A New Domain Or Subdomain
Inside the Domains section,
-
Click on Create A New Domain
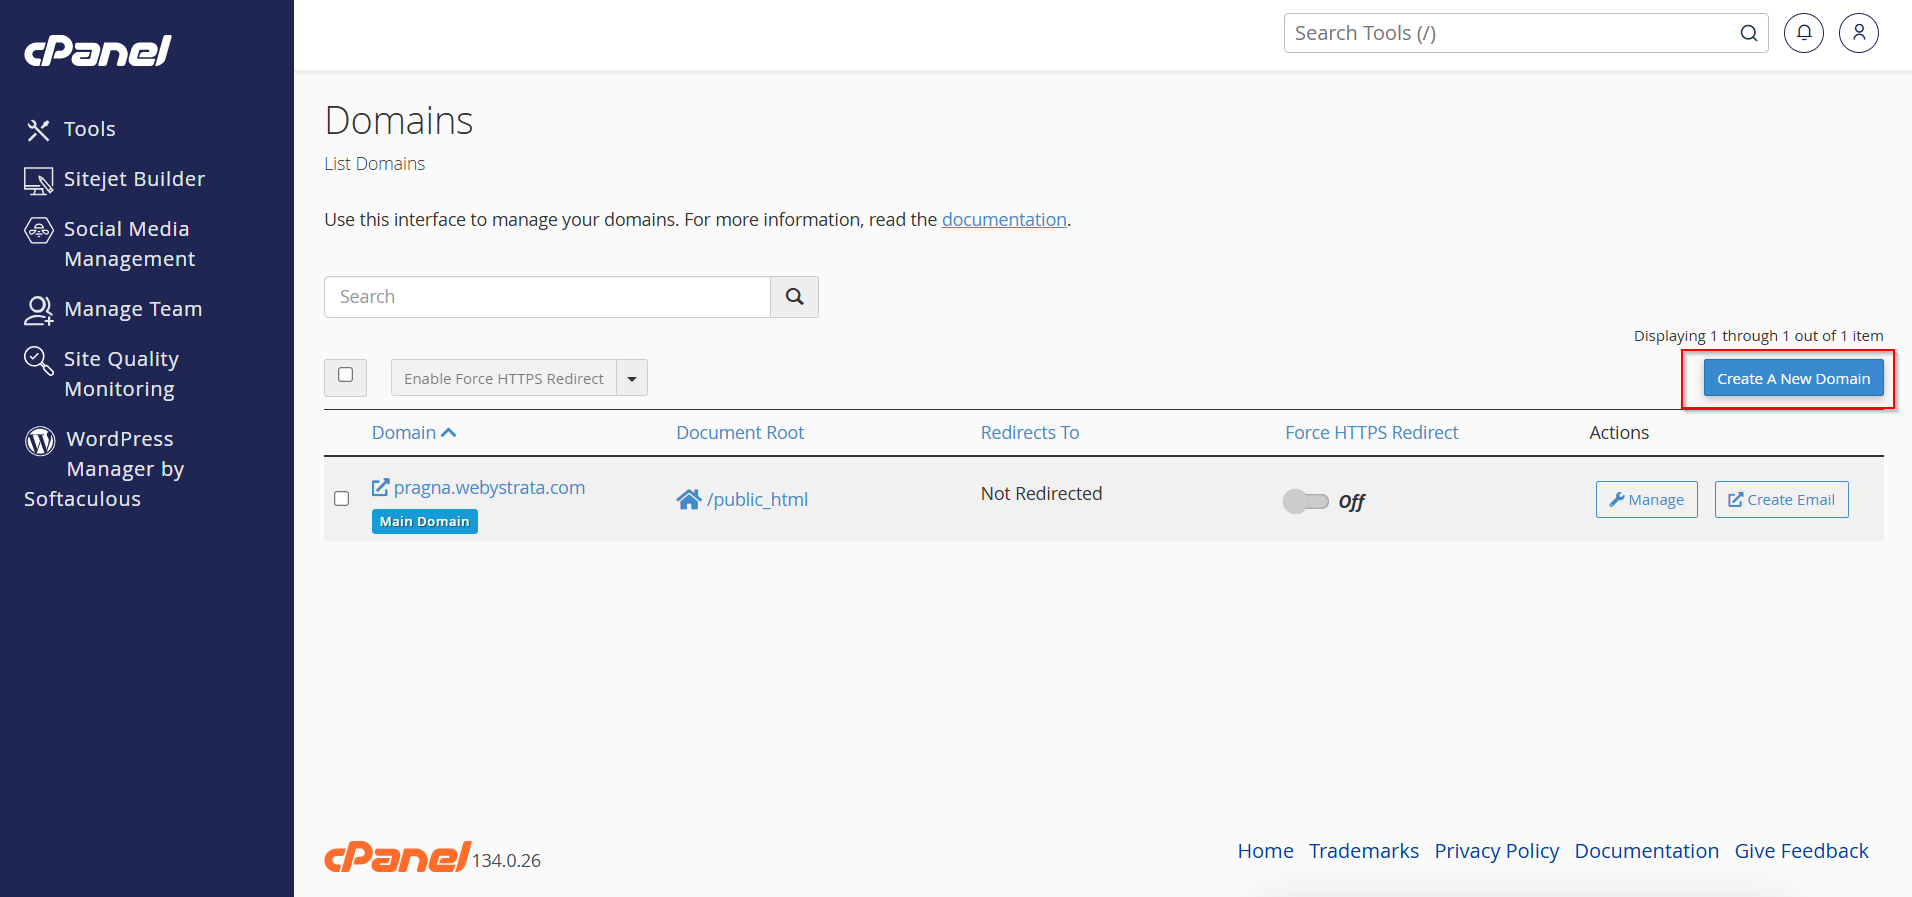
Step 4: Enter Your Subdomain Name
In the domain field, type the name you want to use before your main domain name.
Example:
-
If you enter
blog -
And your main domain is
example.com
Your subdomain will become:
blog.example.com
Choose a short and meaningful subdomain name based on its purpose.

Step 5: Choose The Document Root Folder
The document root is the folder where all files for the subdomain will be stored. In most cases, cPanel automatically creates a folder like:
public_html/blog
You can keep the default folder or customize it if needed. Make sure the folder name is properly organized for easy file management later.

Step 6: Click The Submit Button
After entering all details correctly, click the Submit button. cPanel will now generate the subdomain and automatically configure the required settings on your hosting account.
This process usually takes only a few seconds.

Step 7: Open And Test Your Subdomain
Once the setup is complete, open your browser and type your subdomain URL.
Example:
blog.example.com
If the subdomain loads successfully, your setup is complete and ready for website files, WordPress installation, or other applications.
Conclusion
Creating a subdomain through cPanel is a quick and effective way to organize your website services, blogs, development projects, and customer portals. With just a few steps, you can create and manage separate sections under your main domain without purchasing another domain name.
Whether you are starting a blog, building a testing environment, or creating a support portal, subdomains provide flexibility and better website management for businesses and developers alike.
