Access and Log in to WebyStrata Client Area
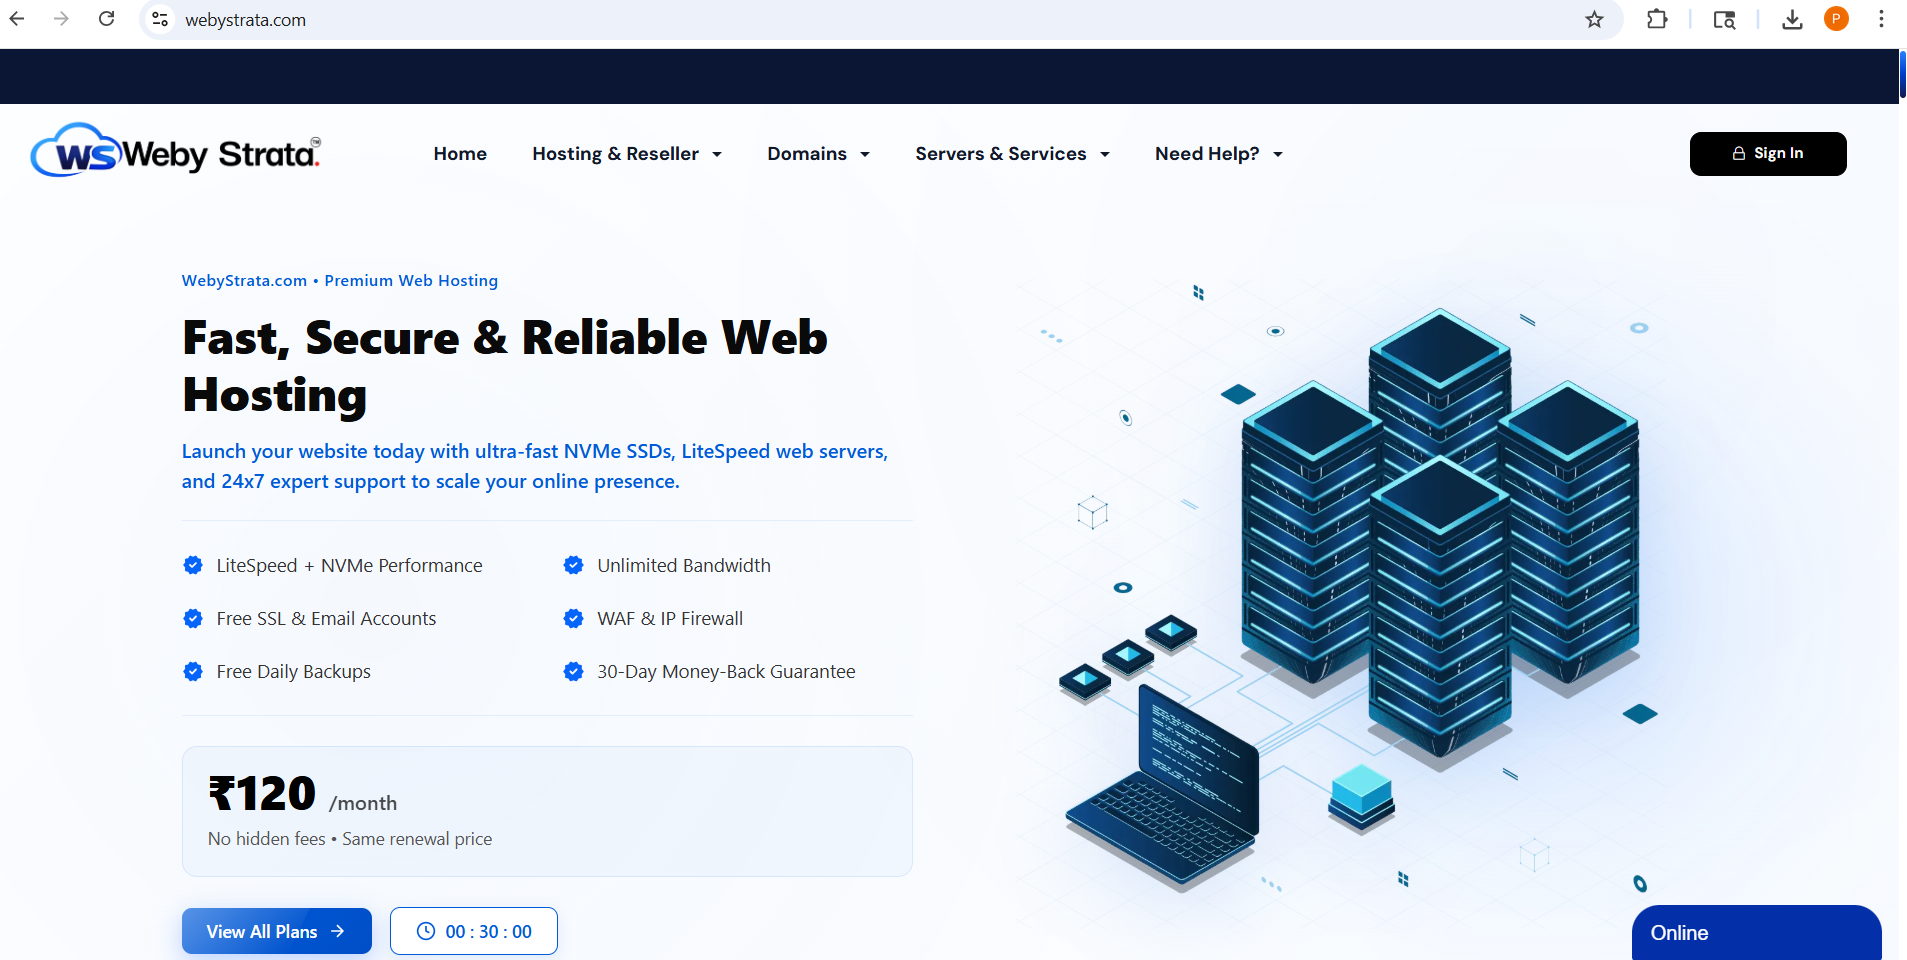
Step 1: Visit the WebyStrata Website
Open your preferred web browser and visit:
www.webystrata.com
You will arrive at the WebyStrata homepage where hosting services and account options are available.
Step 2: Click the Sign In Button
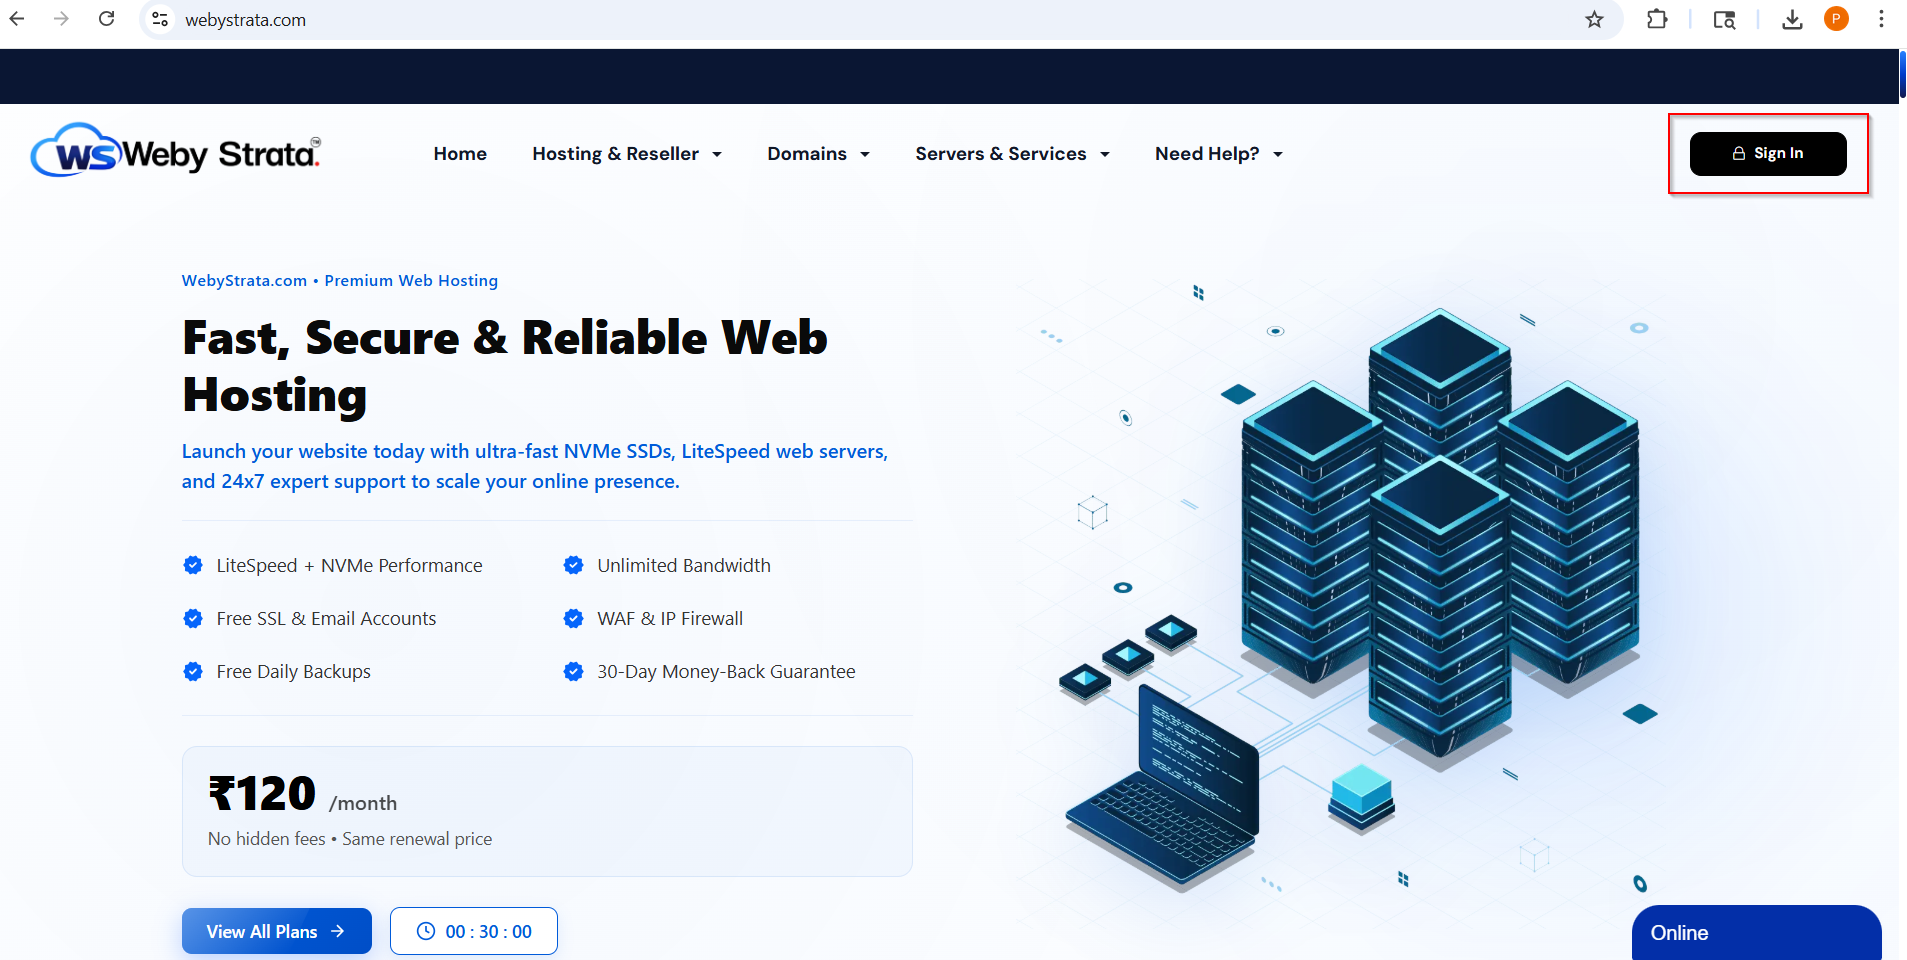
On the homepage, locate the Sign In button at the top-right corner of the website.
Click the Sign In button to begin the login process.
Step 3: Open the WebyStrata Login Portal
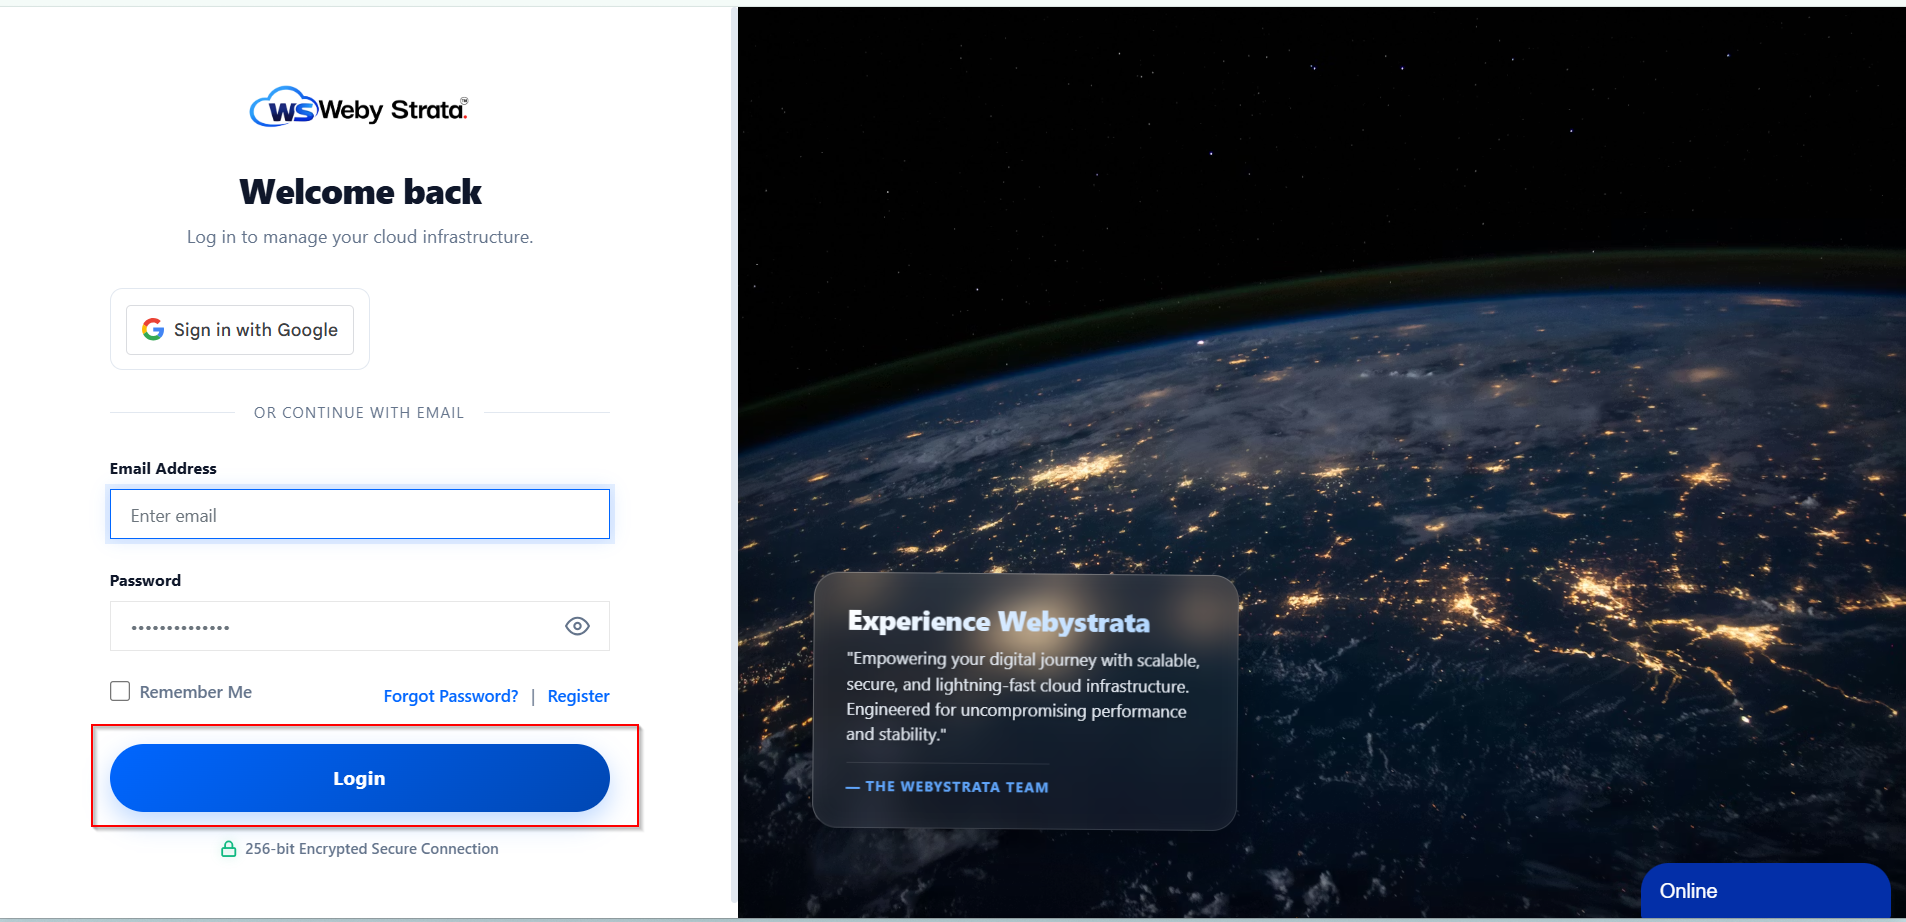
After clicking Sign In, your browser will redirect to the secure client login portal
Step 4: Enter Your Login Credentials
Fill in the following details:
- Registered Email Address
- Account Password
Ensure the entered credentials are correct and secure.
After entering your details, click Login.
Step 5: Access the Client Area
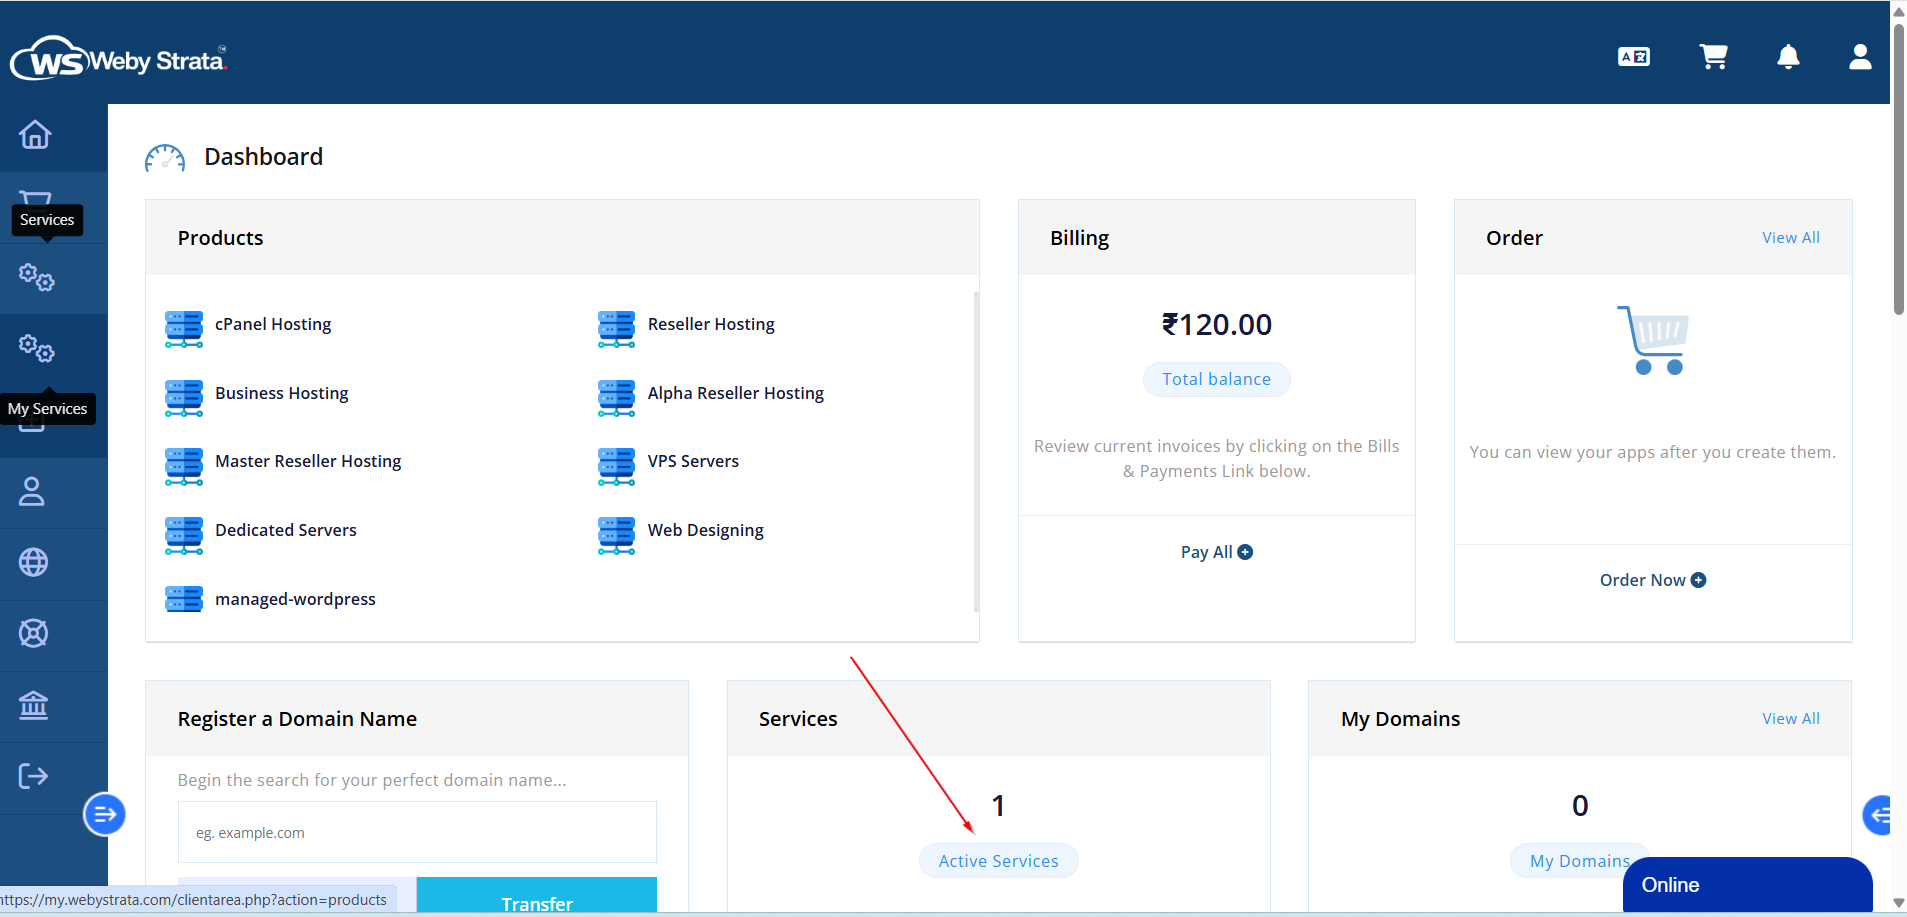
Once logged in successfully, you will enter the WebyStrata Client Area dashboard.
Inside the client area, you can:
- Manage hosting services
- View invoices
- Manage domains
- Access support tickets
- Configure account settings
From the Client Area dashboard:
- Click on Services
- Select My Services
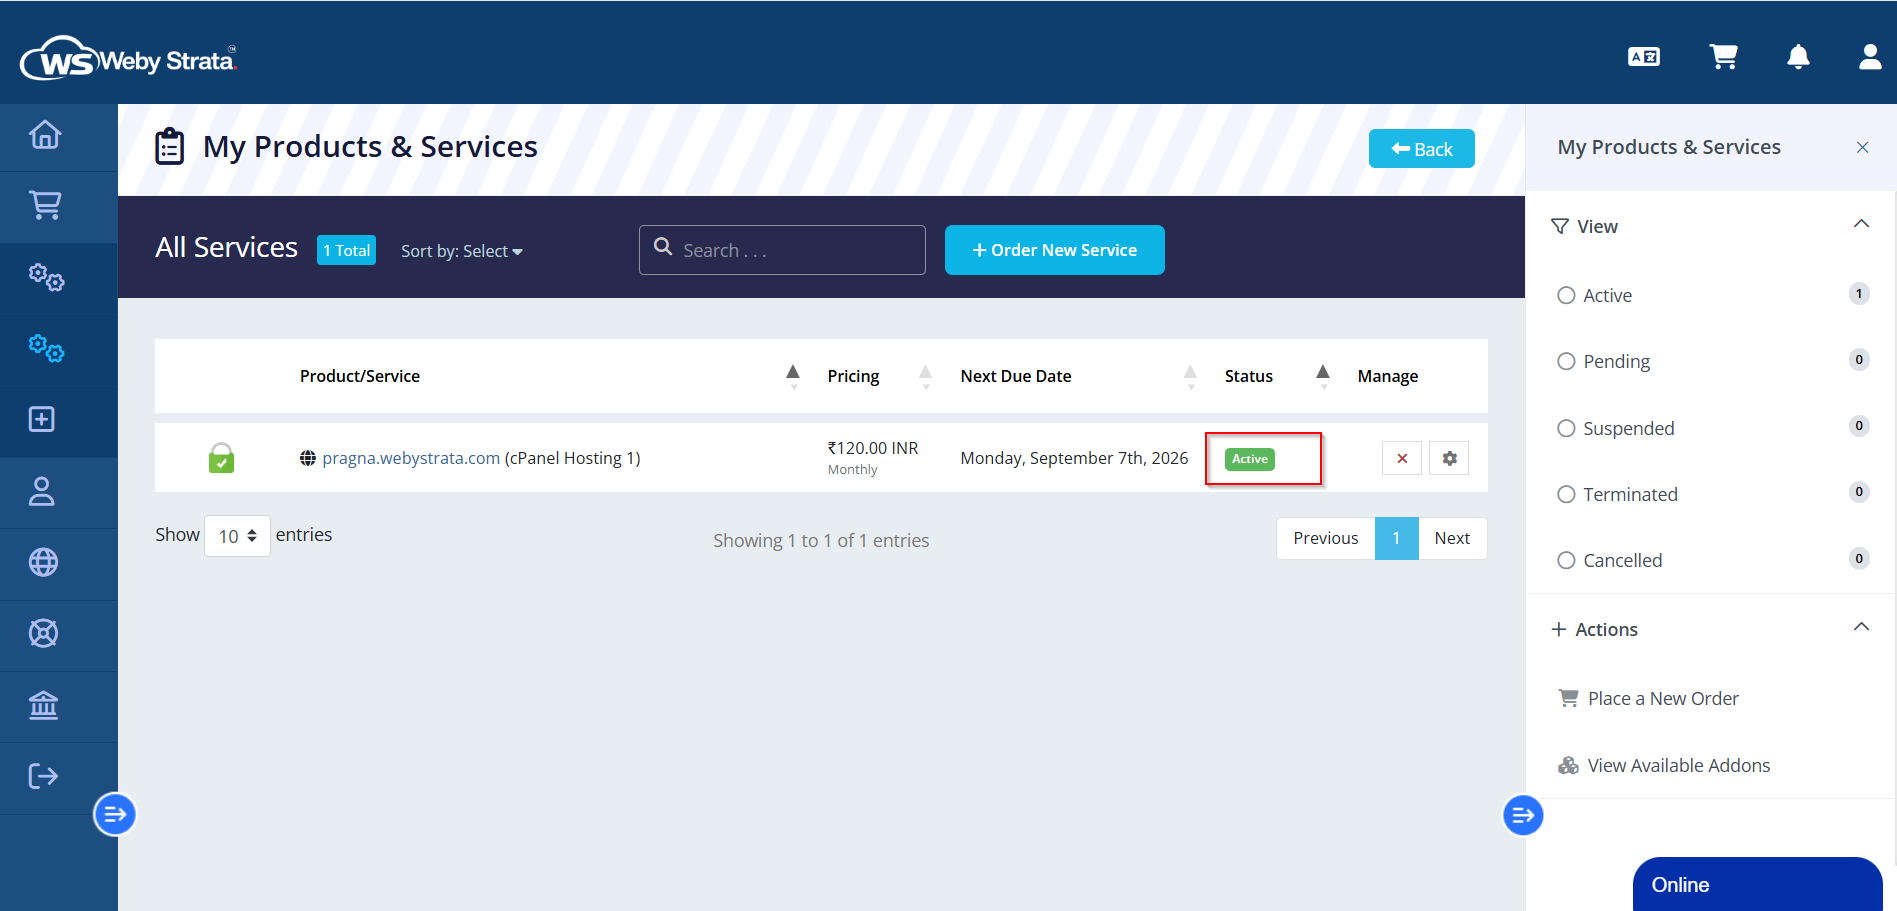
Step 6: Select the Active Hosting Service
Locate your active hosting package and click on it to open the hosting management page.
You can identify active services using the Active status label.
Step 7: Click “Log in to cPanel”
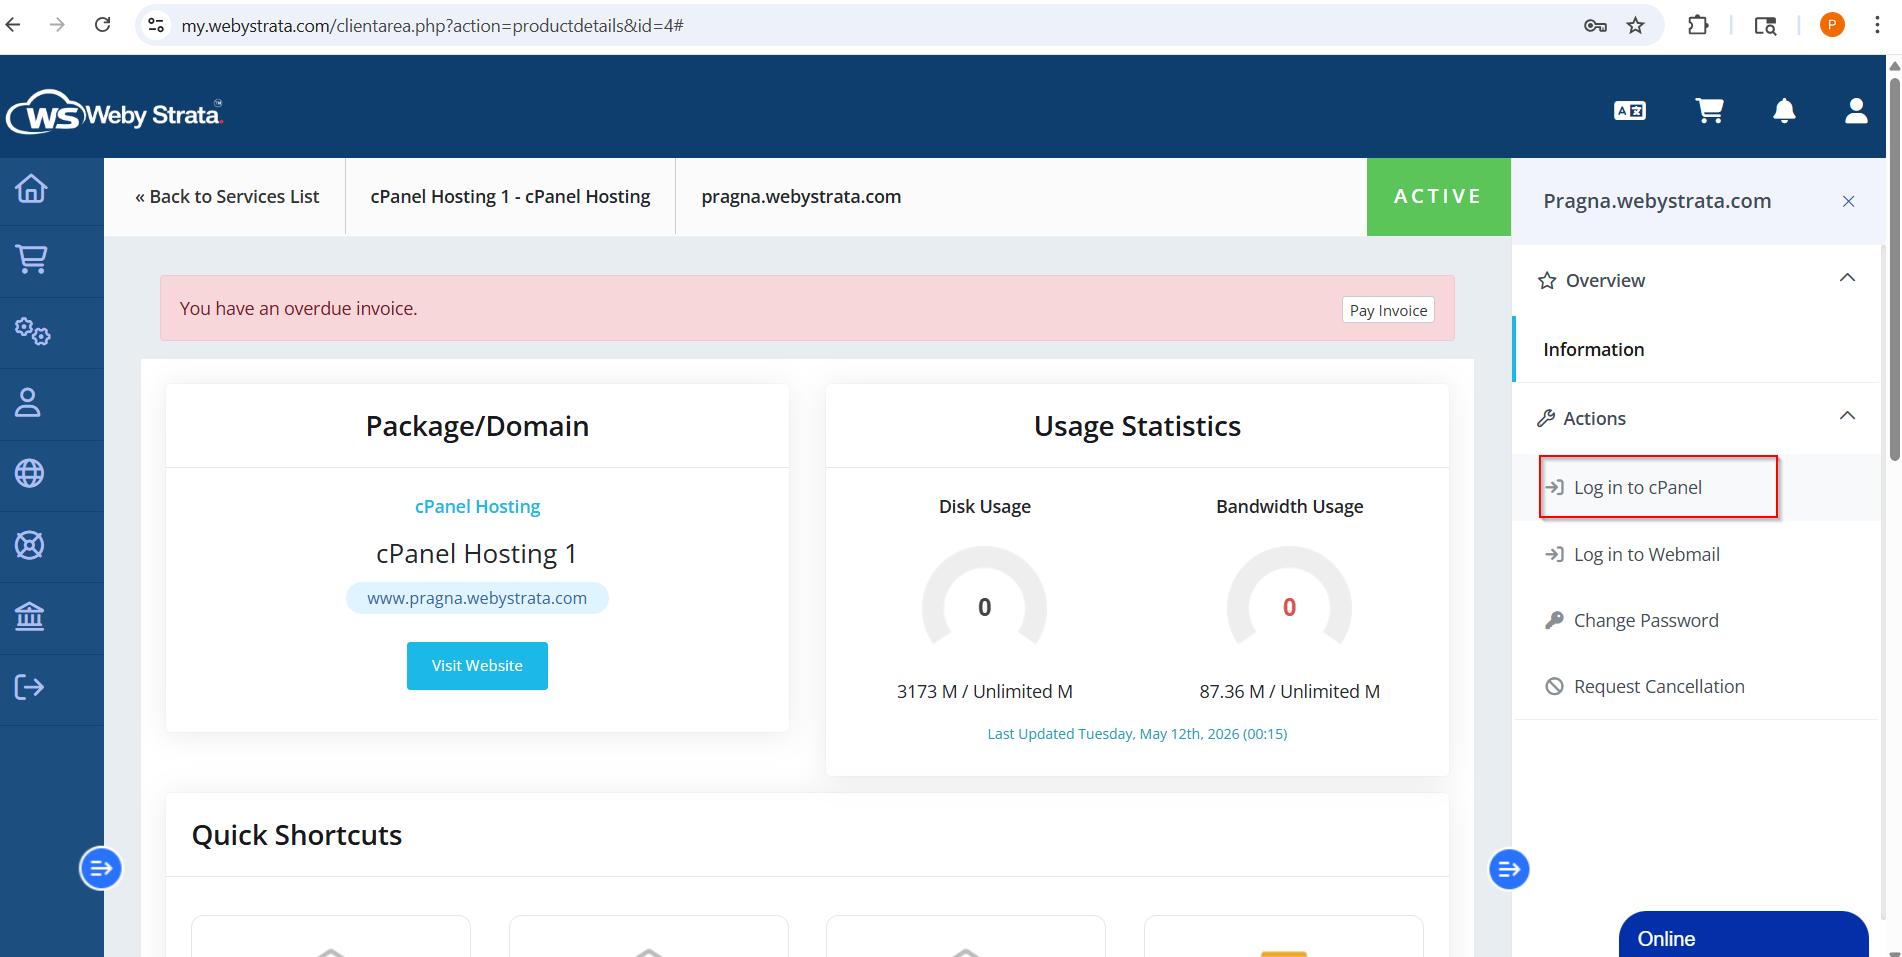
Inside the hosting management page, click the Log in to cPanel button.
This will securely redirect you to your hosting control panel without requiring another login.
Step 8: Manage Your Hosting via cPanel
Inside cPanel, you can manage:
- Website files
- Email accounts
- Databases
- SSL certificates
- Domains and subdomains
- Backups
- WordPress installations
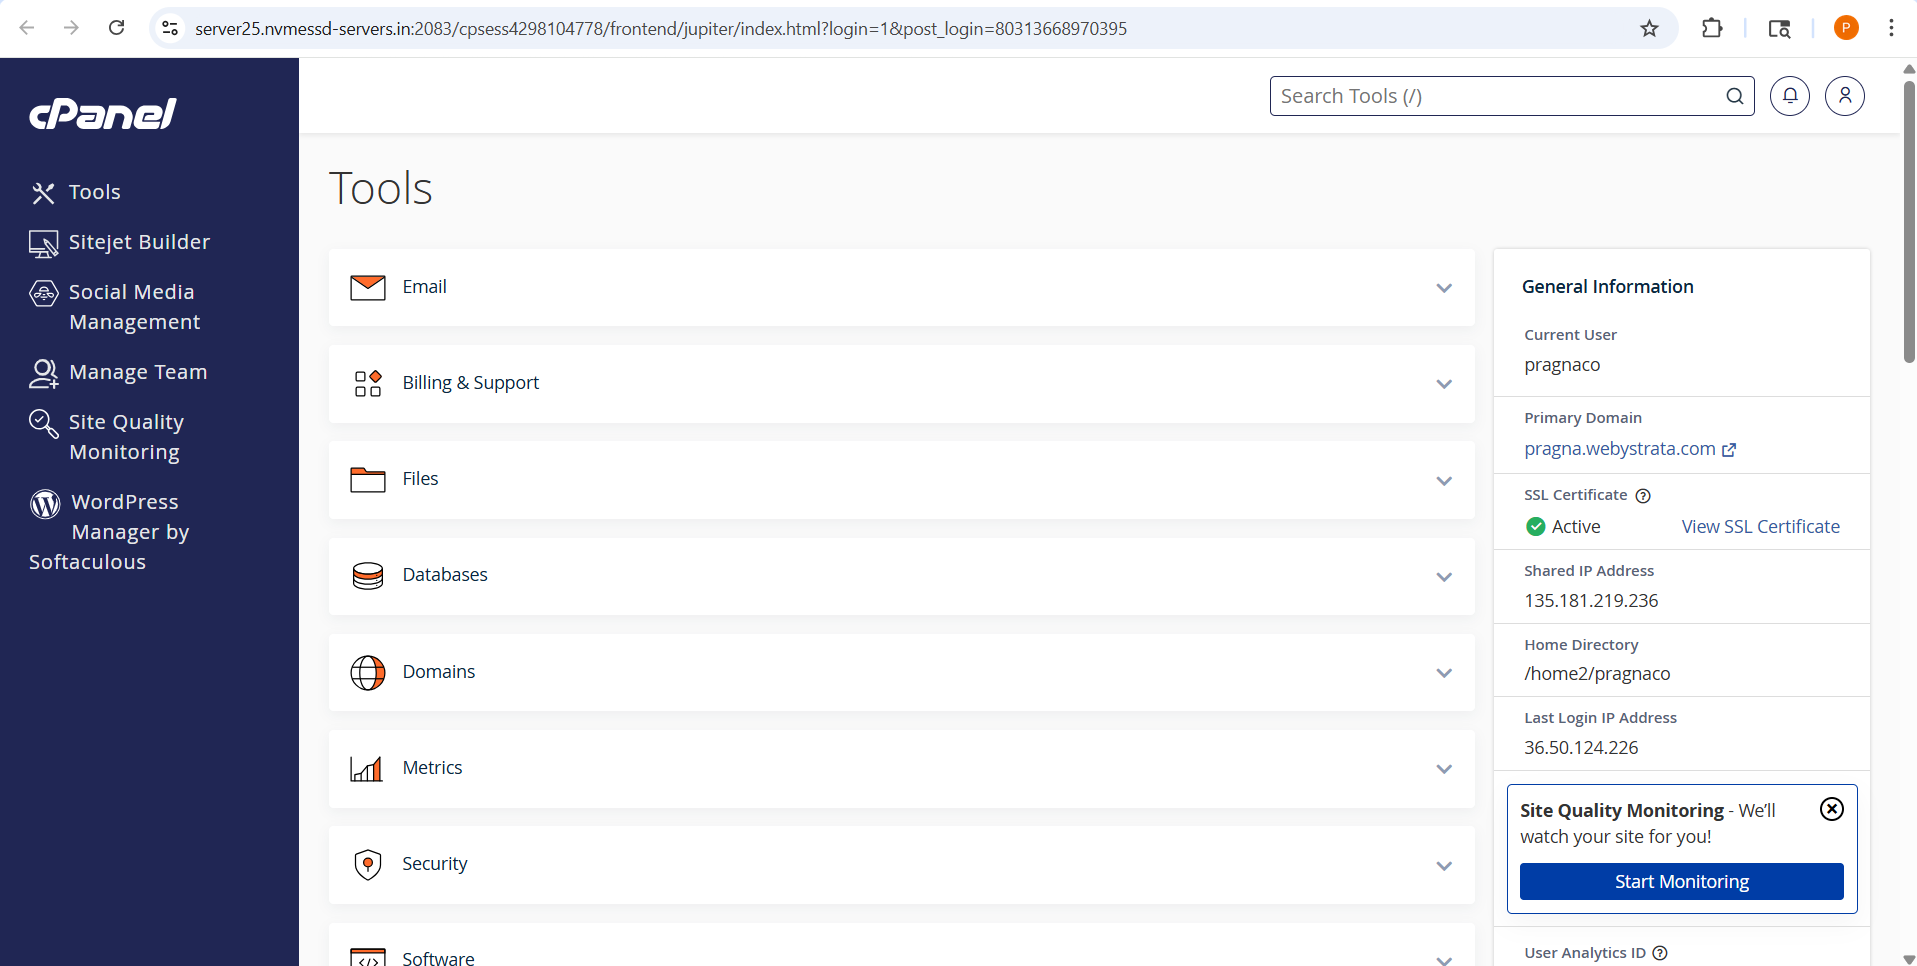
You have now successfully accessed the WebyStrata Client Area and securely logged in to cPanel. Always ensure your login credentials remain secure and avoid sharing your account information with unauthorized users.