How to Set Up Product Addons in WHMCS
If you want to increase revenue and provide more flexibility to your customers, learning how to Set Up Product Addons in WHMCS is essential. Product Addons allow you to offer optional services alongside your hosting plans, VPS packages, domains, or other products. These addons can include services such as premium support, dedicated IP addresses, website backups, SSL certificates, malware protection, and more. By choosing to Set Up Product Addons in WHMCS, you can create additional upselling opportunities while giving customers the ability to customize their purchases according to their needs.
What Are Product Addons in WHMCS?
Product Addons in WHMCS are optional services or features that customers can purchase alongside a primary product. They allow customers to customize their order by adding extra services based on their needs.
Examples of Product Addons:
- Daily or Weekly Backups
- Dedicated IP Address
- Premium Support
- SSL Certificate Installation
- Website Security Monitoring
- Additional Storage Space
- Managed Hosting Services
- Website Migration
For example, if a customer orders a Shared Hosting plan, they can also select a Backup Service addon or Premium Support addon during checkout.
Step 1: Log in to WHMCS Admin Area
Log in to your WHMCS administrator dashboard.

Step 2: Access Product Addons Settings
- Navigate to Configuration Icon → System Settings
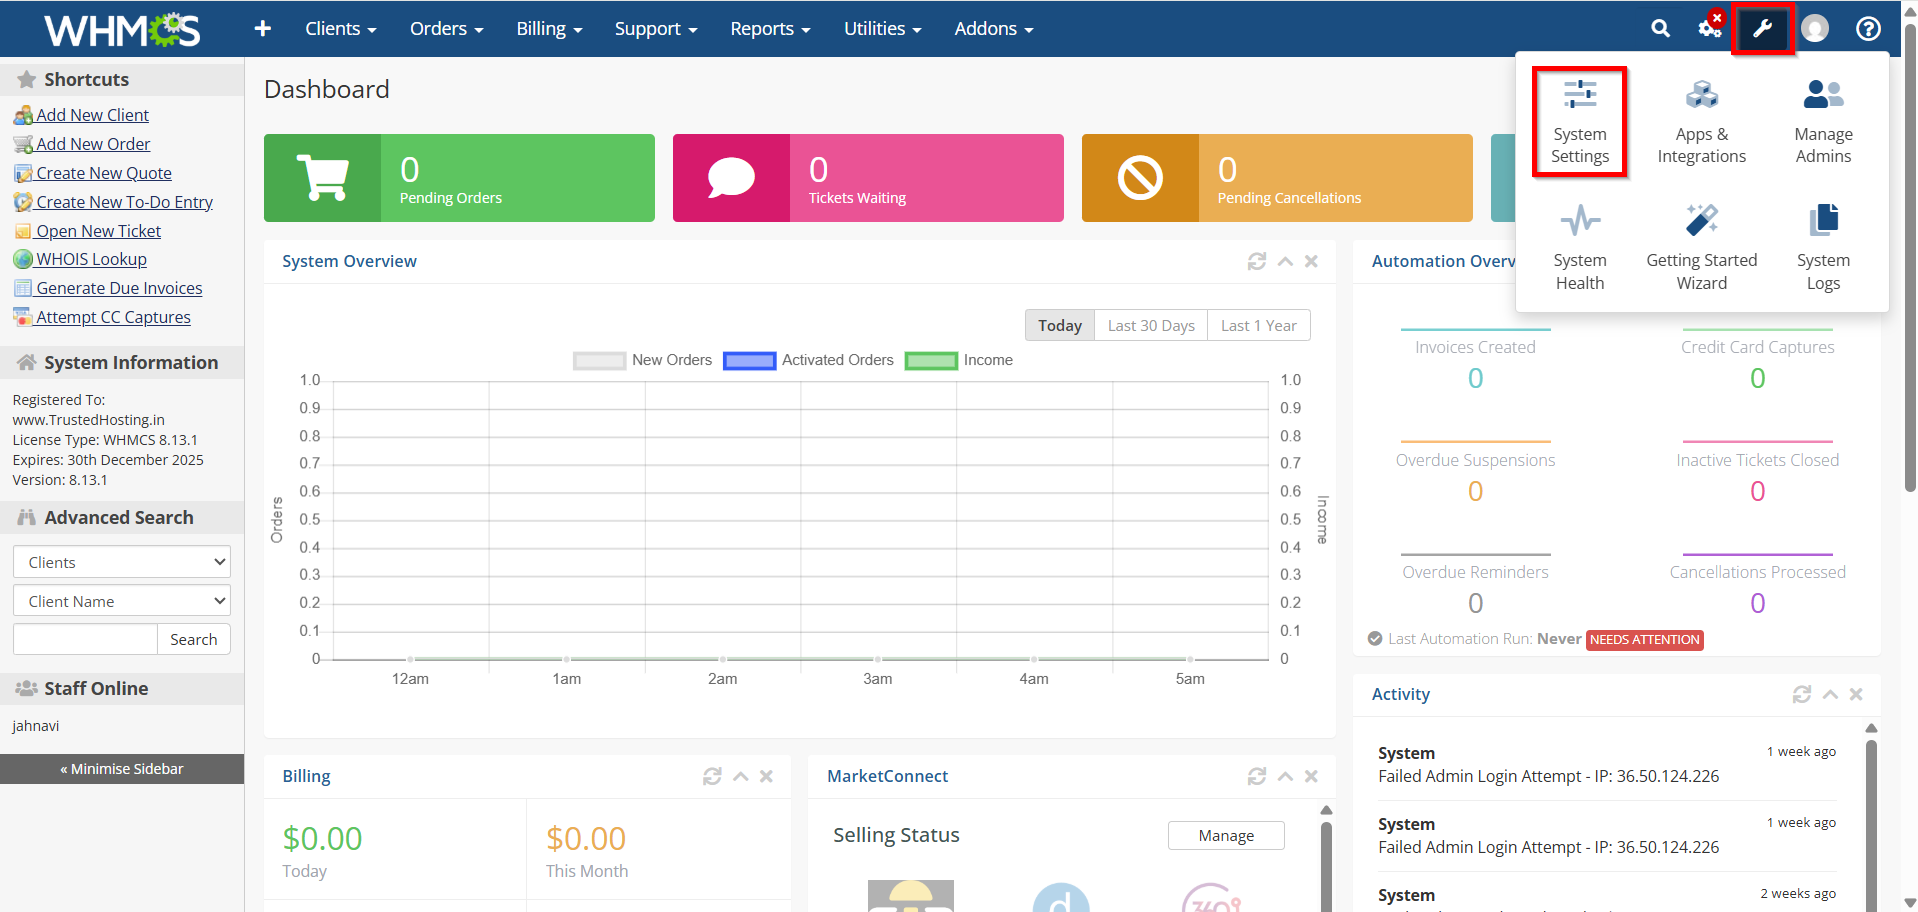
- Under All Settings ,

- Select Product Addons.

Step 3: Create a New Product Addon
After opening the Product Addons page:
- Click Add New Addon.
This section allows administrators to create and manage all available product addons.
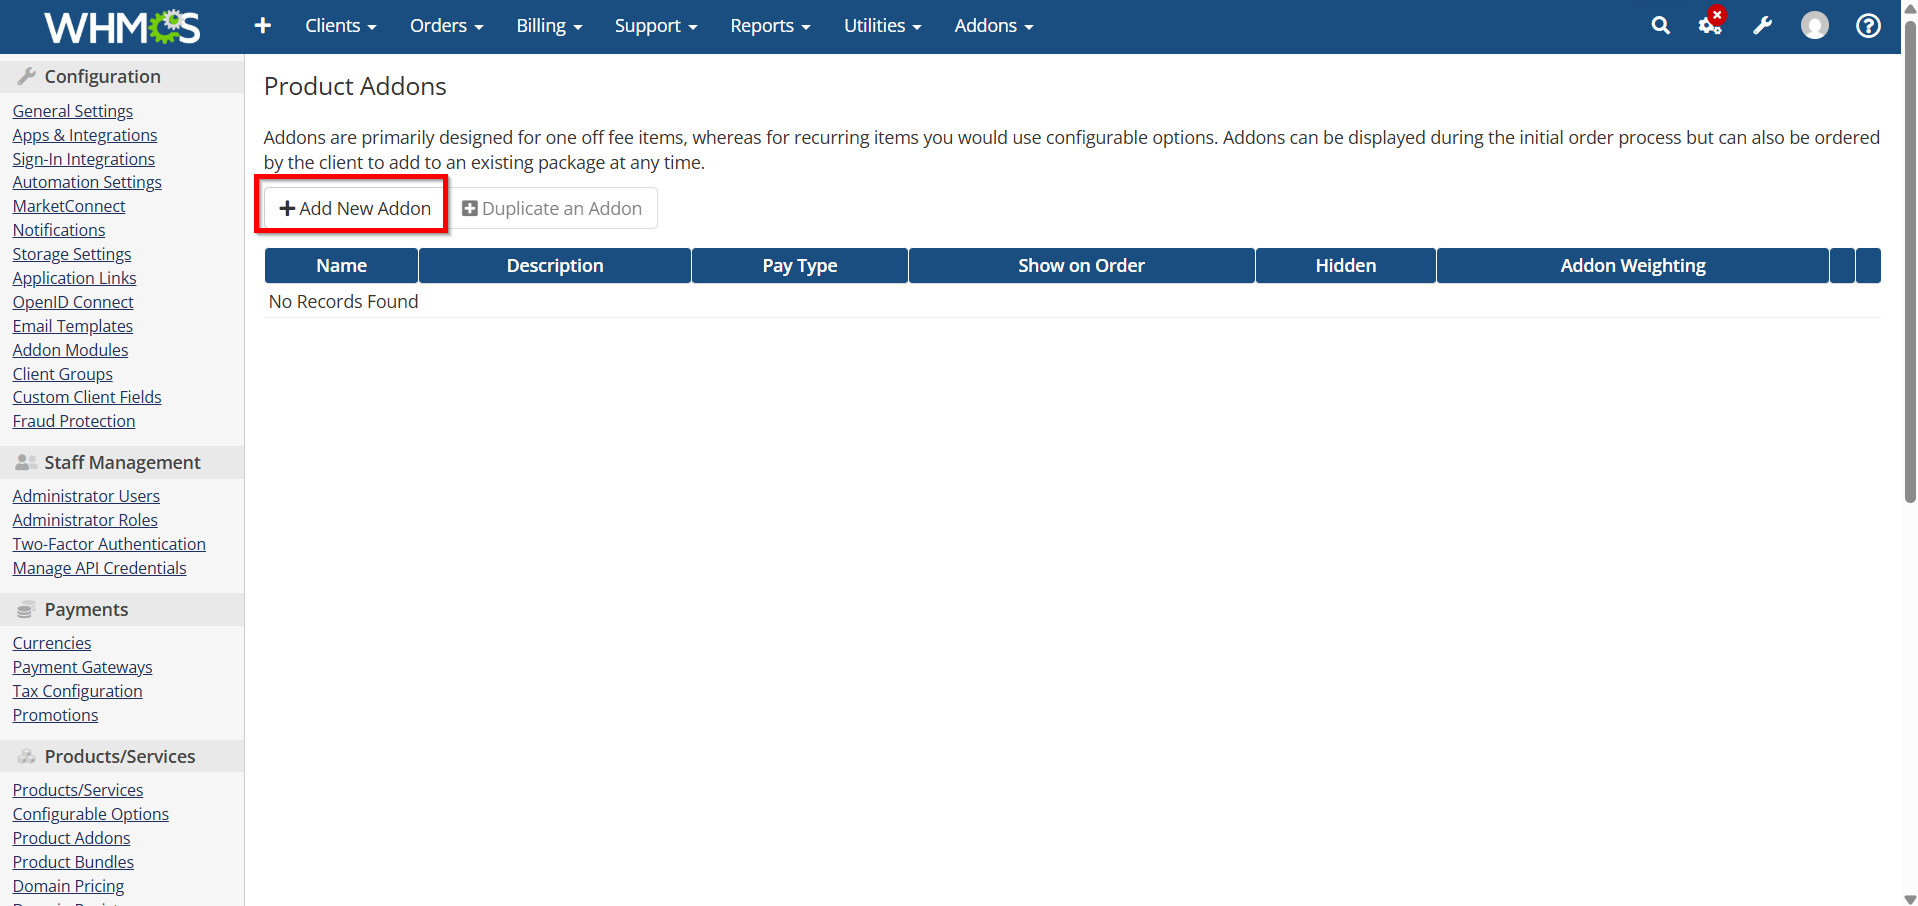
- Addon Type
- Enter the Addon Name.
- Choose whether the addon is visible to customers by using Hidden Option
- Click Continue
Use clear and descriptive names so customers understand the addon’s purpose immediately.

Example Addons
- Website Backup Service
- Dedicated IP Address
- Premium Support
- Website Security Monitoring
- SSL Certificate Installation
- Managed Services
- Extra Disk Space
Step 4: Configure Addon Pricing
Pricing is one of the most important parts when you Set Up Product Addons in WHMCS.
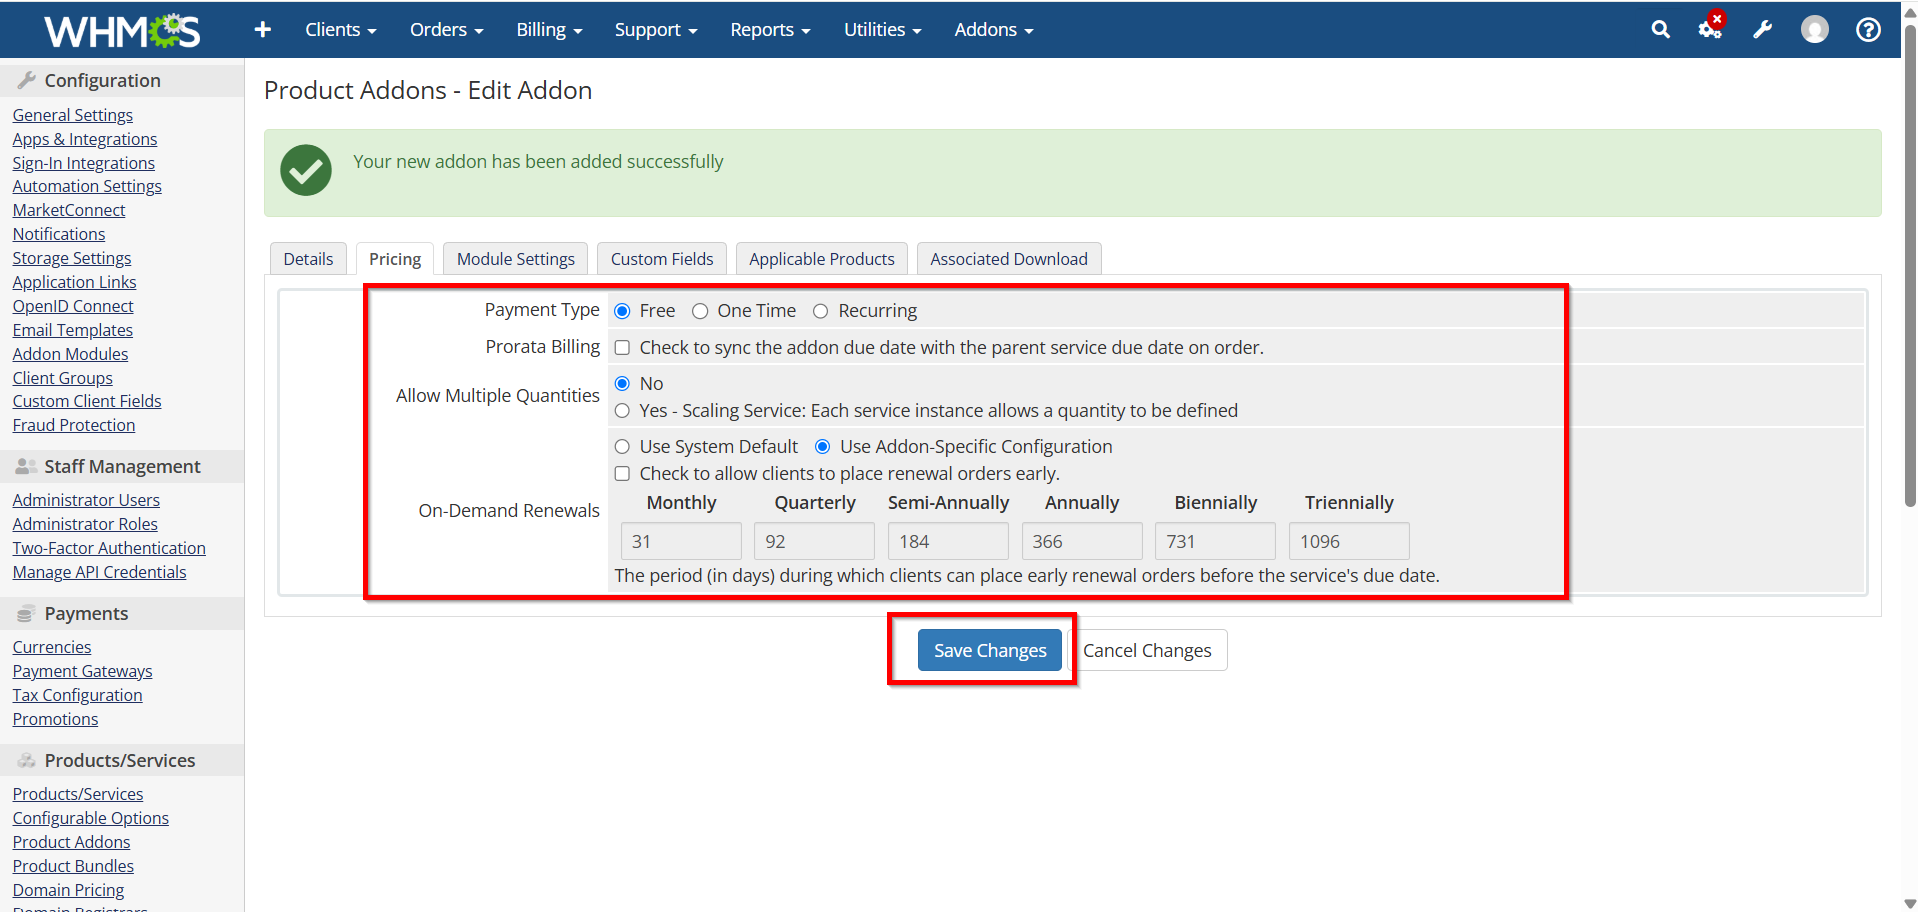
- Open the addon you created.
- Navigate to the Pricing section.

3. Select the billing cycle:
- One Time
- Monthly
- Quarterly
- Semi-Annually
- Annually
- Biennially
- Triennially
4. Enter the pricing for each cycle.
5. Save the configuration.
Choose pricing that aligns with the value provided by the addon and complements your primary services.
Step 5: Assign Addons to Products
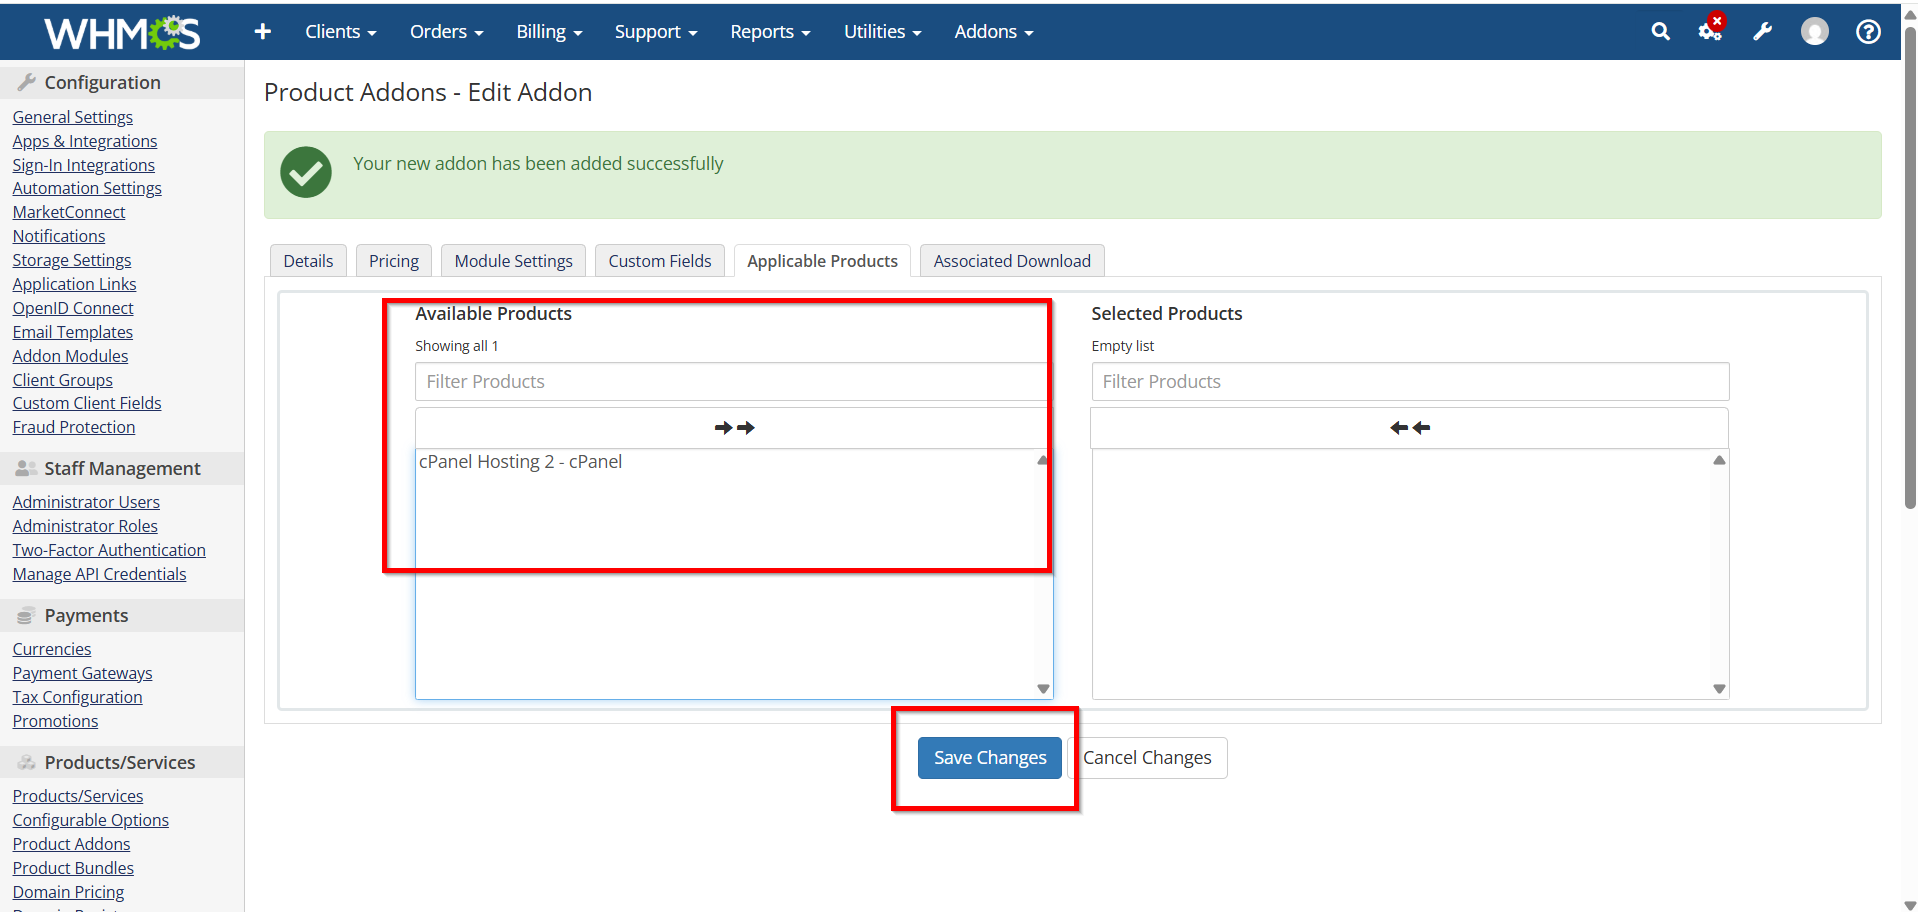
Once pricing is configured, assign the addon to specific products.
- Open the addon settings.
- Locate the Applicable Products section.
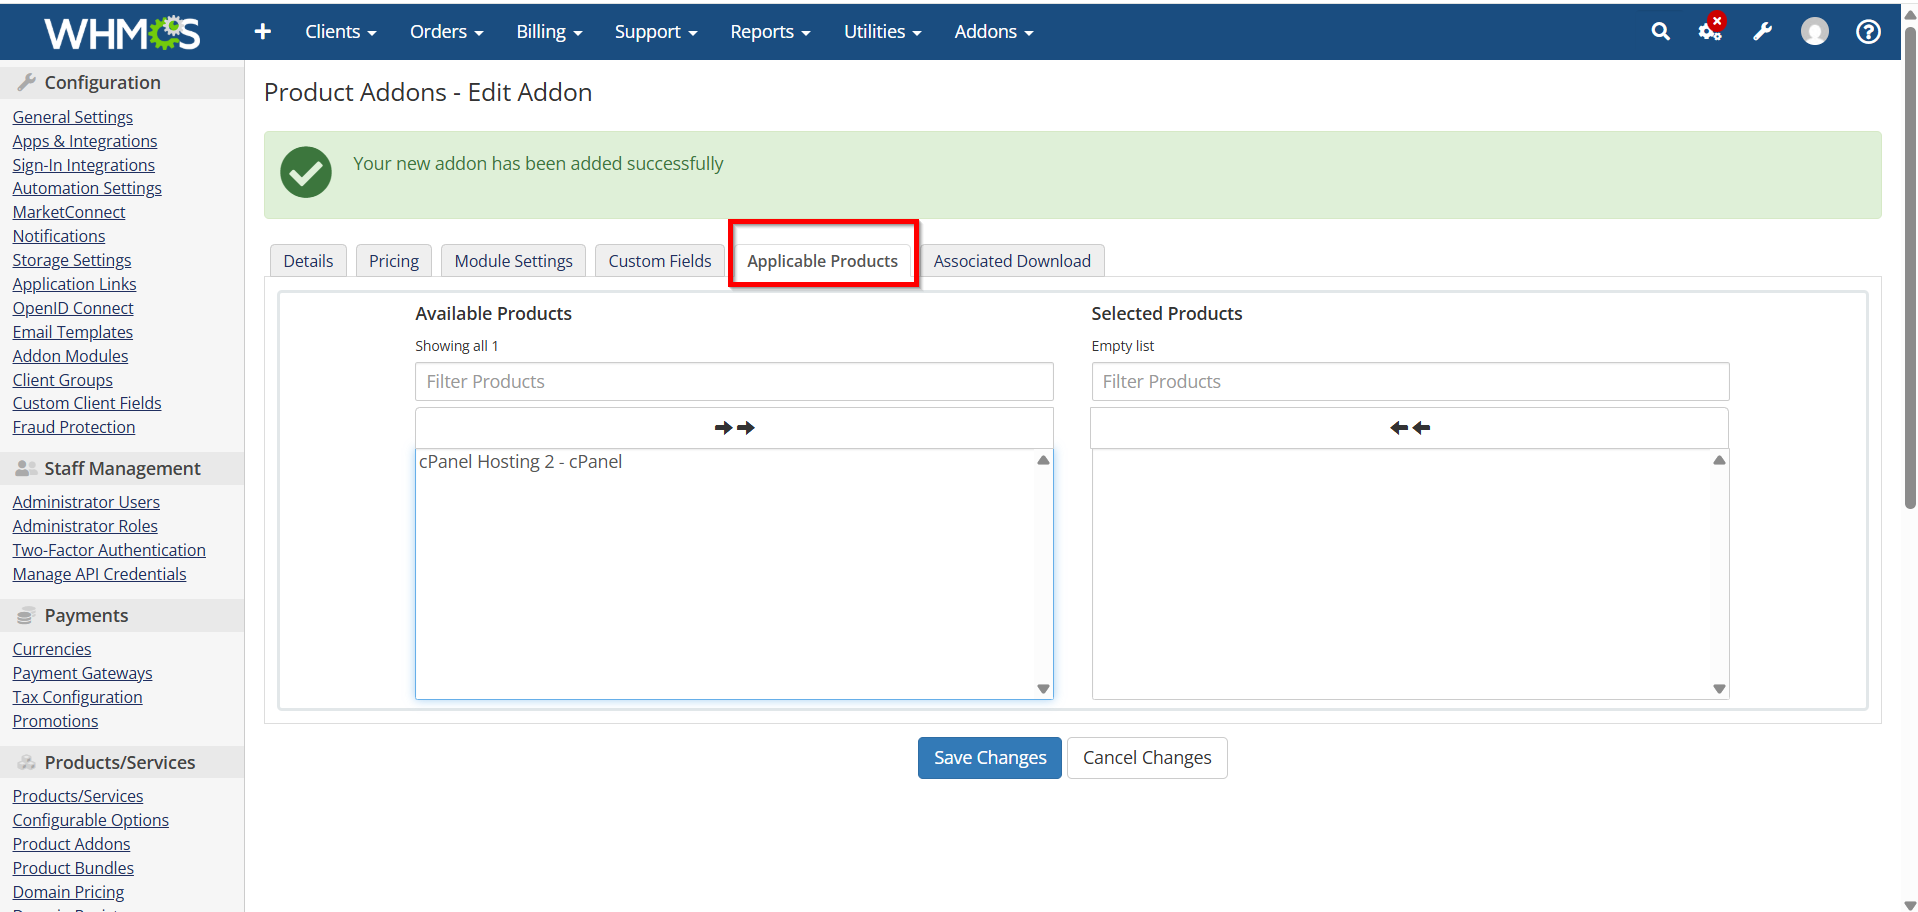
3. Select the products that can use the addon.
4. Save your changes.
For example:
- Dedicated IP addon → VPS Hosting
- Backup Service addon → Shared Hosting
- Managed Support addon → Dedicated Servers
This ensures customers only see relevant addon options during checkout.
Step 6: Test the Product Addon
Before making the addon available to customers:
- Visit your client-facing order form.
- Select a product associated with the addon.
- Verify the addon appears correctly.
- Add the addon to the cart.
- Complete a test order.
- Confirm billing and provisioning work as expected.
Testing helps identify configuration issues before customers encounter them.
Why Use Product Addons in WHMCS?
1. Increase Revenue
2. Provide More Flexibility
3. Simplify Product Management
4. Improve Customer Experience
5. Create Upselling Opportunities
6. Automate Billing
7. Offer Specialized Services
Benefits of Product Addons
Before you Set Up Product Addons in WHMCS, it's important to understand their advantages:
- Increase average order value through upselling.
- Offer premium features without creating multiple product variations.
- Improve customer flexibility and customization.
- Automate addon billing and renewals.
- Simplify service management.
- Create targeted offers for specific products.
- Generate recurring revenue from optional services.
Best Practices for Product Addons
When you Set Up Product Addons in WHMCS, consider the following recommendations:
- Offer Relevant Addons
- Keep Pricing Transparent
- Limit Choices
- Use Descriptive Names
- Monitor Performance
- Bundle Strategic Services
Conclusion
Learning how to Set Up Product Addons in WHMCS can significantly improve your service offerings and increase revenue opportunities. Product Addons allow customers to customize their purchases while helping hosting providers deliver premium services efficiently. By following the steps outlined above to Set Up Product Addons in WHMCS, you can create a flexible upselling strategy, automate addon management, and enhance the overall customer experience. Properly configured addons not only boost sales but also provide additional value that helps strengthen long-term customer relationships.