
How to Set Up Cron Job in WHMCS
WHMCS relies heavily on automation to manage billing, invoicing, account provisioning, support notifications, domain management, and many other routine tasks. The core of this automation system is the WHMCS cron job.
A properly configured cron job ensures that your WHMCS installation performs scheduled tasks automatically without requiring manual intervention. Without a working cron job, invoices may not be generated on time, payment reminders may not be sent, services may not be suspended for overdue invoices, and many automated functions may fail.
This guide explains what the WHMCS cron job is, why it is important, and how to configure it correctly.
What is a Cron Job?
A cron job is a scheduled task that runs automatically on a Linux server at predefined intervals. WHMCS uses a cron job to execute automation tasks such as:
-
Invoice generation
-
Payment processing
-
Account provisioning
-
Service suspension and termination
-
Domain renewal reminders
-
Currency updates
-
Database maintenance
-
Support ticket escalation
-
Automated reports
The cron job acts as the automation engine behind WHMCS.
Why Configure a Cron Job in WHMCS?
Setting up the WHMCS cron job provides several benefits:
- Automated Billing
- Timely Payment Reminders
- Automatic Service Management
- Domain Automation
- Reduced Administrative Work
- Improved Customer Experience
Prerequisites
Before configuring the cron job, ensure:
-
WHMCS is installed correctly.
-
You have server access through SSH, cPanel, DirectAdmin, or another hosting control panel.
-
PHP CLI is available on the server.
-
The WHMCS cron directory exists.
-
Appropriate file permissions are configured.
How to Configure the Cron Job
Step 1: Log in to Your Hosting Control Panel
Access your hosting control panel such as:
-
cPanel
-
DirectAdmin
-
Plesk
-
Webmin

Step 2: Open the Cron Jobs Section
Locate the Cron Jobs option Under Advanced Section.
- Go to Advanced Section then Cron Jobs.
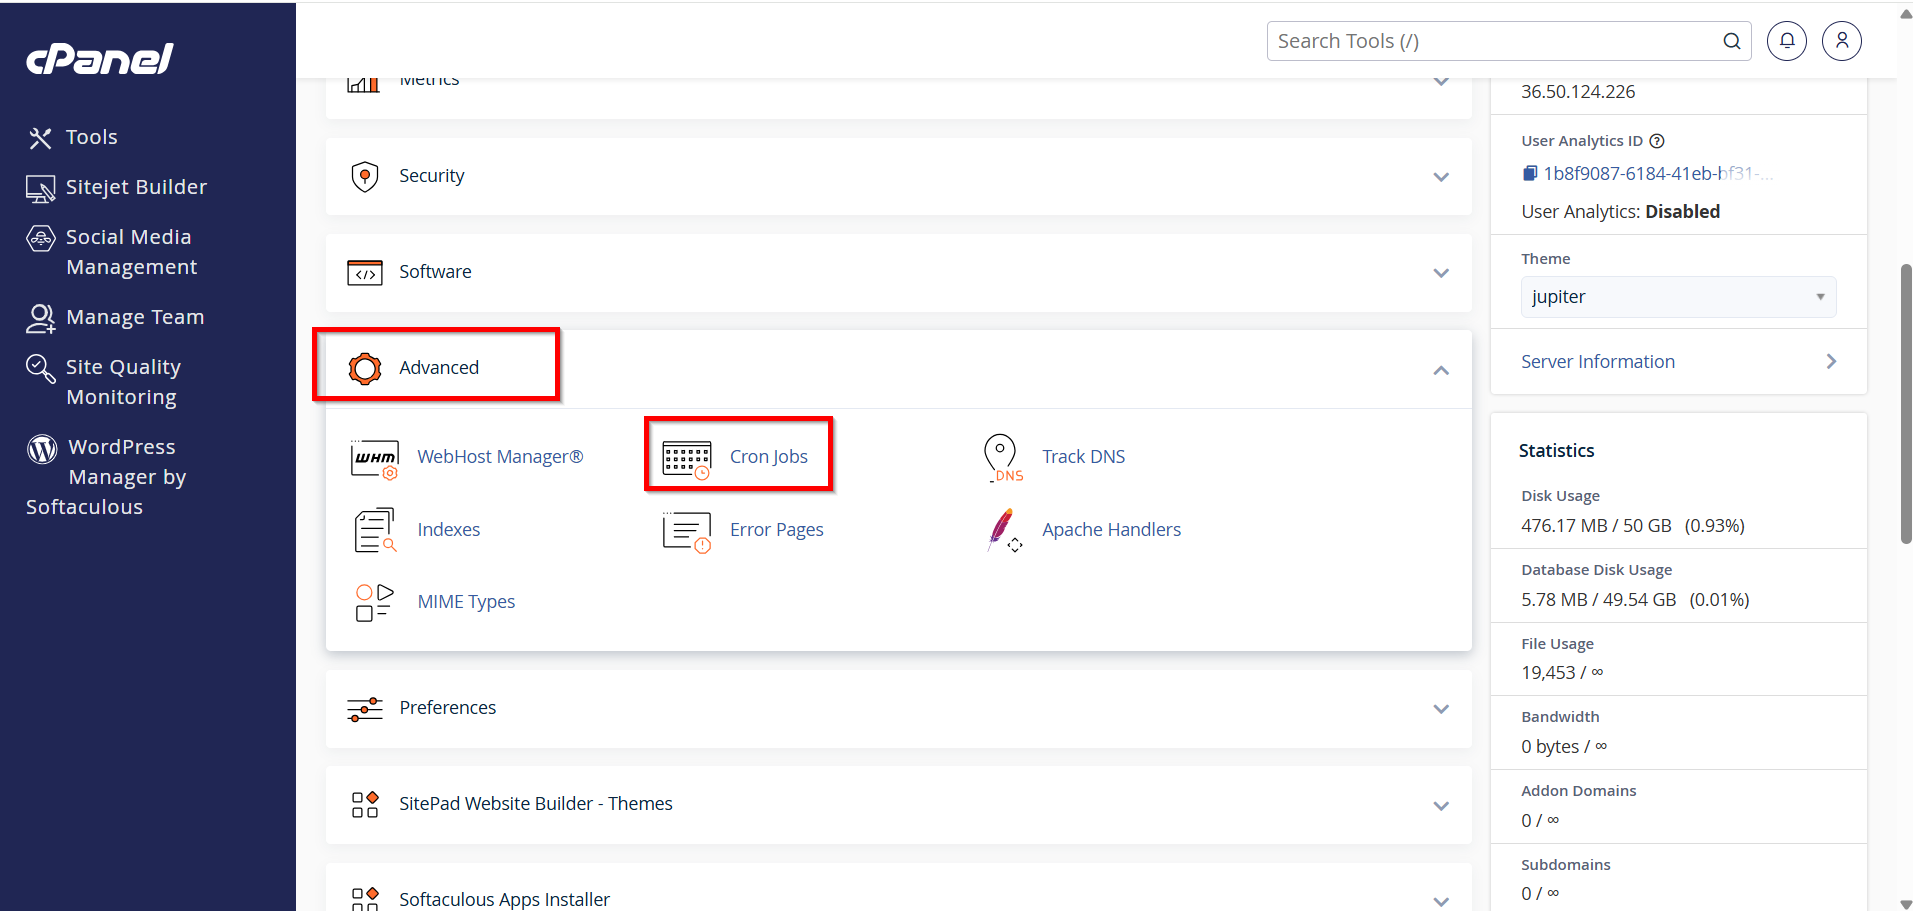
The location varies depending on the hosting platform.
Step 3: Create a New Cron Job
- Enter the Email and then Click Update Email.

- Create a cron job that runs once every five minutes.
Recommended schedule:
*/5 * * * *
This tells the server to execute the task every five minutes.

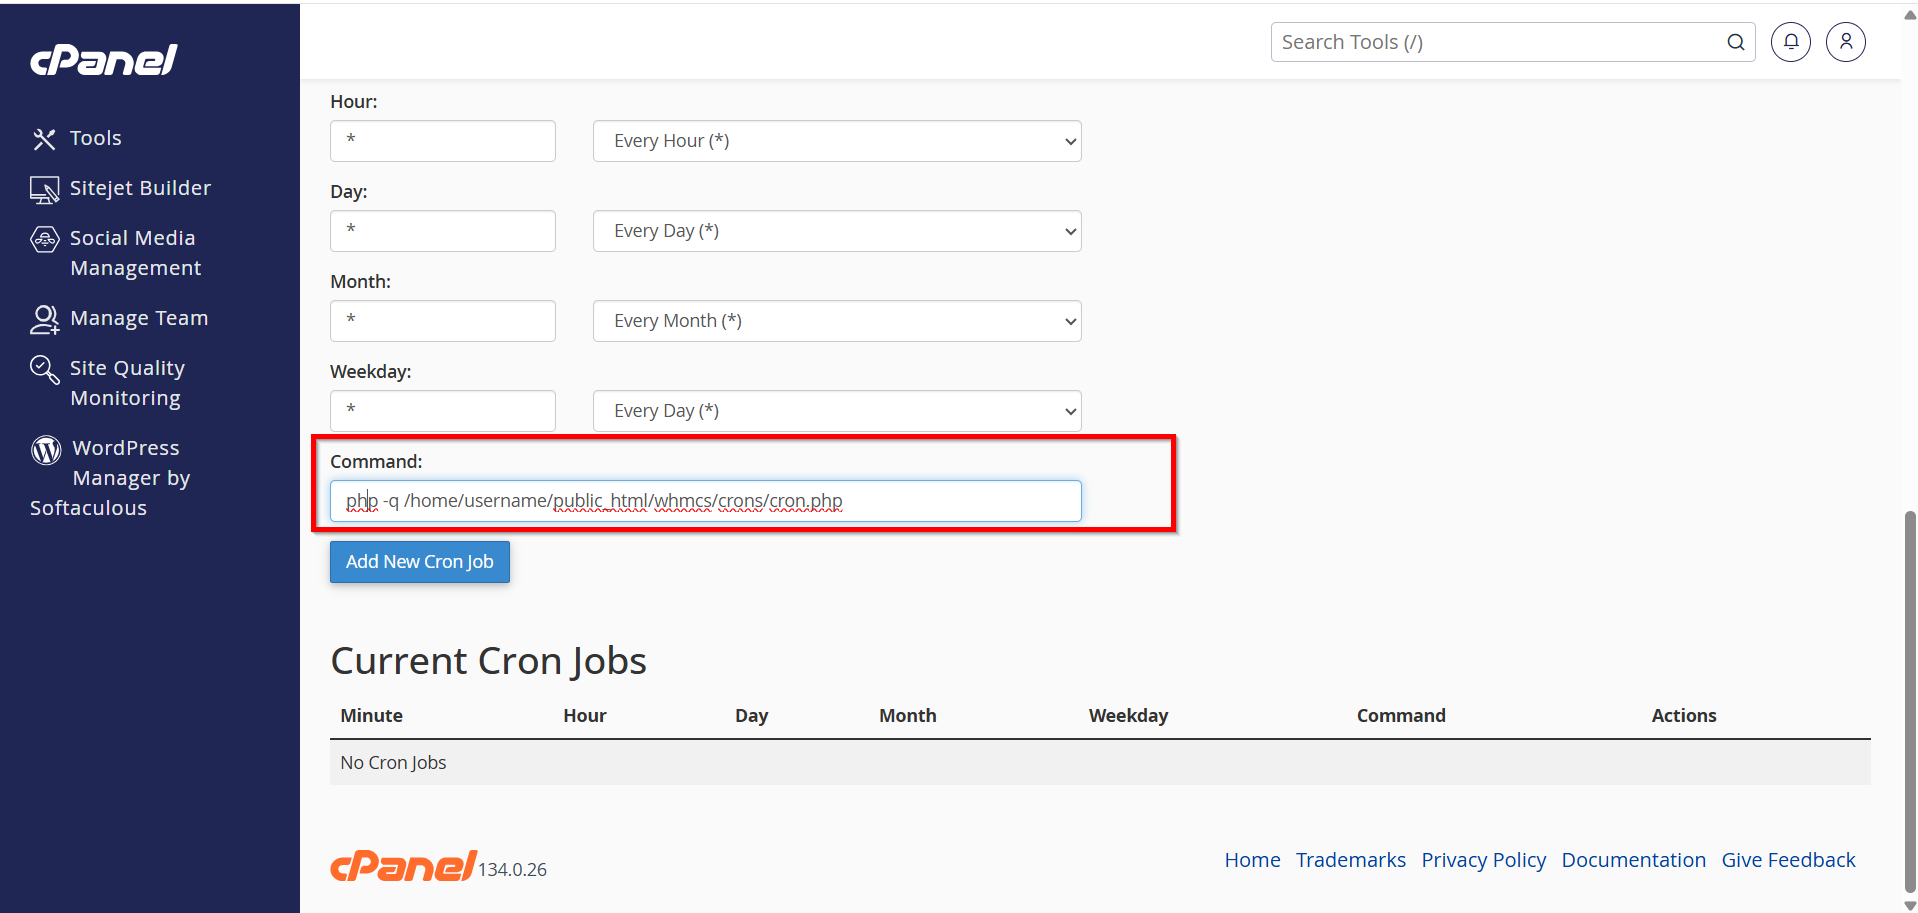
Step 4: Enter the WHMCS Cron Command
Example:
php -q /home/username/public_html/whmcs/crons/cron.php
Replace the path with your actual WHMCS installation path.
Step 5: Save the Cron Job
Click Add New Cron Job.
The server will begin executing the cron automatically according to the configured schedule.

Verifying the Cron Job
After configuration, verify that the cron is working correctly.
Navigate to:
WHMCS Admin Area → System Health and Updates → System Health Status
Check:
-
Cron Status
-
Last Cron Run
-
Automation Status
If the cron job is functioning correctly, WHMCS will display the latest successful execution time.
Conclusion
Cron Job Setup in WHMCS is essential for maintaining a fully automated billing and hosting management platform. A properly configured cron job ensures invoices are generated on time, payments are processed automatically, services are managed efficiently, and domain-related tasks run without manual intervention.
By configuring the cron job correctly and monitoring its operation regularly, you can improve reliability, reduce administrative workload, and ensure your WHMCS installation operates smoothly and efficiently.
