
Renaming WHMCS Admin Folder
By default, WHMCS uses /admin as the administrator login directory. Renaming the WHMCS admin folder adds an extra layer of security by making it more difficult for unauthorized users and automated bots to locate your administration area.
This guide explains how to safely rename your WHMCS admin directory and update the necessary configuration settings.
Why Rename the Admin Folder?
The default admin directory is commonly targeted by automated login attempts and malicious bots. Renaming the folder can help:
-
Improve WHMCS security.
-
Reduce automated brute-force attacks.
-
Hide the administrator login URL from common scans.
-
Add an additional layer of protection alongside strong passwords and two-factor authentication.
Before You Begin
Before making any changes, ensure that:
-
You have access to your hosting control panel or FTP account.
-
You have access to the WHMCS installation files.
-
You create a full backup of your WHMCS files and database.
Step 1: Locate the Admin Directory
-
Log in to your hosting control panel (cPanel, DirectAdmin, Plesk, etc.).

2. Open Files then Click File Manager.

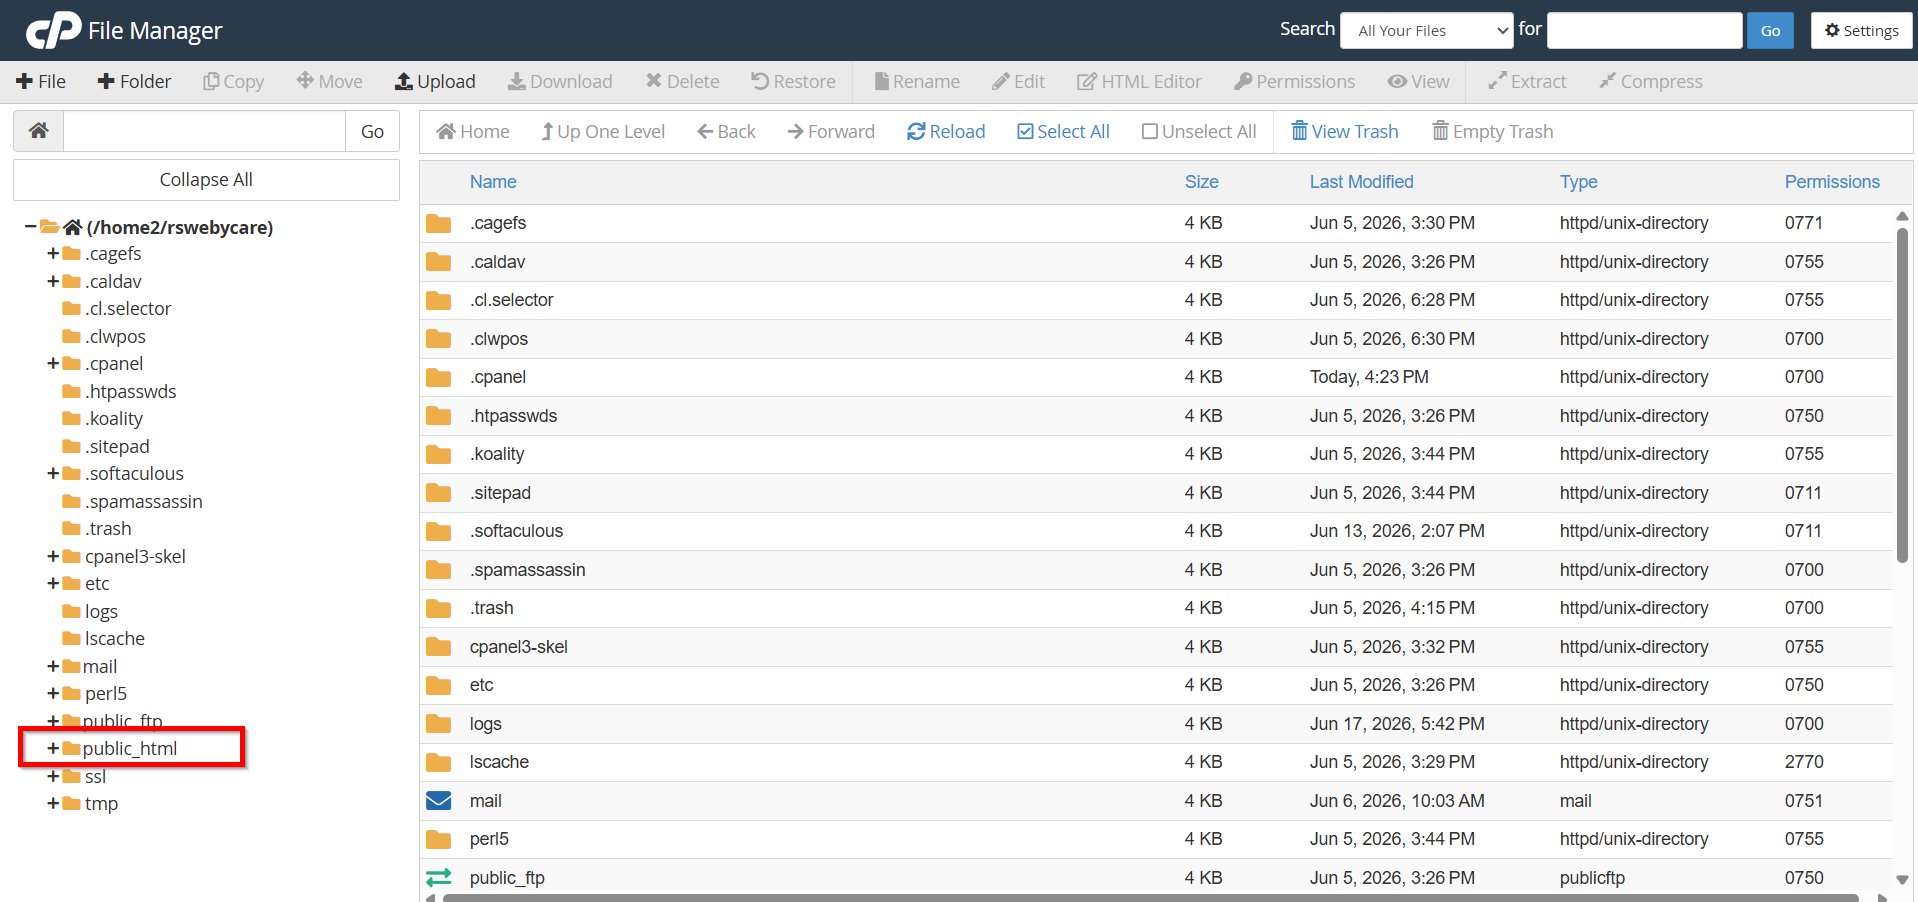
3. Navigate to your WHMCS installation directory, usually
- public_html
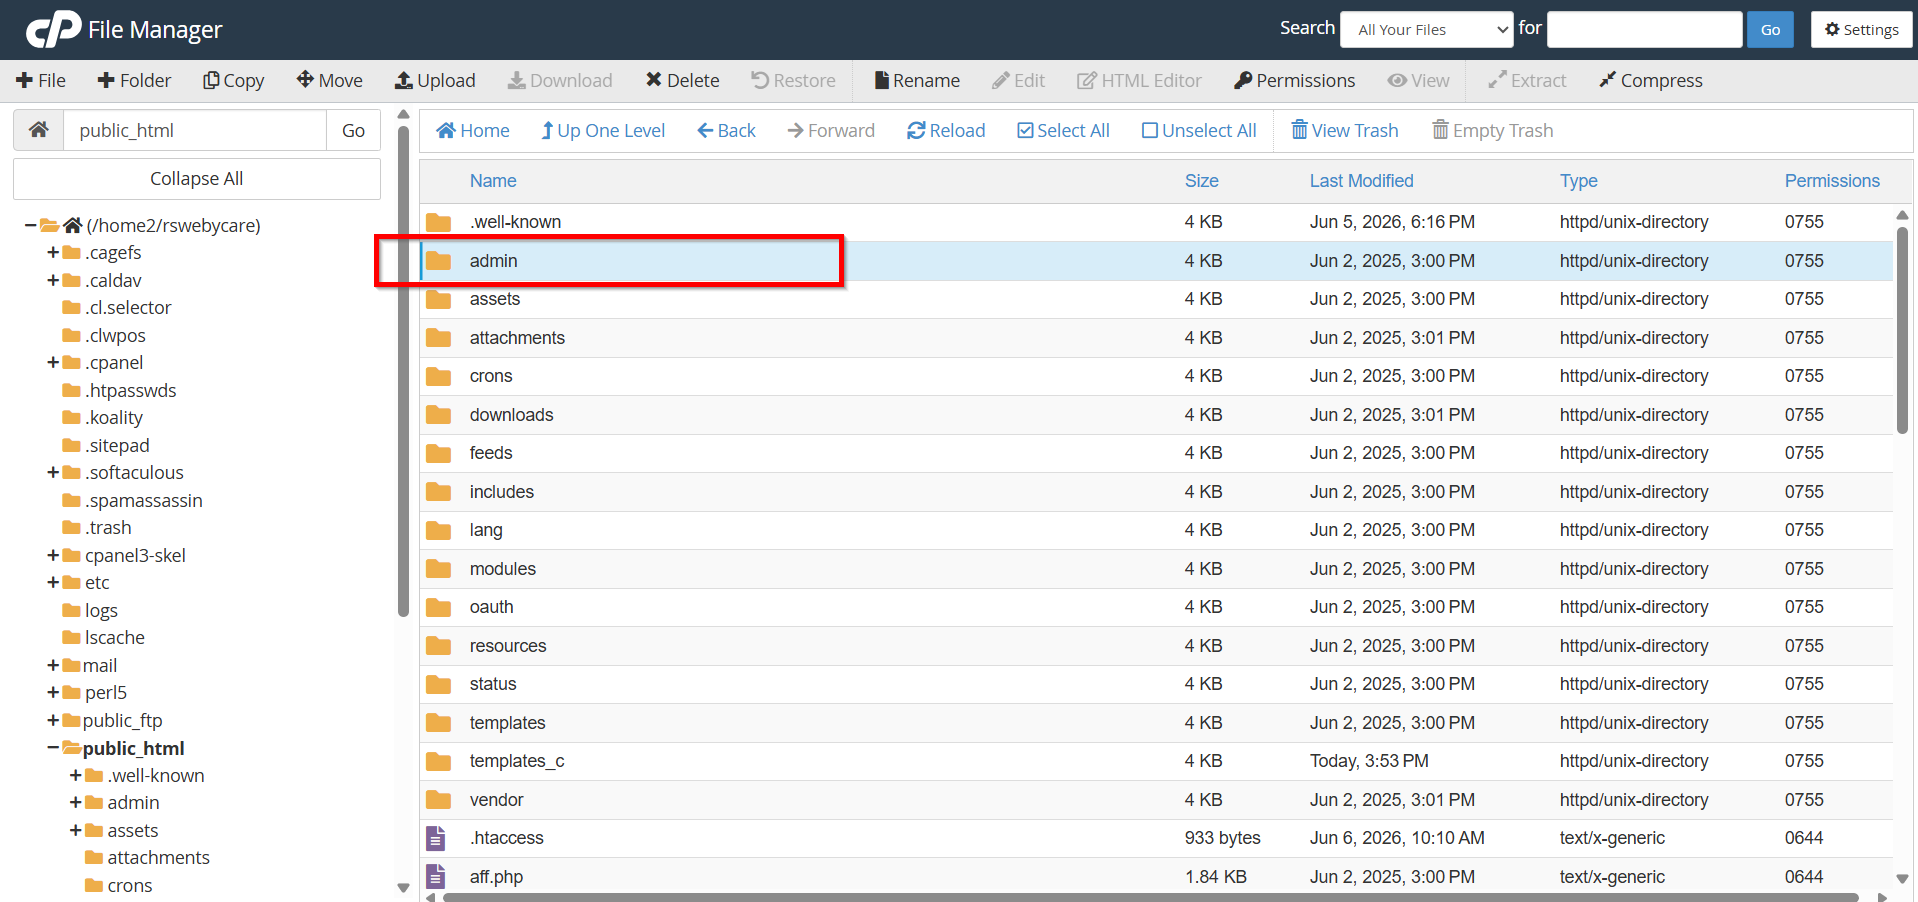
4. Locate the folder named:
ex: admin
Step 2: Rename the Admin Folder
-
Select the admin directory then Click Rename.

2. Rename it to a unique name of your choice.
Example:
admin → secureadmin
You may choose any custom folder name, such as:
secureadmin
clientadmin
mycontrolpanel
whmcsadmin
For improved security, avoid using obvious names that contain the word "admin."

Step 3: Update the Configuration File
After renaming the directory, you must inform WHMCS of the new location.
-
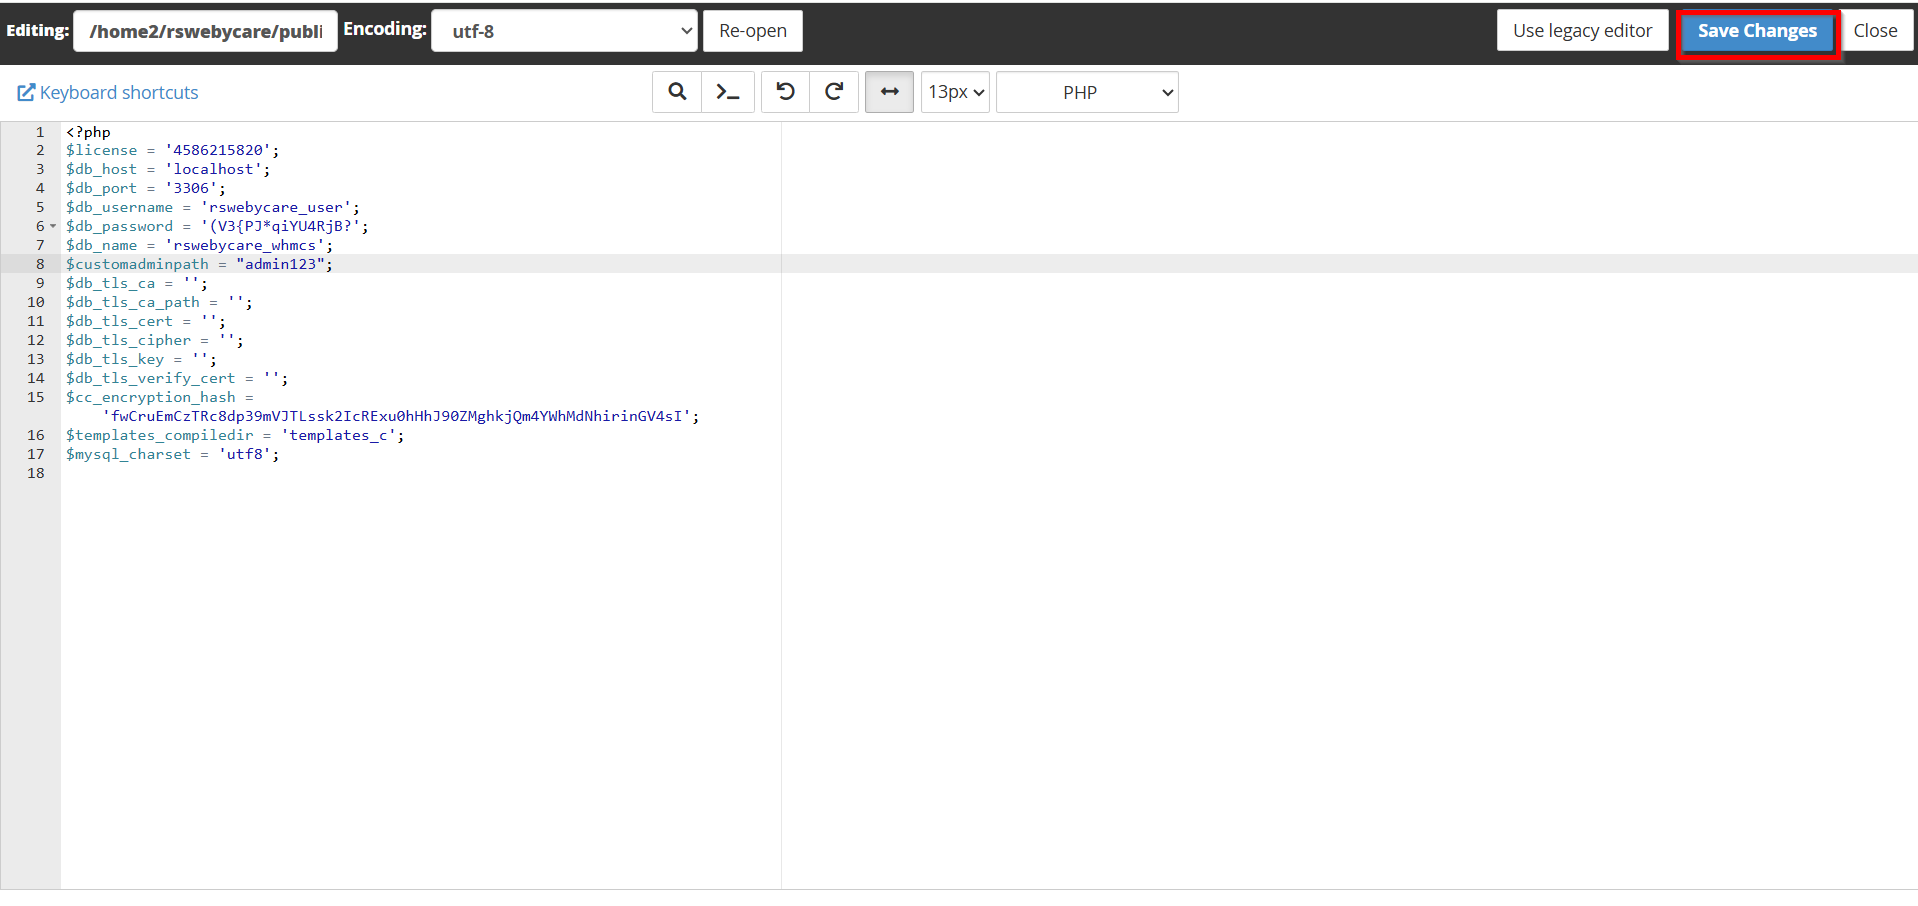
Open the configuration.php file located in the WHMCS root directory.

- Click Edit

2. Add or update the following line:
$customadminpath = "secureadmin";
Replace secureadmin with your chosen folder name.
Example:
$customadminpath = "mycontrolpanel";
-
Save the file.
Step 4: Verify Admin Access
-
Open your browser.
-
Navigate to your new admin URL.
Example:
https://yourdomain.com/secureadmin/
-
Log in using your administrator credentials.
-
Confirm that all administrative functions operate normally.
Step 5: Update Saved Bookmarks
If you have bookmarked the previous admin URL, update your bookmarks to reflect the new location.
Old URL:
https://yourdomain.com/admin/
New URL:
https://yourdomain.com/secureadmin/
You should also notify any other administrators who access the WHMCS installation.
Security Best Practices
Renaming the admin folder improves security, but it should not be your only protection method. WHMCS recommends:
-
Enabling Two-Factor Authentication (2FA).
-
Using strong administrator passwords.
-
Restricting admin access by IP address when possible.
-
Keeping WHMCS updated to the latest version.
-
Regularly reviewing administrator accounts and permissions.
Conclusion
Renaming the WHMCS admin folder is a simple yet effective way to strengthen the security of your billing and client management system. By changing the default admin directory and updating the configuration file, you can reduce exposure to automated attacks and make your WHMCS installation more secure. Always verify access after making the change and follow additional security best practices to protect your administrative area.
